How to contribute to Amplify Flutter

Offline Programmer
Posted on October 25, 2021

Have you thought about contributing to an open-source project? Contributing is a great way to learn more new technologies and ecosystems and make constructive, helpful bug reports, feature requests, and the noblest of all contributions: a good, clean pull request. It builds your resume by demonstrating that you can collaborate with others on code, and It feels good to give back to a project you use!
Prerequisites
- A GitHub account you can create here https://github.com/join
- Flutter Development environment https://flutter.dev/docs/get-started/install
- IDE (e.g. Android Studio or VSCode) combined with Flutter command-line tools https://flutter.dev/docs/get-started/editor?tab=vscode
Dev Environment Setup
Step 1: Fork the aws-amplify/amplify-flutter repo by clicking on the fork button on the top right of this page (https://github.com/aws-amplify/amplify-flutter). This will create a copy of this repository in your GitHub account.
GitHub keeps track of the relationship between your repo and the one you have forked it from. You can think of your repo as a working copy.
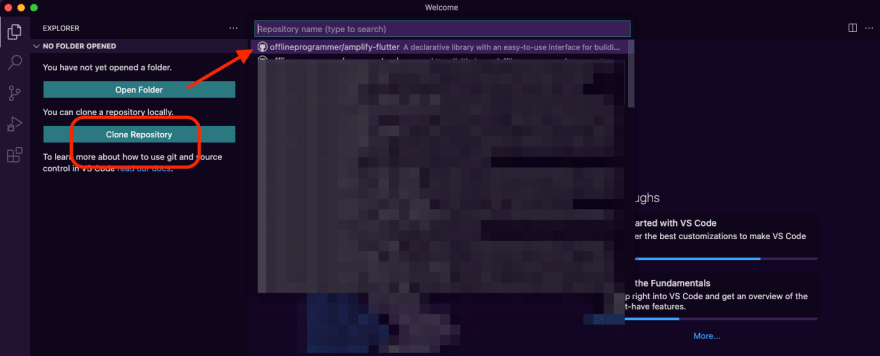
Step 2: Open VSCode and clone your fork down to your machine so you can begin making changes form
This will open up a File Explorer where you can then choose where the Git repository should be stored.
Step 3: You will need to install melos for dependency management. Run the commands below in the VSCode terminal
$ flutter pub global activate melos
$ melos bootstrap
Step 4: Let’s run the example app. To do that, you need to include your amplifyconfiguration.dart file in the lib folder. Follow the guide here (https://docs.amplify.aws/console/adminui/start/) to create an app and then pull it into the example app by running the command below
amplify pull --appId <Your_AppId> —envName <Your_App_Env>
Setup the following categories for the example app
- Amplify Authentication https://docs.amplify.aws/lib/auth/getting-started/q/platform/flutter/
- Amplify Analytics https://docs.amplify.aws/lib/analytics/getting-started/q/platform/flutter/
- Amplify Storage https://docs.amplify.aws/lib/storage/getting-started/q/platform/flutter/
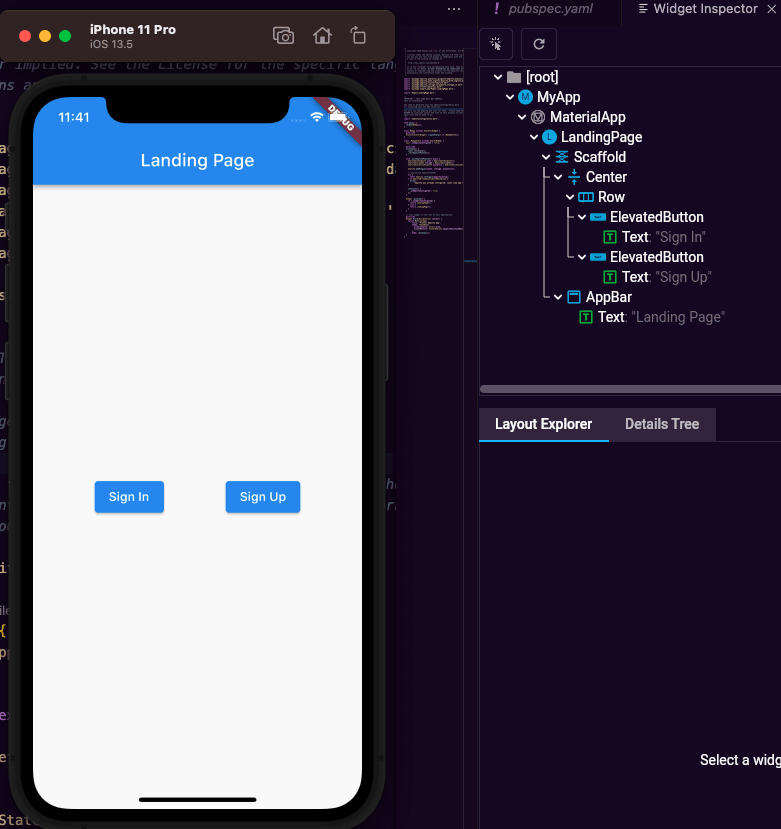
Run the example app once you complete the setup & configurations.
Congratulations, Your development environment is ready.
Contributing to the Repo
Use one of the commands below to create a new branch within your fork
git checkout -b "group-token/short-token-[branch-name]"
or
git checkout -b "short-token/[branch-name]"
Use the group-token to indicate the category you are working on. e.g. amplify-datastore. short-token can be one of the following
- feat
- chore
- bug
Your code needs to conform to the style guides, code patterns standards of the Amplify Flutter repos. We recommend following the Effective Dart coding conventions: https://dart.dev/guides/language/effective-dart or respective Swift and Kotlin conventions. Use inline docs where appropriate to explain your code and use the dartdoc conventions (https://dart.dev/guides/language/effective-dart/documentation) to document the new APIs. Note that the linter rules used for Amplify Flutter are derived from the Dart team's lints (https://pub.dev/packages/lints ) package and the Flutter team's flutter_lints (https://pub.dev/packages/flutter_lints).
Make sure to cover the new logic with enough unit tests to pass the target coverage of our CI/CD pipeline. Each packages/[category] contains the following for testing:
- example folder with a Dart test app for integration testing that specific category. To run these apps, you must include your amplifyconfiguration.dart file in the lib folder.
- iOS unit tests live alongside the example app in the ios/unit_tests folder
- android/src/test/kotlin/.... Test.kt file, where we write the Android unit tests.
- test/ ... test.dart file, where we write the Dart unit tests.
We highly recommend updating the example app to use your new changes (if applicable) and to build the app on iOS and Android.
Creating PR
Once you commit your work, push your branch
git push -u origin <branch-name>
You might get the error below about missing upstream branch
fatal: The current branch <branch-name> has no upstream branch.
To push the current branch and set the remote as upstream, use

git push --set-upstream origin <branch-name>
In this case you need to use the command bellow to push your branh
git push --set-upstream origin <branch-name>
Return to your fork on GitHub, and refresh the page to see your recently pushed branch.
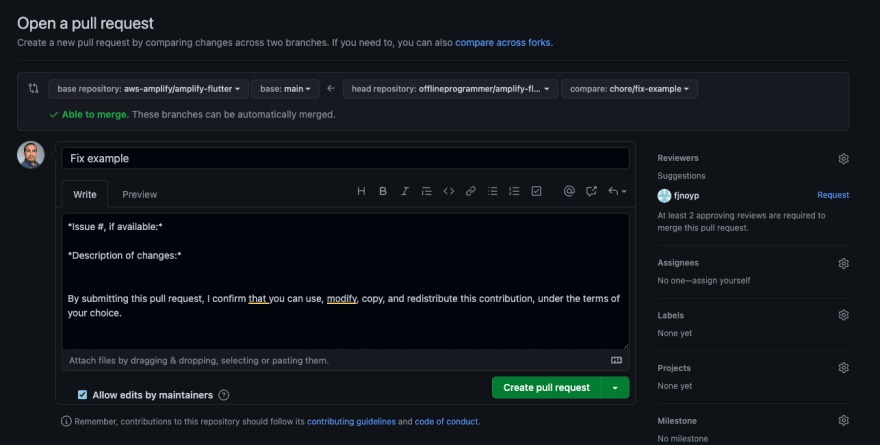
Click on (Compare & pull request)to submit the PR template.
The Amplify team will review your PR and provide feedback if needed. make sure to address any automated check that fails (such as linting, unit tests, etc. in CI). Finally, once your changes meet the requirements and checks, the team will merge your changes into the repo.
Well done. We are very excited about your contributions!
Check our contributing guidelines (https://github.com/aws-amplify/amplify-flutter/blob/main/CONTRIBUTING.md) to learn more.
Follow me on Twitter for more tips about #coding, #learning, #technology...etc.
Check my Apps on Google Play & Apple Store

Posted on October 25, 2021
Join Our Newsletter. No Spam, Only the good stuff.
Sign up to receive the latest update from our blog.


