Collect payments in your Django ecommerce portal using Flutterwave ~PART 1

Nick Langat
Posted on July 26, 2021

It is great to see most businesses going digital as opposed to the traditional way of doing things(mostly manually). Assuming you are running an online electronics store, you may want your customers to be able to make payments on the spot and while at it, give them the flexibility of selecting whether to pay using mobile money or card.
My name is Nick and in this two-part tutorial, we are going to create a simple electronics store using Django and then collect payments from customers using Flutterwave.
PROJECT SETUP
Let's quickly create a Django project by navigating to the desktop directory and opening a terminal window then:
mkdir django_flutterwave && cd django_flutterwave
Next let's create a new virtual env and install dependencies we will need.
virtualenv env

source env/bin/activate

pip install django requests django-environ Pillow
So aside from django we need:
1.requests library-to make calls to the payments endpoint
2.django-environ- to securely store our environment variables
3.Pillow to help with image processing
Let's create the project:
django-admin startproject django_store .
python manage.py startapp electronics
Remember to add 'electronics' to the list of installed apps in the project's settings.py.
MODELS
Open electronics/models.py and add the following code to it:
from django.db import models

# Create your models here.
class Product(models.Model):
    name=models.CharField(max_length=250)
    image=models.ImageField(upload_to='product_images')
    price=models.FloatField()

    def __str__(self) -> str:
        return str(self.name)

#Register it in admin
from django.contrib import admin
admin.site.register(Product)
The next step is to run makemigrations and finally migrate commands to register our database table.
Spin up the server using runserver command.
Create a superuser using the createsuperuser command and login to (http://localhost:8000/admin/) and add a couple of electronic products.
SETTINGS CONFIGURATION
Notice that our Product class accepts images so let's update our settings.py to reflect this. At the bottom of the file add the following code:
MEDIA_ROOT = os.path.join(BASE_DIR, 'media')
MEDIA_URL = '/media/'
open the project's urls.py and add the following code:
from django.contrib import admin
from django.urls import path
from django.conf import settings
from django.conf.urls.static import static

urlpatterns = [
    path('admin/', admin.site.urls),
 ]
if settings.DEBUG:
    urlpatterns += static(settings.MEDIA_URL, document_root=settings.MEDIA_ROOT)
To tell django where to find our HTML markup, add the following to the TEMPLATES SECTION inside the DIRS part:
os.path.join(BASE_DIR, 'templates')
With that in place let's move on.
VIEWS
All the business logic will sit here. We need to list the products from the database so let's create a function to handle that.
Add the following code to the views.py.
from django.shortcuts import render
from .models import Product
# Create your views here.

def list_products(request):
    products=Product.objects.all()
    ctx={
        'products':products
    }
    return render(request, 'products.html', ctx)
update the project's urls.py like so:
from os import name
from django.contrib import admin
from django.urls import path
from django.conf import settings
from django.conf.urls.static import static
from electronics.views import list_products

urlpatterns = [
    path('admin/', admin.site.urls),
    path('', list_products, name='list'),
 ]
if settings.DEBUG:
    urlpatterns += static(settings.MEDIA_URL, document_root=settings.MEDIA_ROOT)
TEMPLATES
Create a root level folder called 'templates' and inside it create 'products.html' file. Now the content to this file can be found on this paste
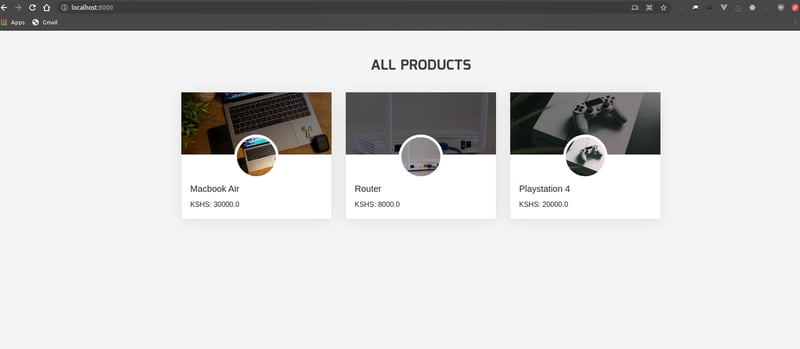
With that in place go ahead and restart the dev server and access (http://localhost:8000/) and you should surely see some UI like mine below:

THAT'S IT
Well I have to wrap up this part at this juncture. The goal here was to create the project, add products and display them on the homepage. I hope that is what you have on your end.
Thanks for taking time to read and follow along. I am working on part 2 so stay tuned!
Follow me here and on Twitter for updates.
Also if you have time visit my website here.
Cheers!

Posted on July 26, 2021
Join Our Newsletter. No Spam, Only the good stuff.
Sign up to receive the latest update from our blog.