Created an anime data scraping application with kivyMD and BS4

Ngonidzashe Nzenze
Posted on August 20, 2021
I'm a big fan of anime and as any anime lover, I always want to be up to date with my favorite anime. I want to know whether or not a new episode has been aired and usually, I'm always checking these anime sites for updates. But what often occurs is that I end up getting glued to the site discovering more and more anime until I realize 'Oh, it's been three hours!'😅
I decided to create an application that just keeps me up to date with the few anime that I want to watch. It was a pretty good way to get up to speed with web scraping and working with some of those kivymd components.
Final Result
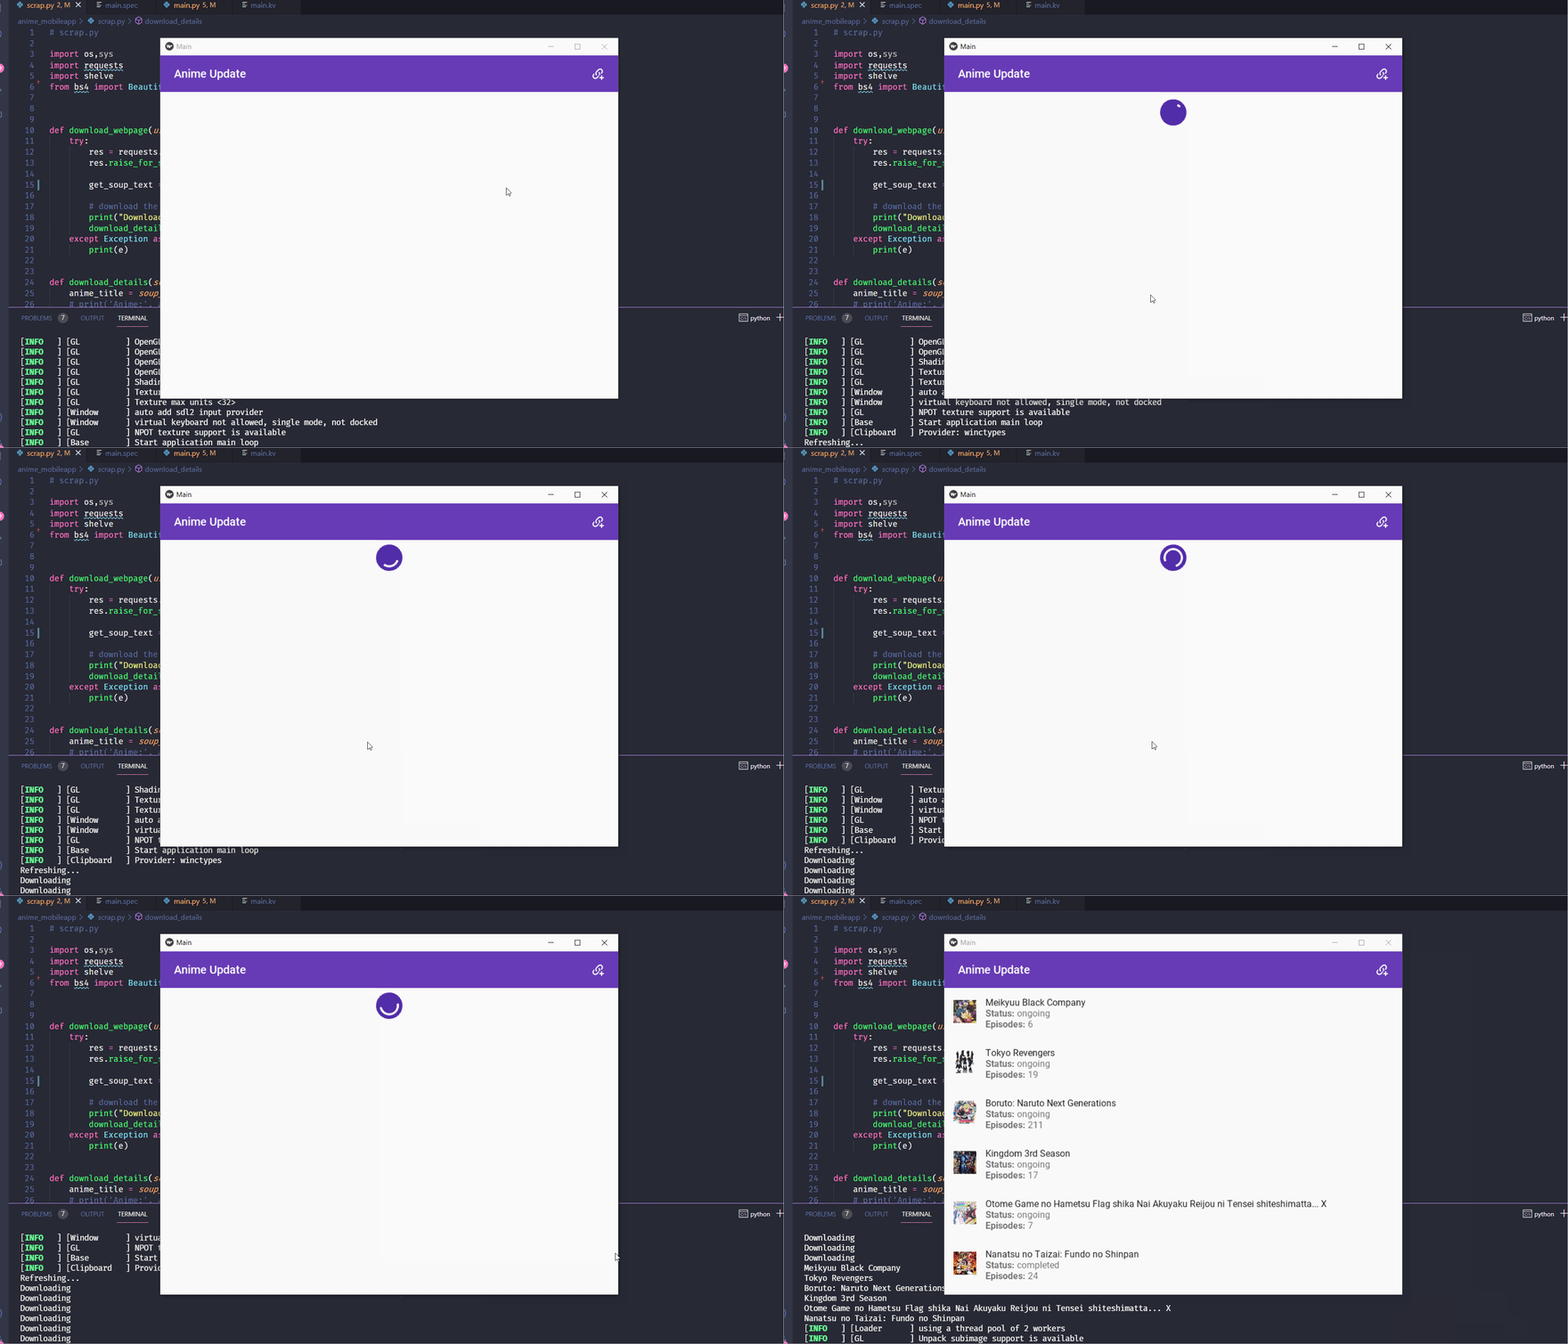
The application is pretty simple. First add the url of the anime on https://gogoanime.vc then navigate back to the 'Anime Update' screen and refresh by swiping down. This will begin the process of scraping data from the site and will display a list of the anime, with an image to the right of each list item and data on the anime such as the name, number of episodes and whether it has finished airing or not.
How it's done
The setup
First create a virtual environment. Inside it, install kivy, kivymd, beautifulsoup4, lxml and requests with the following commands:
pip install kivypip install kivymdpip install bs4pip install requestspip install lxml
We are going to use the lxml parser with BeautifulSoup4
Now create 3 files in the same directory:
-
main.py- to contain the main application code -
main.kv- to contain the interface code -
scrap.py- this file will contain all the code responsible for scraping.
Lets get coding!
Inside main.py, add the following lines
from kivymd.app import MDApp
from kivy.uix.screenmanager import ScreenManager
from kivymd.uix.screen import MDScreen

class ScreenManagement(ScreenManager):
    pass

class MainWindow(MDScreen):
    pass

class AddUrlScreen(MDScreen):
    pass

class MainApp(MDApp):
    def build(self):
        self.theme_cls.primary_palette = "DeepPurple"

if __name__ == "__main__":
    app = MainApp()
    app.run()
Here I'm just creating the skeleton🦴 of the application. It will have two screens, the main screen responsible for displaying the anime information and the url screen where we can add the urls for the anime we want to scrap. I like the color purple and so I've set self.theme_cls.primary_palette to "DeepPurple". You can check out the kivymd documentation for more details.
Next, inside main.kv, add the following code:
ScreenManagement:
    MainWindow:
    AddUrlScreen:

<MainWindow>:
    name: 'mainscreen'

    #toolbar
    MDBoxLayout:
        orientation: 'vertical'

        MDTopAppBar:
            pos_hint: {'top': 1}
            title: 'AnimeUpdate'
            right_action_items: [["link-variant-plus", lambda x: lambda x:app.open_settings_screen()]]
        MDLabel:
Here we are adding the two screens we created to the screen manager. We then define the 'MainWindow' screen. Then we give it a name so that we can reference it later. We then add a tool bar with a widget on the right. The widget will call the app.open_settings_screen() function which we will create later. The 'MDLabel' is just a placeholder for now. If you run the application now you'll get the following:
Next, we add the refresh layout. Modify the <MainWindow> class in main.kv to look as follows:
<MainWindow>:
    name: 'mainscreen'

    #toolbar
    MDBoxLayout:
        orientation: 'vertical'

        MDTopAppBar:
            pos_hint: {'top': 1}
            title: 'AnimeUpdate'
            right_action_items: [["link-variant-plus", lambda x: lambda x:app.open_settings_screen()]]

        # add these lines
        MDScrollViewRefreshLayout:
            id: refresh_layout
            refresh_callback: root.refresh_callback
            root_layout: root

            MDGridLayout:
                id: box
                adaptive_height: True
                cols: 1
In the above code, we are adding the MDScrollViewLayout which is going to allow us to refresh the screen by swiping down from the top. Notice we deleted MDLabel. We are also adding a MDGridLayout which is going to contain the list items.
Now modify the MainWindow class in main.py to look as follows:
class MainWindow(MDScreen):
    def refresh_callback(self, *args):
        print("Refreshing...")
We define a function called refresh_callback which is going to be called when we swipe down. For now it is going to print 'Refreshing...' in the terminal.
Save and run the application with python main.py in the terminal and then swipe down on the screen:
Next we are going to create the url screen. Inside main.kv, add the following code:
<AddUrlScreen>:
    name: 'addurl'
    id: addurl

    # toolbar
    MDBoxLayout:
        orientation: 'vertical'

        MDTopAppBar:
            pos_hint: {'top': 1}
            title: 'Settings'
            left_action_items: [["keyboard-backspace", lambda x: app.return_to_main_window()]]

        MDFloatLayout:
            size_hint: 1, .9
            id: linkscreen

            MDTextField:
                id: linkinput
                size_hint: .8, None
                pos_hint: {'center_x': .5, 'y': .9}
                hint_text: 'Add Url'
                mode: 'rectangle'
                text_validate_unfocus: False
                on_text_validate: root.add_url(linkinput.text)

            ScrollView:
                md_bg_color: app.theme_cls.primary_color
                pos_hint: {'center_x': .5, 'y': .1}
                size_hint: .9, .8

                MDList:
                    id: linklist
AddUrlScreen has a toolbar but this time, the widget is on the left. This widget will return us to the main screen by calling the app.return_to_main_window() function which we are going to define next. The url screen has a text field. We have set text_validate_unfocus to False so that the text field does not lose focus when we press enter. When we press enter, the text inside the text field is going to be fed to the function root.add_url() which we are also going to define next.
Modify main.py as follows:
#...
from kivy.uix.screenmanager import ScreenManager, CardTransition # new import
#...

class AddUrlScreen(MDScreen):
    def add_url(self, text):
        """Add the url to list and save the url in shelve file"""
        self.ids.linkinput.focus = True
        self.ids.linkinput.text = ''
        print(text)

class MainApp(MDApp):
    def build(self):
        self.theme_cls.primary_palette = "DeepPurple"
        self.root.transition= CardTransition() # new line

    #define methods to switch between screens
    def open_settings_screen(self):
        """open setting window"""
        self.root.current = 'addurl'
        self.root.transition.direction = 'down'

    # new method
    def return_to_main_window(self):
        self.root.current = 'mainscreen'
        self.root.transition.direction = 'up'
Here we import the CardTransition which is one of the many screen transition animations. In the AddUrlScreen class, we also add the add_url method which right now only displays the text in the terminal. In the MainApp class, we set the screen transition to CardTransition and add methods to switch between windows.
Now we are going to define a custom list item that gets added to the url screen whenever we press enter in the text field:
In main.kv add:
<CustomListItem>:
    IconLeftWidget:
        icon: "web"

    IconRightWidget:
        icon: "trash-can"
        theme_text_color: "Custom"
        text_color: 1, 0, 0, 1
        on_release: root.delete_item(root.text)
Modify main.py:
from kivymd.uix.list import OneLineAvatarIconListItem, ThreeLineAvatarIconListItem, ImageLeftWidget

# new class
class CustomListItem(OneLineAvatarIconListItem):
    def delete_item(self, text):
        """Delete list item"""
        self.parent.remove_widget(self)

# modify AddUrlScreen
class AddUrlScreen(MDScreen):
    def add_url(self, text):
        """Add the url to list"""
        self.ids.linklist.add_widget(CustomListItem(text=text)) # new line
        self.ids.linkinput.focus = True
        self.ids.linkinput.text = ''
        # removed print line
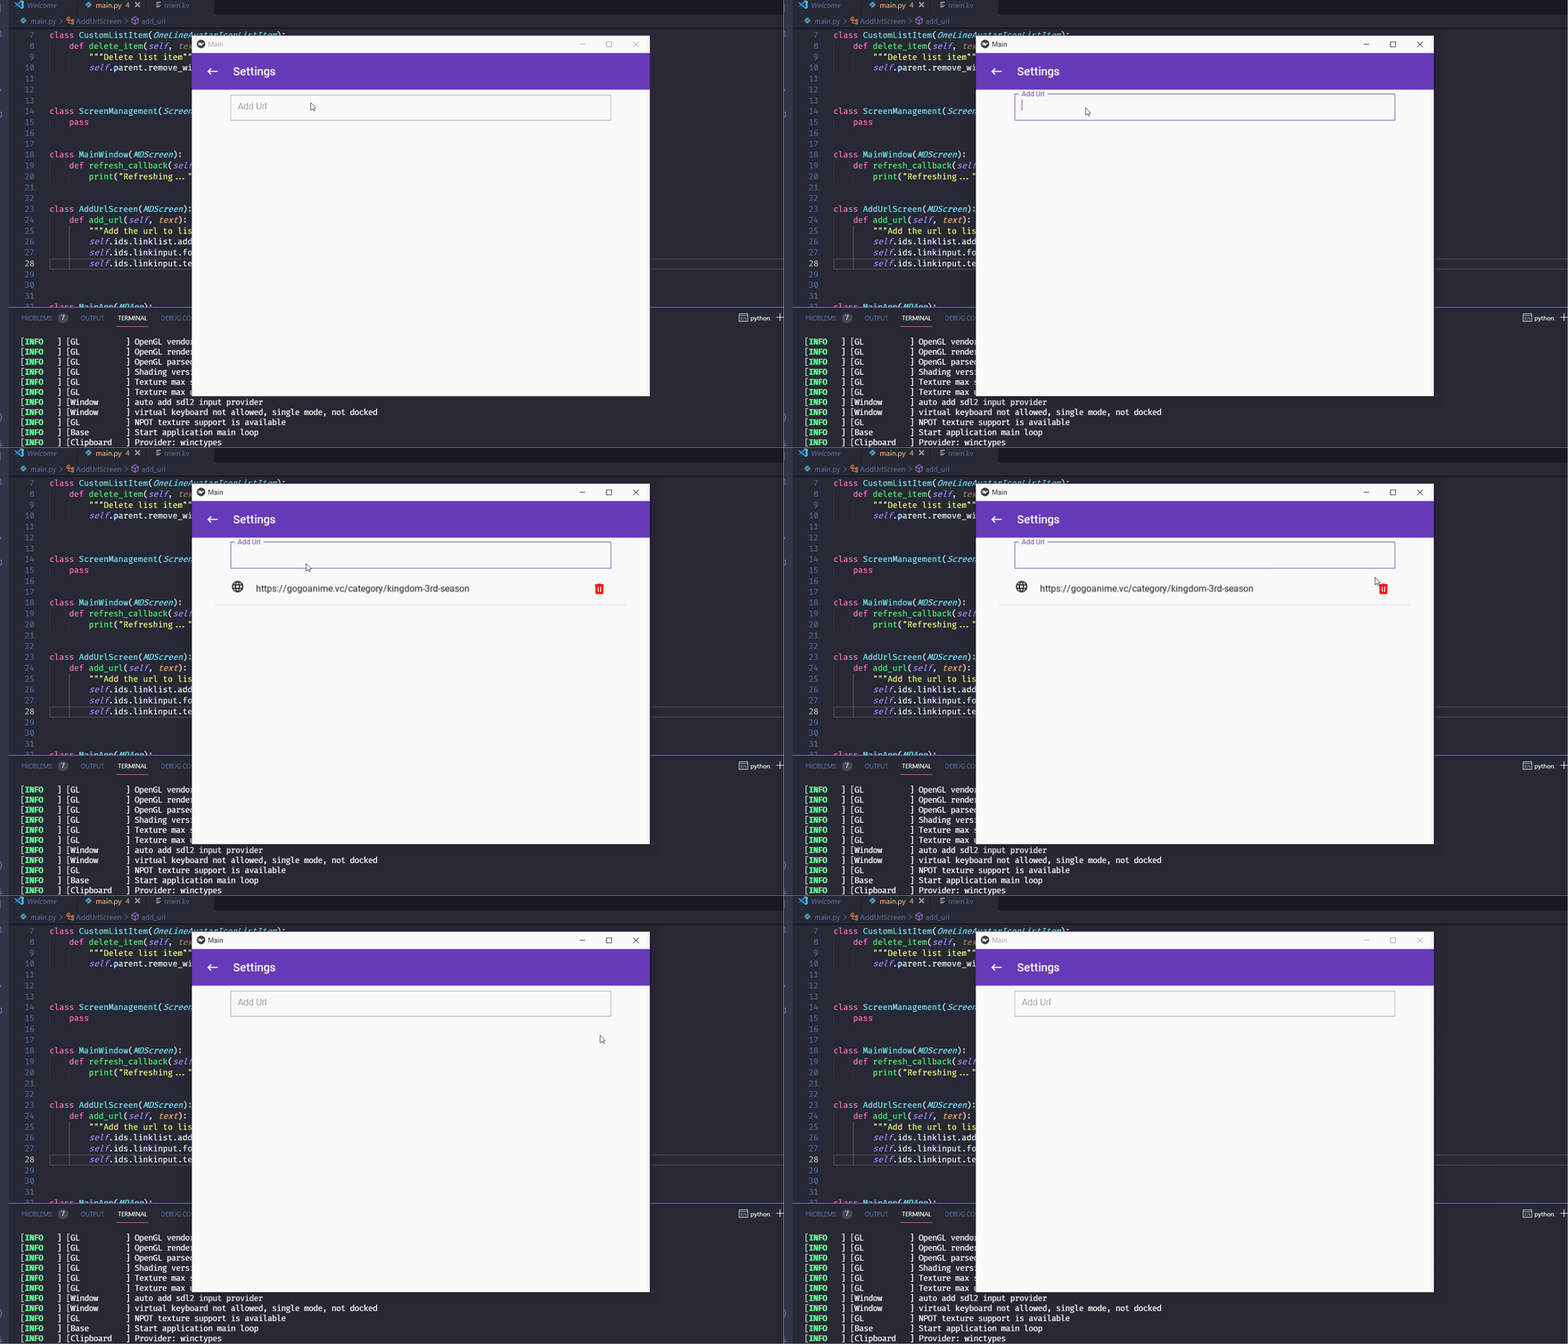
We have imported three items some of which we are going to use later on. Create the CustomListItem class which inherits from the OneLineAvatarIconListItem class. The CustomListItem has an icon on the left and a delete icon on the right. If you run the application now, you can add and delete items:
Now we are going to set up a way to save the urls we have added so that we don't have to keep adding the urls everytime we want to get info on an anime. To do that, we are going to make use of the python shelve module. Modify main.py as follows:
import shelve, os # import shelve and os

# modify CustomListItem to delete item from shelve file
class CustomListItem(OneLineAvatarIconListItem):
    def delete_item(self, text):
        """Delete list item"""
        with shelve.open('./save_files/mydata')as shelf_file:

            url_list = shelf_file['url_list']
            url_list.remove(str(text))
            shelf_file['url_list'] = url_list

        self.parent.remove_widget(self)

# modify the AddUrlScreen class
class AddUrlScreen(MDScreen):
    def add_url(self, text):
        """Add the url to list and save the url in shelve file"""
        self.ids.linklist.add_widget(CustomListItem(text=text))
        self.ids.linkinput.focus = True
        self.ids.linkinput.text = ''

        # saving to shelve file
        with shelve.open('./save_files/mydata') as shelf_file:
            url_list = shelf_file['url_list']
            url_list.append(str(text))
            shelf_file['url_list'] = url_list

    def on_pre_enter(self):
    '''Load the shelve file with list item from shelve file'''
        try:
            with shelve.open('./save_files/mydata') as shelf_file:
                self.ids.linklist.clear_widgets()
                for item in shelf_file['url_list']:
                    self.ids.linklist.add_widget(CustomListItem(text=item))

        except KeyError:
            with shelve.open('./save_files/mydata') as shelf_file:
                shelf_file['url_list'] = []


class MainApp(MDApp):
    #.....

    # add this function to create two directories at start up
    def on_start(self):
        try:
            os.mkdir('images')
            os.mkdir('save_files')
        except:
            pass
Okay, I know that's a lot of code😅 but let me try my best to explain what's going on here. We modify CustomListItem so that when we delete this widget, we also delete the data we has saved in the shelve file. In AddUrlScreen, we add code to save the data in a shelve file in a list called url_list. So every time we press enter in the text field, the text is saved to the shelve file inside a folder named save_files which is in our current working directory. The on_pre_enter method allows us to do things when we are navigating to AddUrlScreen. It will load the saved urls and add CustomListItem widgets. The on_start function creates two folders when the application is started.
Web scraping with beautifulsoup4
I will not get into the details of beautifulsoup4. You can find more information about it in the documentation. The site we are going to be scrapping is gogoanime. If you visit this site, enter an anime name in the search field and press enter, you will be redirected to the results page. Here if you click on an anime, you will be directed to a page with details of that anime. The url will look like this: https://gogoanime.vc/category/name-of-anime.
This is the type of url that our application is going to be using to get details. Right click on the site and click 'inspect'. This will open a small section that allows you look at the details of certain elements like the html used to create them and their classes and so forth. We are going to be selecting the image, the anime name, the status and the number of episodes. There are many ways to select items using beautifulsoup4, I used the css selectors.
Inside scrap.py add the following code:
import os,sys
import requests
import shelve
from bs4 import BeautifulSoup

def download_webpage(url):
    try:
        # use requests to get the url text
        res = requests.get(url)
        res.raise_for_status()

        # parse the text to BeautifulSoup
        get_soup_text = BeautifulSoup(res.text, features='lxml')

        # download the image
        print("Downloading")
        download_details(get_soup_text)
    except Exception as e:
        print(e)

def download_details(soup_text):
    # get the anime title
    anime_title = soup_text.select('.anime_info_episodes > h2')[0].getText()
    # get the number of episodes
    episodes = soup_text.select('.anime_video_body ul li .active')[0].get('ep_end')
    # get the status
    completed = True if soup_text.find(title = 'Completed Anime') != None else False
    ongoing = True if soup_text.find(title = 'Ongoing Anime') != None else False
    # get the image
    image_elements = soup_text.select('.anime_info_body_bg img')

    if image_elements == []:
        pass
    else:
        # get image source
        image_url = image_elements[0].get('src')
        image = requests.get(image_url)
        image.raise_for_status()

    ## Save details to shelve file
    with shelve.open('./save_files/mydata') as shelf_file:
        file_name = os.path.basename(image_url)

        shelf_file[anime_title] = {
            'episodes': episodes,
            'completed': completed,
            'ongoing': ongoing,
            'image': file_name
            }

    # save the image
    if os.path.exists(f'./images/{file_name}') != True:
        image_file = open(os.path.join('images', file_name), 'wb')
        for chuck in image.iter_content(100000):
            image_file.write(chuck)
        image_file.close()
    else:
        pass
I know, it's a lot of code but I promise we're almost done. This code has two functions, download_webpage and download_details. download_webpage uses requests to download the text from the given url. The text is then parsed to BeautifulSoup which enables us to select the elements. download_details then takes this parsed text and selects the elements(name of anime, number of episodes etc). We use requests again to get the image source and download the image and save it in a folder named images.
And that is that for web scraping. Now to finish of the application.
Finishing Off the application
Modify main.py:
#...
from scrap import download_webpage # new import
from kivy.clock import Clock # new import

# modify MainWindow class
class MainWindow(MDScreen):
    #...

    # add new method
    def get_anime_info(self):
        '''Get the anime info and creates a list item widget and adds it to screen'''
        # open shelve files and get the urls
        with shelve.open('./save_files/mydata') as shelf_file:
            url_list = shelf_file['url_list']

        # download data from each url
        for url in url_list:
            download_webpage(url)

        # after downloading the data and saving it shelve file get the data and display it
        with shelve.open('./save_files/mydata') as shelf_file:
            for key in shelf_file.keys():
                if key != 'url_list':
                    print(key)
                    anime = shelf_file[key]
                    episodes = anime['episodes']
                    completed = anime['completed']
                    image = anime['image']

                    anime_complete = 'completed' if completed else 'ongoing'
                    # create a list item with the data
                    list_item = ThreeLineAvatarIconListItem(text=key, secondary_text=f"[b]Status:[/b] {anime_complete}", tertiary_text=f"[b]Episodes:[/b] {episodes}")
                    #add image to the list item
                    list_item.add_widget(ImageLeftWidget(source=f"./images/{image}"))

                    # finally add the list item to screen
                    self.ids.box.add_widget(list_item)
Import the scraping function from scrap.py and Thread from the threading module which we are going to use later. Next we add a new method to MainWindow. This method is going to be responsible for downloading and displaying the anime information every time we refresh. First, it is going to get the urls that were saved in the shelve file. It will pass these urls to the download_webpage function. This function will download all the anime data and save the information in the shelve file. Afterwards, the information is extracted from the shelve file and finally, list items are created and added to the screen.
Now for the final addition to get everything working.
#main.py

# Modify MainWindow
class MainWindow(MDScreen):
    # modify refresh_callback
    def refresh_callback(self, *args):
        print("Refreshing...")

        # new addition
        def refresh_callback():
            self.ids.box.clear_widgets()

            # call the get_anime_info method
            self.get_anime_info()
            self.ids.refresh_layout.refresh_done()

        Clock.schedule_once(refresh_callback, 1)
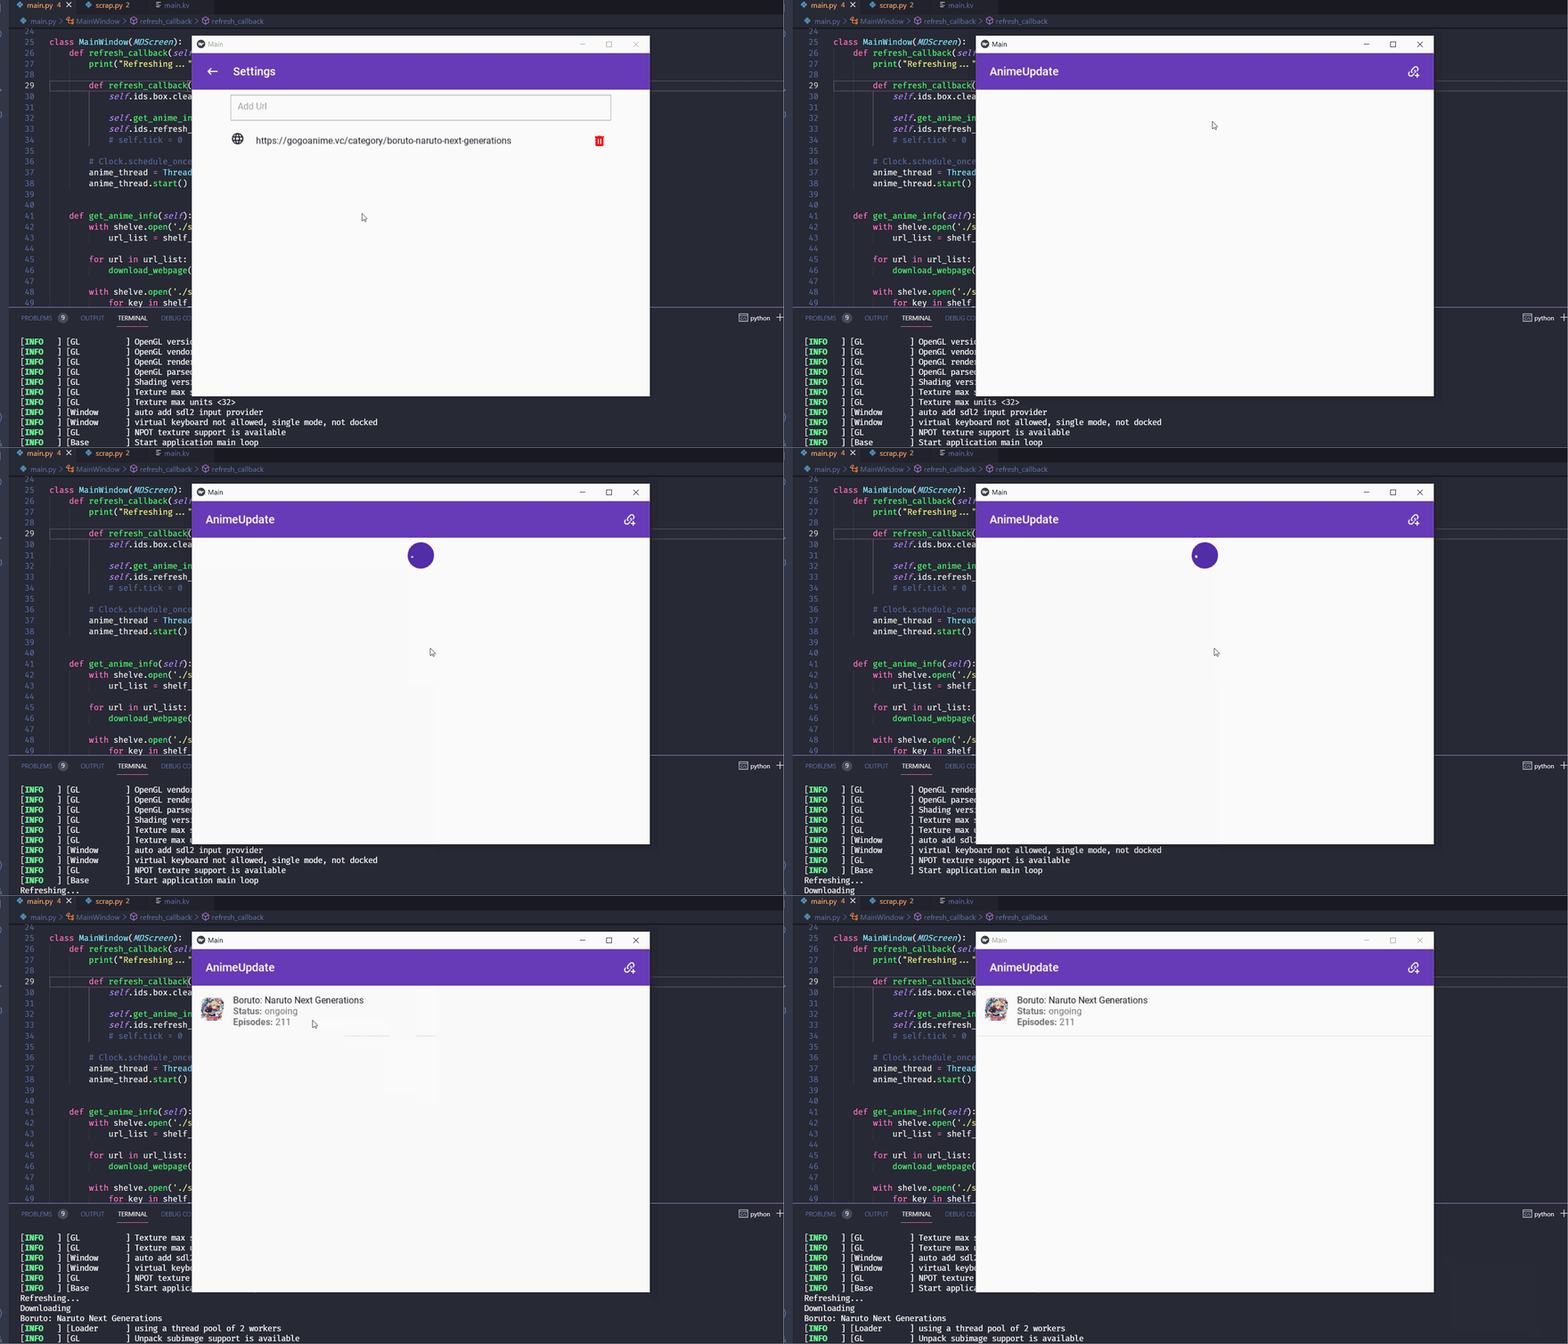
We modify main.py adding a refresh_callback function inside the other refresh_callback function. Now when we refresh(swipe down), the function is called and the anime data is downloaded and displayed:
The application is complete! Now you can be up to date with your favorite anime. Now go, watch some one punchman😎.
Disclaimer: this is for pure educational purpose only. Do not use this in any way that may be deemed as attacking gogoanime.
Full code available here along with the buildozer spec file.

Posted on August 20, 2021
Join Our Newsletter. No Spam, Only the good stuff.
Sign up to receive the latest update from our blog.


