Michael-Lee-1994
Posted on October 21, 2020
Welcome
Anyone who learns to code or writes code for a living, use some sort of medium in which they can take the coding logic that they have stored inside their head and translate that it into a working program. These software programs can be used to help bring the users visualizations to life and are called code editors. That being said there are lots of different software programs that are classified as code editors, and like most products with variation, there are many differences between each code editor.
Intro- Visual Studio Code or VS Code
Some example of popular code editors are Atom, Sublime Text, and Notepad++. But this blog isn't about those editors and you know that because it's written in the title of this blog. This is a tricks and tips about the code editor most people enjoy called Visual Studio Code, or VS Code. Many code editors have their own pros and cons but since I am most familiar with VS Code this blog will focus on how to manipulate VS Code and use it to its full potential.
Basics
To start, I will be assuming that if you are reading this blog that you are somewhat familiar with VS Code, but want to know more about the more niche tools that VS Code has to offer. However, if you ended up here with no prior knowledge about VS Code, then this next section is specifically for you. I will walk you through some of the main features of VS Code.
UI of VS Code
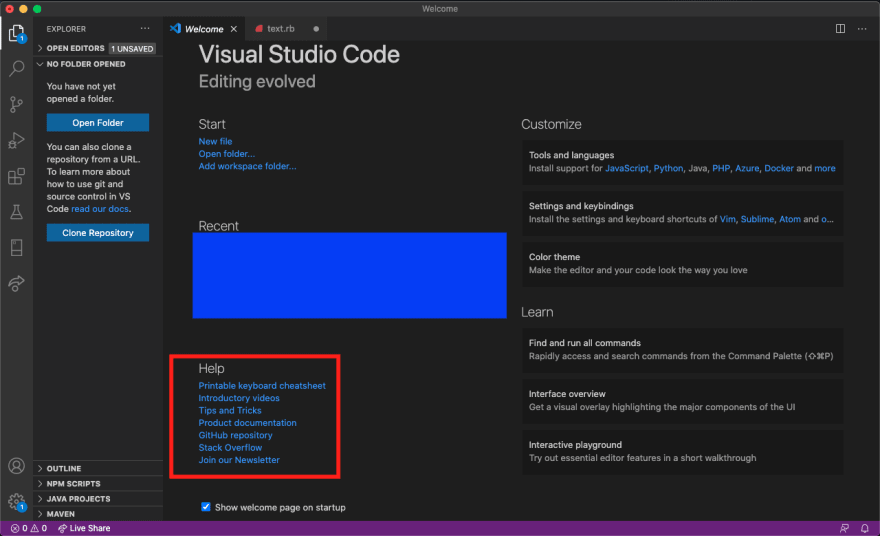
This is a basic image of how VS Code will look when you open it up. It might not be in dark mode, or the dark color layout, but you can set it to that color scheme or a lighter colored mode upon installation or through the settings menu. In this window you can see various clickable side tabs, multiple options to open folders, project, workspaces and etc. in the boot-up menu. All pretty basic functionality needed in for a code editor. Near the lower portion of this image you can see highlighted red box, inside of it, VS Code has listed various helpful links and videos that will walk you through, in more detail, some of the feature of VS Code that I won't talk through. But feel free to click on those helpful links if you get interested in VS Code and decide to download it for yourself.
This is the link to the tips and tricks right here: https://code.visualstudio.com/docs/getstarted/tips-and-tricks#vscode
Themes
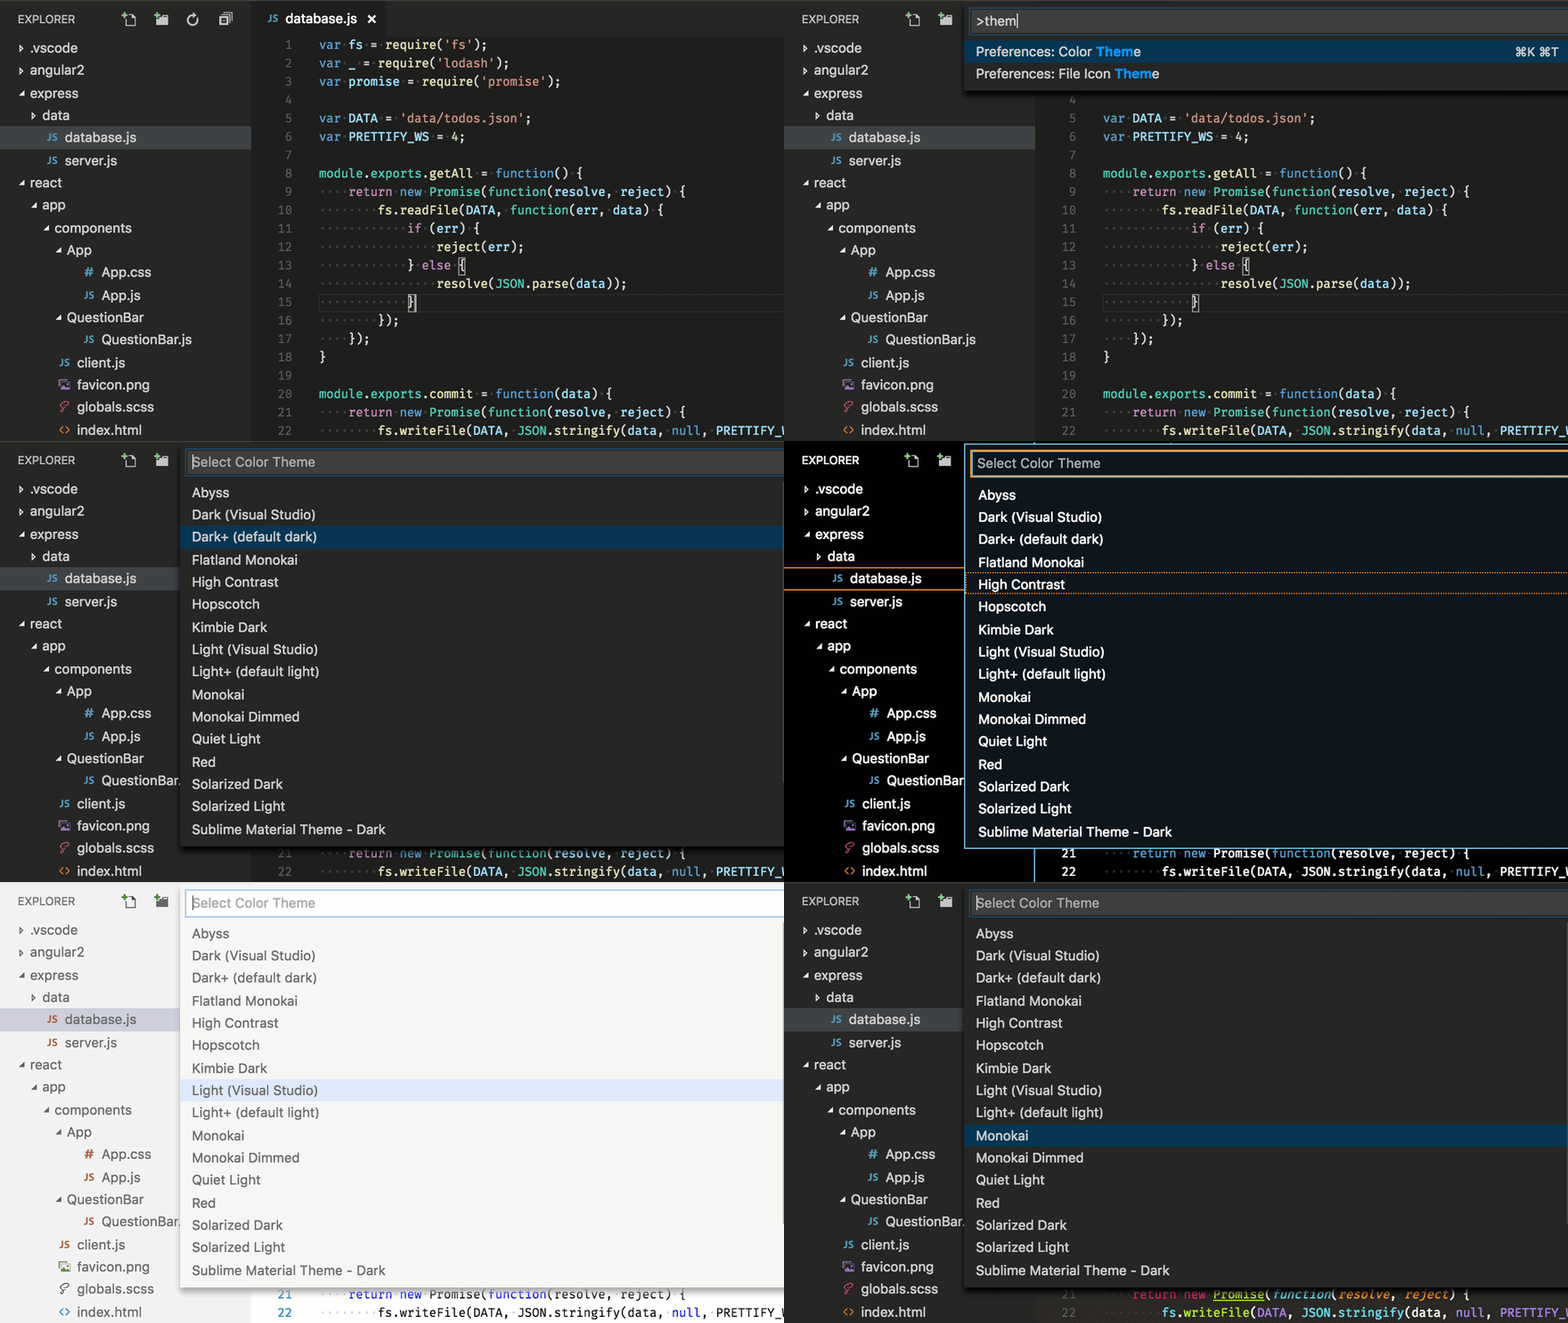
Now we talked about how my VS Code was set to a dark theme, one of the fun things about VS Code is that changing how the interface looks can be simple and helpful. Since this trick is also in the link above I'll only list the commands needed and an image of what happens, don't be shy and go visit the site above, I promise no viruses unless you're on windows then oops, I can't promise you no viruses on windows and its not my fault if you somehow get a virus through my link 😜. But to the point in order to change your interfaces theme you need to press ⌘K and then press ⌘T anywhere in the application in succession, then select the theme you like. When you initially press the ⌘K, you will be able to see at the very bottom of your VS Code window and prompt will appear, signifying that you pressed ⌘K, and notifying that it wants a second input action. Now if the default themes that are available are not to your liking, you can always add more by visiting the Extensions tab on your left tab bar, or the tab that looks like 4 boxes, to install new themes to your theme selections. The Bearded Themes extension, is a personal favorite of mine. Now aside from ascetics, these themes tend to be helpful in color coordinating certain code elements so that you can visually catch any syntax or spelling errors you made while coding, more easily. Though not all of these themes will follow this pattern, most will.
Now that you've customized your themes to fit you liking, we can get to the more helpful tricks you can use. Im sure if you've used or played with VS Code, by now you will know that there are somethings known as extensions that you can download to your application, that will help you in your coding journey. But since extensions are a numerous in number and function, will skip over them in this blog aside from the theme based one introduced above.
Mass typo or word selection ⌘D
What we will go over in this section, is how to manage your code in a more efficient way. One example of this is through the multi selection and code editing feature. This feature in VS Code's documentation, is listed as "add selection to next find match" or ⌘D. Note this command should be used on an open file. So if you're familiar with coding, you should know by now that most code editors, for good reason, do not have a built in spell checker, unlike how most text editors have a dictionary to check for misspelled words. So in a code editor, if you typed bananna, or bannana but wanted to spell banana you would be at a loss and those errors would be kept and possibly unnoticed. And say that while working hard through your code writing pages and pages of it, you finally notice, through bugs or errors when running your tests, that for some reason you have bananna, written down some places, bannana written in others and banana written it the rest of you file. Darn!! Now normally you would have to go through your code, manually track down your errors or use the ⌘F or the find all function in your code to highlight your errors so you can make your code run.
However if you double click the word you want to find and use ⌘D, you can select all instances of that selected word in your code. You might think, wait if I just search for the word with ⌘F or the other find all feature I can find my mistakes that way. The problem, with this method is that you need to know how to you spelled the misspelled word, and you would also need to possible search through every variation of that word to fix your problem. ⌘D however lets you select all words without having to know the spelling of the word, by just selecting/highlighting the word. You might think, "well sure thats cool you found them so what, I still have to go through and manually change each highlighted word like I do with ⌘F." But thats where you are wrong! While you have them selected you can change all of the instances of that selected word a the same time, and you could even change them to be the word "Chicken."

Sure there are limits to this function, like seen above, in that ⌘D didn't select the "nas" in banannanas but it can be very helpful for fixing typos in your code quickly if you select the exact word you would like to fix.

Word can (w)Rap!
Now on to the next tip. Now you might be trying to recreate my banana text above to work on this mass selection yourself or you might be noticing something unique in my code that your code doesn't seem to do. And that is word wrapping. You might've read word wrapping and thought words can't wrap, but think again cause they can. Ba-Dump-Ching!! They can wrap, and by wrap I mean that your sentences can wrap around the text window instead of flowing off the page and becoming unreadable. Like so.

Now this screenshot is exactly the same code as the above image but with word wrap turned off. And as you can see the words flow right off the page and are unreadable. Unless you like scrolling or don't mind swiping left on them words, like Tinder this problem can become annoying quite fast. How do you fix this problem? If you guessed another ⌘ + Letter command, you're close but no cigar. It's an alt/option command with the letter Z. Or if you're familiar with this key symbol: ⌥Z. This will allow you to see your code on the page without that stubborn scrolling to see what text is cut off the end. This also opens up the door to working with multiple tabs open in your code editor, which is pretty neat!
Code movement
Now lastly before this blog gets too long, I'll leave you with one last handy trick that I use often accidentally while typing when I'm not on VS Code. This helpful trick should be implemented in all and any application that utilizes typing in bulk. This trick is moving your code lines either up or down one or multiple lines 😲.

What? You seem disappointed... This trick is a lot more helpful than you would imagine. Especially when you have blocks of nested code and you're trying to see where your code is breaking down. Or if you just have code that you need to run sooner or later in your top down coding language and you want to quickly reorganize where it is in your file, without having to copy and paste that code snippet in the correct spot. And the best part is you don't even need to highlight the code or select the whole code to move it. With the ⌥↑↓, or option arrow up/down, you can move any code big or small up and down with the click of 2 easy buttons. I wish I could have a gif of me demonstrating the capabilities of this shortcut, but I will have to improve my gif making abilities first.
Finally
Hopefully though, if you even made it this far into my poorly written, maybe? helpful blog, you got something useful out of it. Maybe you learned a tool or two or maybe you just liked the links to the actual VS Code page I posted above that actually had detailed lists of tricks and tips. But anyways thanks for stopping by, maybe I'll continue on the saga of tricks and tips later, when I get better at writing blogs. There are lots more tricks, but I end up rambling and lost the time to put them here but hopefully I helped y'all in some way. Thanks for reading, and Keep Coding.
*Disclaimer, not all of these images are owned by me, I am not claiming to own these images in the slightest

Posted on October 21, 2020
Join Our Newsletter. No Spam, Only the good stuff.
Sign up to receive the latest update from our blog.


