Emmanuel Akanji
Posted on October 30, 2022

Table of Contents
- Beginning.
- What is Jenkins?
- Why Jenkins?
- Prerequisites
- Installing and configuring Jenkins Server
- Configure Jenkins to retrieve source code from GitHub via Webhooks.
- Set up Jenkins to use ssh to copy files to the NFS server.
Introduction
The previous projects enable us to add new web servers to our project and set up a load balancer to distribute traffic between them. However, we must still manually copy the files to the web servers. This project would allow us to automate the process of configuring multiple web servers.
Agility and the speed with which software solutions are delivered are critical factors in the world of software development. To accomplish this, we must automate as much as possible, as this will ensure quick and repeatable deployments. In this project, we will begin by automating a portion of our routine tasks using Jenkins, a free and open-source tool.
This procedure revolves heavily around the concept of b>Continuous Integration (CI)/b>.
CI is a software development practice in which developers integrate code into a shared repository on a regular basis, preferably several times per day. Each integration can then be validated using an automated build and automated tests. CD is a software release process that employs automated testing to determine whether changes to a codebase are correct and stable enough for immediate autonomous deployment to a production environment.
What is Jenkins?
Jenkins is a self-contained, open-source automation server that can be used to automate a wide range of tasks related to software development, testing, and delivery or deployment. Jenkins is a Java-based open-source tool. Jenkins is a continuous integration tool. It is used to continuously build and test your software projects, making it easier for developers to incorporate changes to the project and for users to obtain a fresh build. It also enables you to continuously deliver your software by integrating with a wide range of testing and deployment technologies.
Jenkins can be installed using native system packages, Docker, or it can run standalone on any machine that has the Java runtime environment installed.
Why Jenkins?
Jenkins is a continuous integration tool. It makes it easier for thousands of developers all over the world to build, test, and deploy their software with confidence. Because it assists in keeping track of the version control system and initiating and monitoring a build system if there are any changes.
In this project, we will use Jenkins CI to ensure that any changes made to the source code in GitHub are automatically updated on the web servers.
Prerequisites
- Source Code: GitHub
- Infrastructure: AWS.
- Webserver Linux: Red Hat Enterprise Linux 8.
- Database Server: Ubuntu 20.04 + MySQL.
- Storage Server: Red Hat Enterprise Linux 8 + NFS Server.
- Load Balancer: Ubuntu 20.04.
- Programming Language: PHP.
To configure the above steps refer to the previous tutorial Here
Task: Enhance the architecture in the previous project by adding a Jenkins server, and configure a job to automatically deploy source code changes from Git to the NFS server.
Installing and Configuring Jenkins Server
Install Jenkins on the Jenkins server.
- Make an AWS EC2 server based on Ubuntu Server 20.04 LTS and call it "Jenkins."
- Install JDK(Java Development Kit) on the Jenkins server. Since Jenkins is a Java-based application.
sudo apt update
sudo apt install default-jdk-headless
- Set up Jenkins
wget -q -O - https://pkg.jenkins.io/debian-stable/jenkins.io.key | sudo apt-key add -
sudo sh -c 'echo deb https://pkg.jenkins.io/debian-stable binary/ > \
    /etc/apt/sources.list.d/jenkins.list'
sudo apt update
sudo apt-get install jenkins
- We have to make sure that Jenkins is running.
sudo systemctl status jenkins
- By default Jenkins server uses TCP port 8080 - open it by creating a new inbound rule in your EC2 security group.
- Perform initial Jenkins setup. From your browser access.
http://<Jenkins-Server-Public-IP-Address>:8080
Note:You will be prompted to provide a default admin password.
- To get retrieve the default admin password, run the following command.
sudo cat /var/lib/jenkins/secrets/initialAdminPassword
- Then you will be asked which plugins to install - choose suggested plugins.
- Once plugin installation is done - create an admin user and you will get your Jenkin server address.
Configure Jenkins to retrieve source code from GitHub via Webhooks.
In this section, we will configure Jenkins to automatically retrieve source code from GitHub whenever there is a change in the source code. Webhooks would be used to accomplish this.
- Enable webhooks in your GitHub repository settings. Go to your GitHub repository and select Settings > Webhooks > Add webhook.
- Open the Jenkins web console, click "New Item," and create a Freestyle project.
- To connect your GitHub repository to Jenkins, simply copy the URL from your GitHub repository.
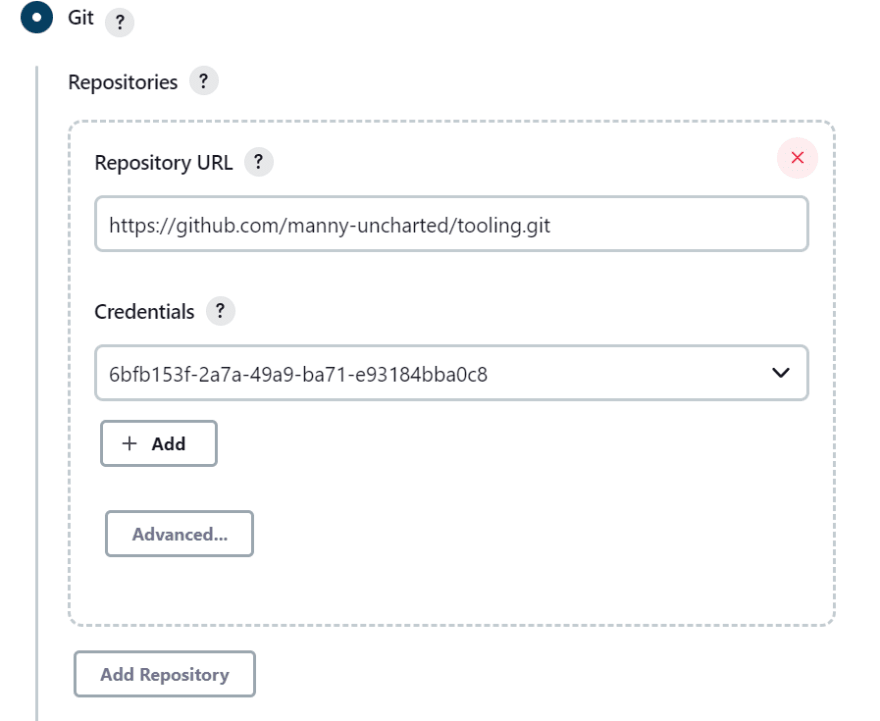
- In your Jenkins project's configurations, select Git repository, enter the URL of your GitHub repository, and click "Add" to add credentials so Jenkins can access your GitHub repository.
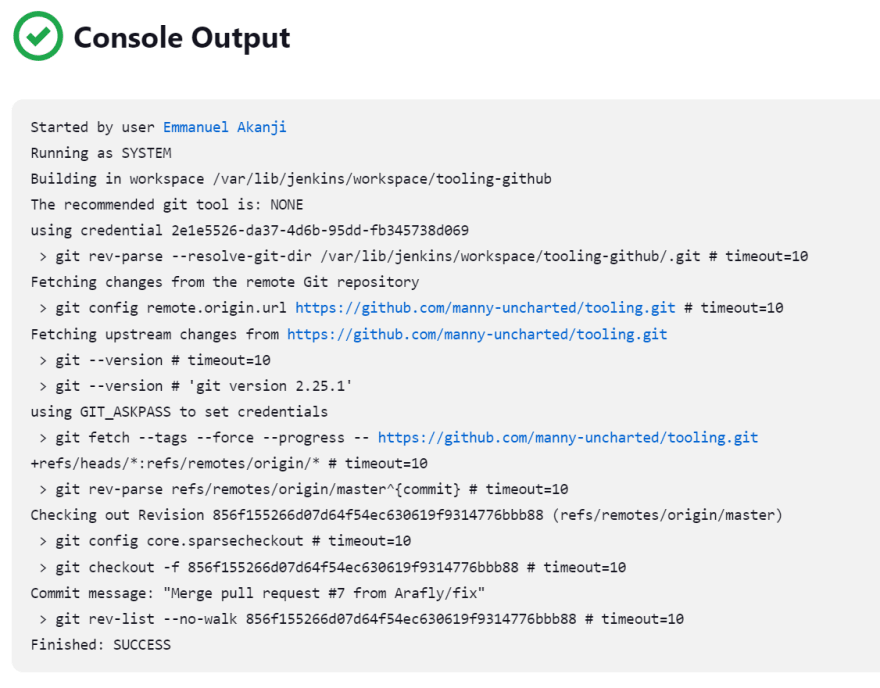
- Save the configurations and run the build. When you click "Build Now," you'll see that the build was successful.
You can open the build and see if it has run successfully in "Console Output."
If so, congratulations! You have just completed your first Jenkins build!
Please keep in mind that this build produces nothing and only runs when we manually trigger it. Let us fix it.
-
In your Jenkins project, go to "Configure" your job/project and add these two configurations.
- Build Triggers > Build when a change is pushed to GitHub, triggering the job via the GitHub webhook:
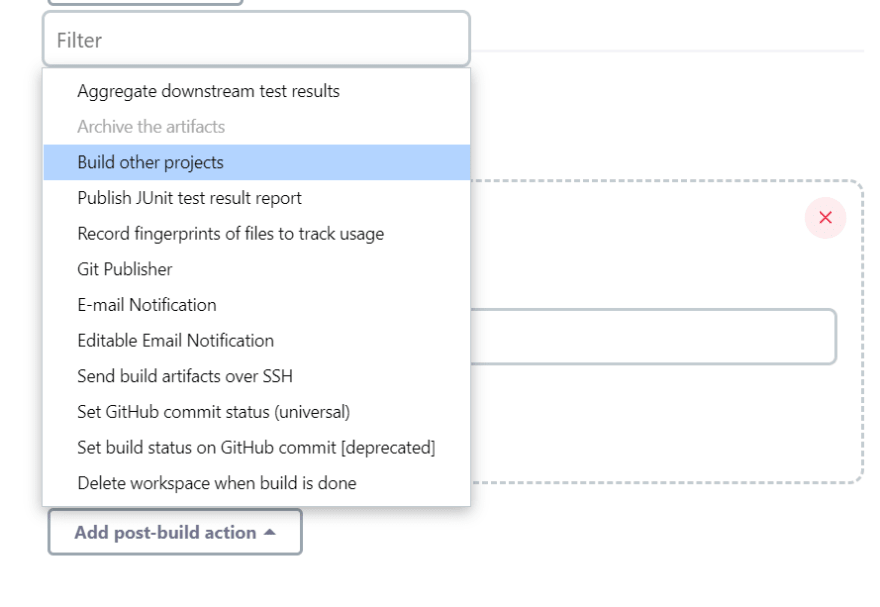
- Configure "Post-build Actions" to archive all files - files generated by a build are referred to as "artifacts."
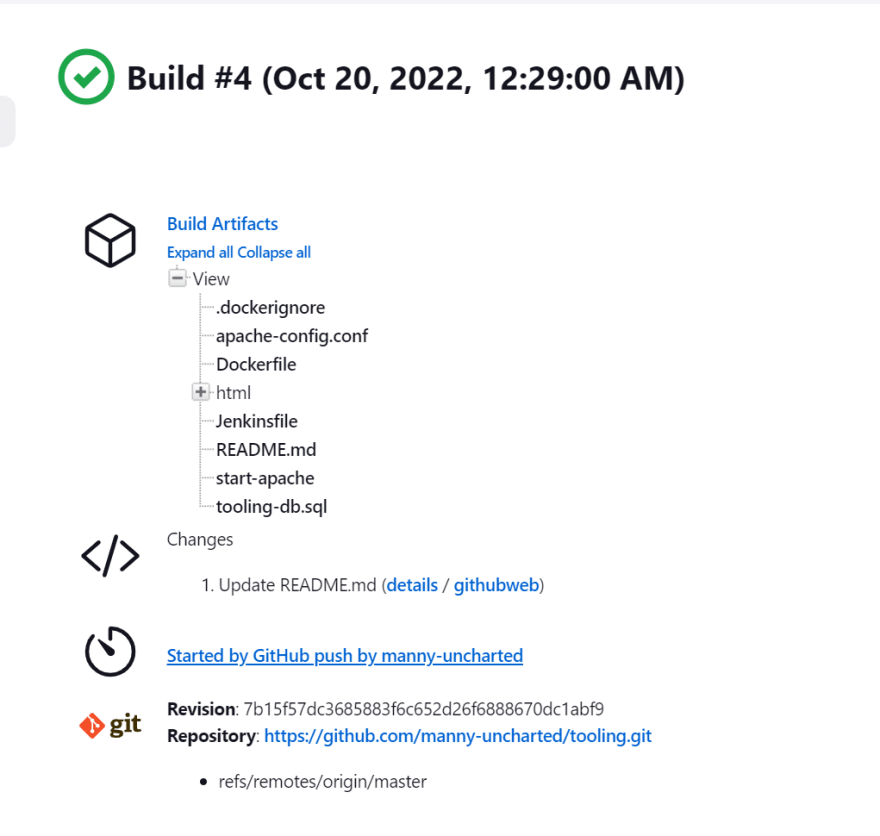
Now, go ahead and make some changes to any file in your GitHub repository (for example, the README.MD file) and push the changes to the master branch.
- We should see that a new build was launched automatically (via webhook) and that its results - artifacts - were saved on the Jenkins server.
Note: You have now configured an automated Jenkins job to receive files from GitHub via webhook trigger (this method is considered 'push' because the changes are 'pushed' and file transfer is initiated by GitHub). Other methods include: triggering one job (downstream) from another (upstream), polling GitHub on a regular basis, and so on.
- By default, the artifacts are stored on Jenkins server locally
ls /var/lib/jenkins/jobs/tooling_github/builds/<build_number>/archive/
Set up Jenkins to use ssh to copy files to the NFS server.
Now that we have our artifacts stored locally on the Jenkins server, we must copy them to the NFS server to the /mnt/apps directory.
Because Jenkins is highly extendable and can be configured to do almost anything, we will need a plugin called "Publish over SSH" to copy files to the NFS server.
- Install the "Publish over SSH" plugin. Go to the Jenkins web console and select "Manage Jenkins" > "Manage Plugins" > "Available" > "Publish over SSH" > "Install without restart."
- Set up the job/project to copy artifacts to the NFS server. Select "Manage Jenkins" from the main dashboard and then "Configure System." Scroll down to the Publish over SSH plugin configuration section and configure it to connect to your NFS server. The configuration is simple; you simply need to provide the following information:
- Provide a private key (the contents of the.pem file that you use to connect to the NFS server via SSH/Putty). arbitrary name
- Hostname - This can be your NFS server's private IP address.
- ec2-user is the username (since NFS server is based on EC2 with RHEL 8)
- Remote directory - /mnt/apps because our Web Servers use it as a mounting point to retrieve files from the NFS server
Then save the configurations.
Note: Test the configuration and ensure that the connection returns Success. Remember that TCP port 22 on the NFS server must be open in order to receive SSH connections.
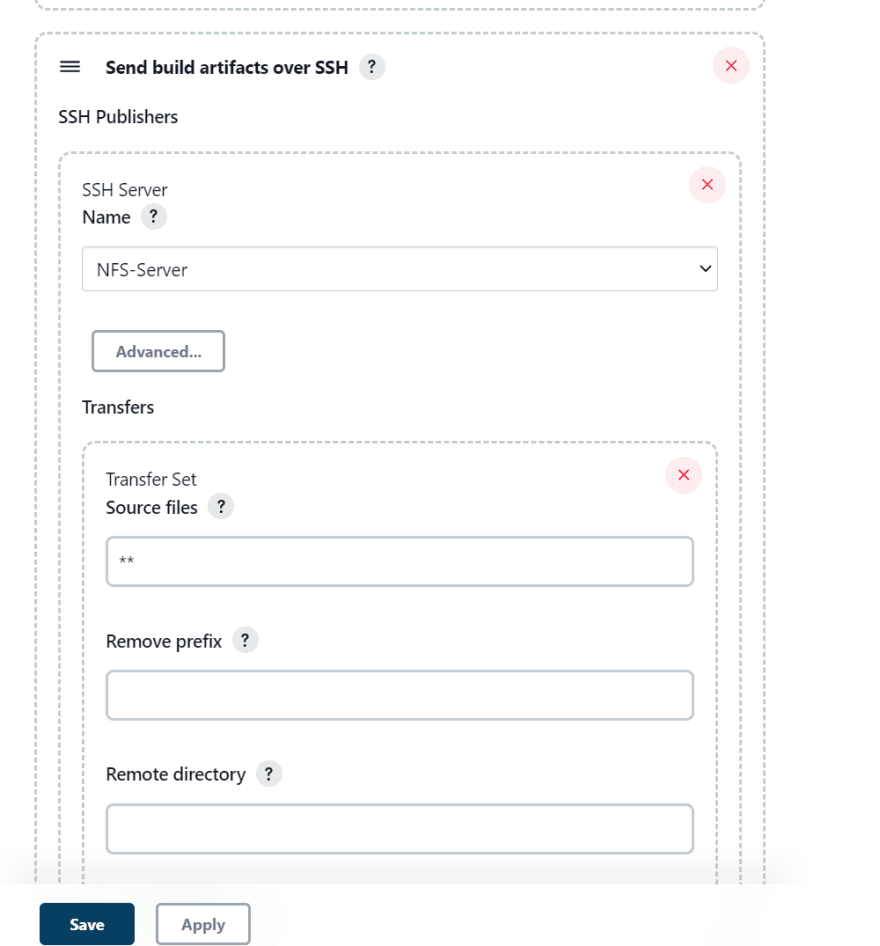
- Now, open the Jenkins project configuration page and add another "Post-build Actions" to copy the artifacts to the NFS server. You have chosen the option "Send build artifacts over SSH."
- Now configure it to send all files generated by the build to our previously defined remote directory /mnt/apps. In our case, we want to copy all files and directories, so we use ** and then save the configurations.
If you want to apply a specific pattern to determine which files to send – use this syntax.
- Now, go ahead and make some changes to any file in your GitHub repository (for example, the README.MD file) and push the changes to the master branch. The build will be triggered by the webhook, and the artifacts will be copied to the NFS server.
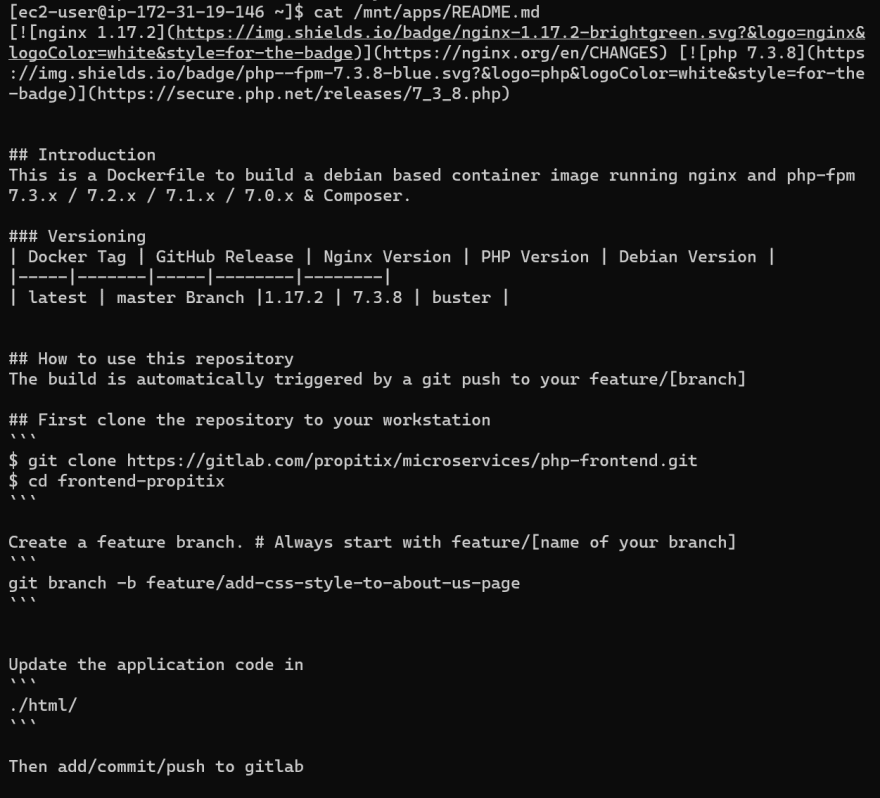
- To ensure that the files in /mnt/apps have been updated, connect via SSH/Putty to your NFS server and check the README.MD file
cat /mnt/apps/README.md
We have just completed our first Continuous Integration solution using Jenkins CI.

Posted on October 30, 2022
Join Our Newsletter. No Spam, Only the good stuff.
Sign up to receive the latest update from our blog.


