How To Pick Document In Xamarin.iOS

Logesh Palani
Posted on February 2, 2020
Introduction
This blog demonstrates, how to pick a file in the iOS device in the Xamarin iOS application. In-default must enable the iCloud provisioning certificate, however, I need pick from the local device, not in iOS Cloud, so provisioning profile is not necessary.
Prerequisites
- Visual Studio for Mac
- XCode (optional)
- Simulator or Physical Device
Step 1:
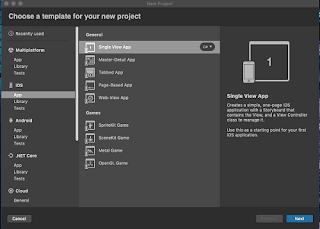
Open Visual Studio for Mac >> New >> In the left plane select App under iOS >>
center plane select Single View App >> click Next.
Step 2:
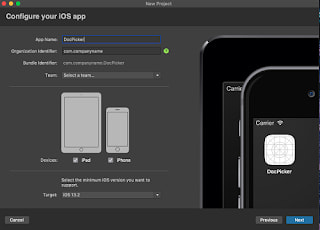
Next, give your Application Name, Device type, Identifier, select Target Version and click Ok.
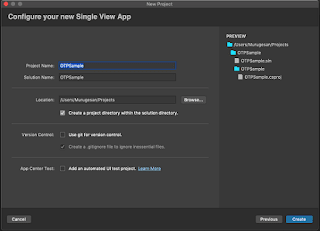
followed by check the app name and solution name, then click Create.
Step 3:
Now, open Storyboard in your interface builder using the right click of Main.Storyboard >> in the context menu select Open with >> followed by XCode Interface Builder (because of my favorite designer is XCode). Afterward, drag Button from Toolbox and place in the center of the scene. by doing >> Solution Explorer >> open Main.Storyboard >> drag to place Button in the center of the scene and set perfect constraints and Create a click event for this button.
Now, open ViewController.cs file and write the code given below, by going to Solution Explorer >> double click and open ViewController.cs file. In the code, I created the Document View Controller and Present in the popview inside the event, we created before. In case the controller was canceled the WasCancelled event will be invoked or DidPickDocumentAturls delegate will be invoked.
partial void BtnDirectPick\_TouchUpInside(UIButton sender)
{
var picker = new UIDocumentPickerViewController(allowedUTIs, UIDocumentPickerMode.Open);
            picker.WasCancelled += Picker\_WasCancelled;
            picker.DidPickDocumentAtUrls += (object s, UIDocumentPickedAtUrlsEventArgs e) =>
            {
                Console.WriteLine("url = {0}", e.Urls[0].AbsoluteString);
//bool success = await MoveFileToApp(didPickDocArgs.Url);
var success = true;
string filename = e.Urls[0].LastPathComponent;
string msg = success ? string.Format("Successfully imported file '{0}'", filename) : string.Format("Failed to import file '{0}'", filename);
// Some invaild file url returns null
                NSData data = NSData.FromUrl(e.Urls[0]);
if(data!=null){
byte[] dataBytes = new byte[data.Length];

                System.Runtime.InteropServices.Marshal.Copy(data.Bytes, dataBytes, 0, Convert.ToInt32(data.Length));

for (int i = 0; i < dataBytes.Length; i++)
                {
                    Console.WriteLine(dataBytes[i]);
                }
                }

                Console.WriteLine(data + "Completed");

var alertController = UIAlertController.Create("import", msg, UIAlertControllerStyle.Alert);
var okButton = UIAlertAction.Create("OK", UIAlertActionStyle.Default, (obj) =>
                {
                    alertController.DismissViewController(true, null);
                });
                alertController.AddAction(okButton);
                PresentViewController(alertController, true, null);
            };
            PresentViewController(picker, true, null);
        }

        private void Picker\_WasCancelled(object sender, EventArgs e)
{
            Console.WriteLine("Picker was Cancelled");
        }
If you need to filter a specific format file, use below URI filters
private string[] allowedUTIs = {
                    UTType.UTF8PlainText,
                    UTType.PlainText,
                    UTType.RTF,
                    UTType.PNG,
                    UTType.Text,
                    UTType.PDF,
                    UTType.Image
                };
Step 4:
Press F5 or run the project, you will get output like below.
Summary
- Create _UIDocumentPickerViewController _
- Implement picker delegate
- Convert NSData to byte.
In this article, we learned how to use the document view controller in Xamarin iOS.

Posted on February 2, 2020
Join Our Newsletter. No Spam, Only the good stuff.
Sign up to receive the latest update from our blog.
Related
November 27, 2024


