Lob
Posted on November 30, 2021

Adding an autocomplete feature to a Vue form can greatly improve UX. Users will only need to type a few characters before they get a selectable suggestion.
This design pattern is particularly effective on e-commerce sites where it's important to make the experience of entering an address as quick and painless as possible.
In this tutorial, we're going to build an address form app using Vue 3 and the Composition API. We'll also use the address autocomplete API offered by Lob to provide address suggestions.
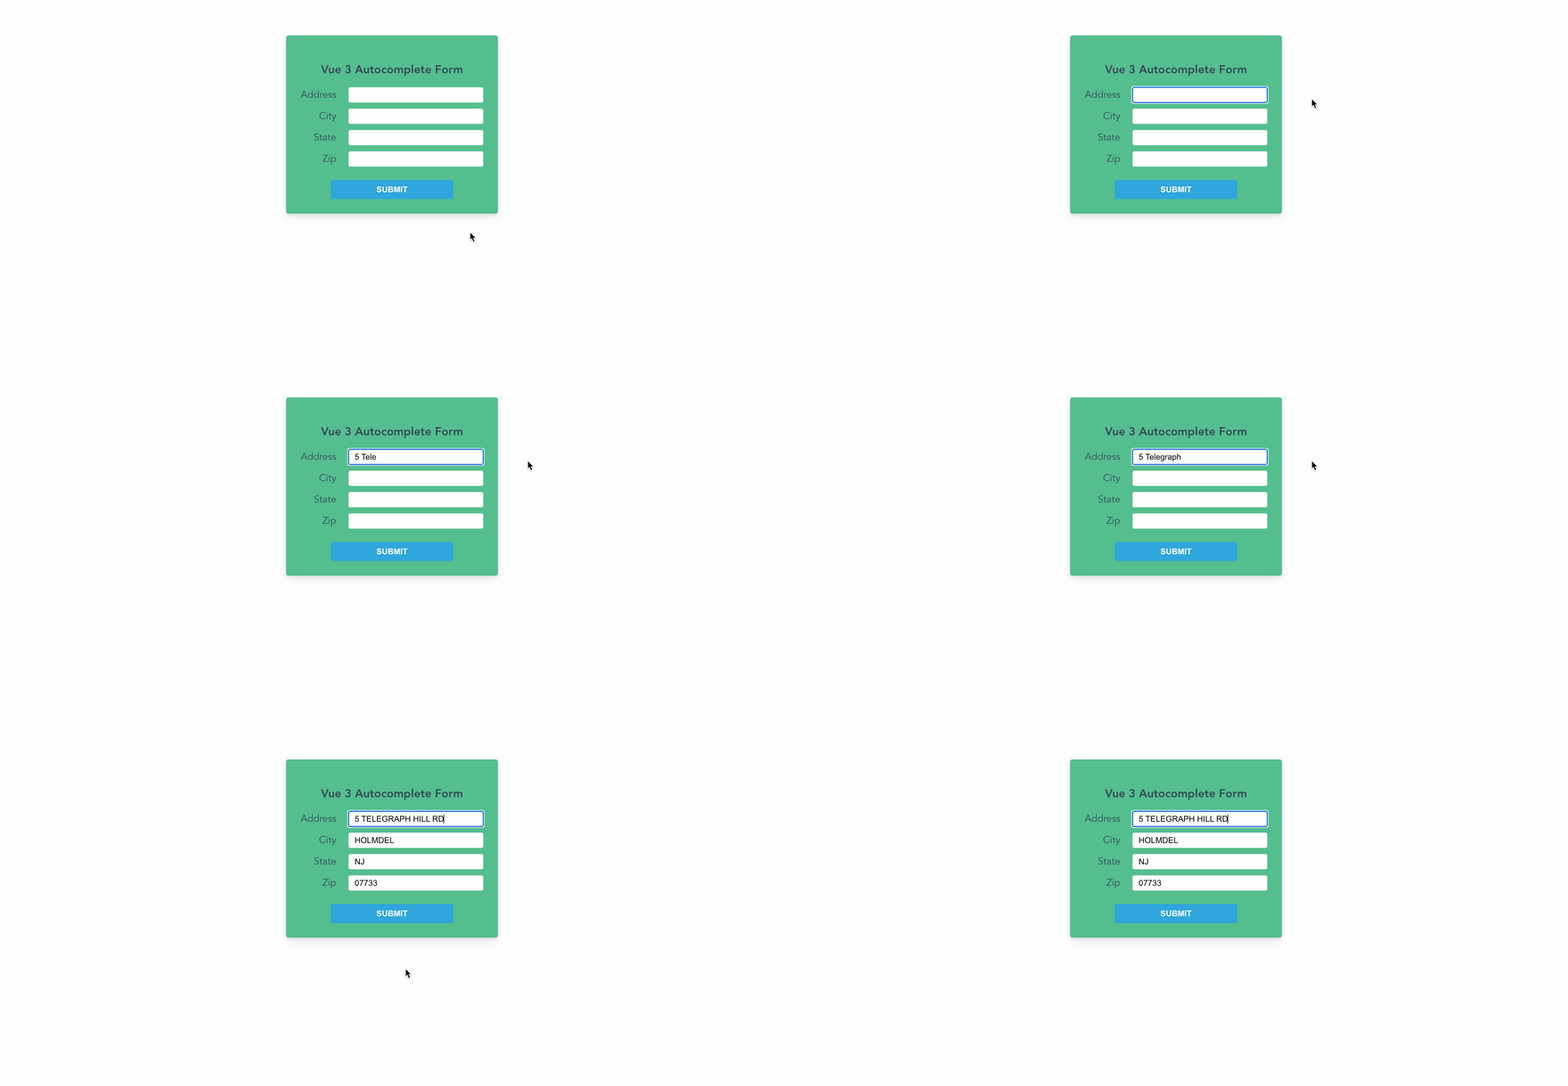
Here's how the completed feature will function:
To complete this tutorial I'll assume you're familiar with Vue 3. If you'd like to see the complete code of the finished product you can get it on GitHub here.
Project setup
To develop this app we'll install the Vite + Vue starter template, which will give us an excellent developer experience for building a Vue 3 app.
Once the template installs, change into the directory, install the NPM modules, and run the Vite dev server.
Vite will then automatically open the project in your browser.
Basic form setup
The first thing we'll do is clear the boilerplate content of App.vue and set up a basic form. You'll notice four labeled text inputs - one for Address, City, State, and Zip.
I've added a v-model to each text input which will bind them to a data property that we'll set up next.
src/App.vue
Let's now create a script tag where we'll create our component definition with a Composition API setup function. In this function, we'll declare a ref for each form field and return those to the render context.
src/App.vue
You'll also want to add some CSS to this component to style it. I won't show that here for the sake of brevity, but you can copy and paste it from the GitHub repo.
At this point, we have a reactive form where each input's value is bound to Vue data. (If you want to confirm this, type in each field and see their state in Vue Devtools).
Autocomplete composition function
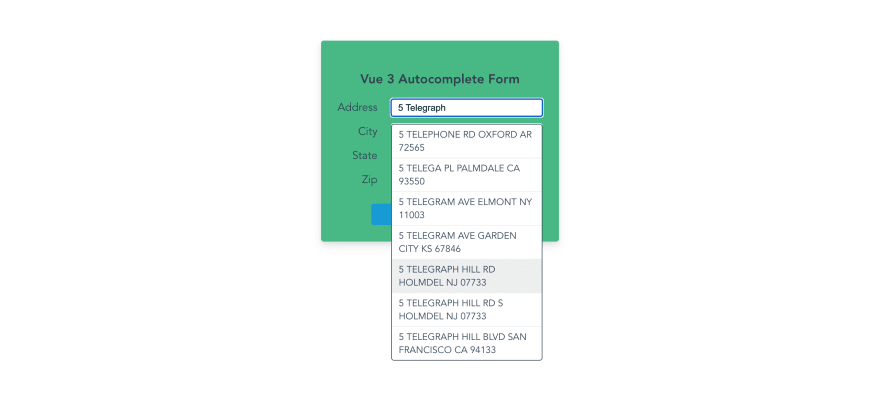
The first field, address, will be our autocomplete field. The concept of the autocomplete feature is this: as the user is typing their address, we call the Lob address autocomplete API and get suggestions which we then display in a dropdown. The user can then use the mouse or keyboard to make a selection, and that selection will fill the other form fields. (Developer plans include 300 API requests per month at no cost.)
Let's now create a function that will get the address suggestions from Lob based on the user's input into this field.
To do this, we'll create a composition function where we can abstract this logic called useAddressSuggestions.js.
In this file, we'll export a function which returns another async function called getSuggestions. Our Vue app can easily call this function by passing in the user's input value for the address field.
src/useAddressSuggestions.js
API key and .env file
Before we continue, you'll need to get an API key to call Lob's API. You can do this by creating a free account with Lob.
Once you've done that, go ahead and grab the publishable test API key which can be safely added to your frontend app.
Even though this key is publishable, we'll still put it in an environment variable file to ensure it doesn't get written to source control and can easily be swapped for a different key as required.
To do this, create a .env file and save in the root directory. It's important you prefix the key with VITE_ as Vite will only render environment variables in the app which have this prefix.
.env
Configuring API call
Returning to our composition function, let's now set up the API call to Lob. As you'll see in the docs, the endpoint for address autocompletion is POST https://api.lob.com/v1/us_autocompletions.
To call this endpoint, we'll be using the native Fetch API. To do this, we'll first need to create an object where we'll configure the API call.
The first config property is the method which we'll set to POST.
To authenticate our API call, we'll need to set a headers option to which we'll assign a new Header API object. The Lob API uses HTTP Basic Auth so we'll set a header Authorization and assign to it
What this does is import our API key, set it to the basic auth username, and encode it as Base 64.
For more details on Lob authorization, see the docs here.
With that done, we'll also provide a Content-Type header to indicate a JSON payload.
Next, we need to set the API call body. This will be a JSON-encoded object.
As explained in the Lob docs, you can send the value you want suggestions for in production mode, but in test mode, you should simply indicate the number of suggestions you want and it will return simulated suggestions (e.g. 5 sugg will return 5 suggestions, 1 sugg will return just one, etc).
So, we'll add an item to JSON payload with key address_prefix and a value conditional on the environment - either the passed in value for production or the string "5 sugg" **for development.
src/useAddressSuggestions.js
Sending and receiving the API call
Now that we've configured our API call, let's write the code for sending and receiving it.
To do this, create a try/catch block and call the autocomplete endpoint using fetch by passing the correct URL and config. The response can then be parsed as JSON.
The data received in the response will be an array of suggestion objects. We're going to transform this array of objects using map so they're easier to use in our app.
The mapped objects will include an id property as well as a sub-object data which will include the complete address suggestions.
We'll also include a name property which will be a string representation of the data that can be displayed to the user.
src/useAddressSuggestions.js
Using the composition function
Let's now return to the App component and import the useAddressSuggestions composition function at the top of the script section.
Inside the setup function, we'll create a reactive array suggestions where we'll store any autocomplete suggestions we want to show the user.
We'll also retrieve the getSuggestions function we just created by calling the composition function.
To populate the reactive array of suggestions with data from getSuggestions we'll create another function onAddressInput. We'll use this as an event handler on the address input. Whenever the user types something, we'll call the function and assign the output to the suggestions array.
We'll now return these three new values to the render context.
src/App.vue
Autocomplete component
A typical autocomplete feature is like an input field mixed with a select dropdown. Rather than create our own from scratch, let's install an open-source autocomplete component.
We'll then import it in our App component and make it available for use by declaring it in the components option.
src/App.vue
Now let's go to the template where we'll use this component. We'll replace the address input with this component.
The config we'll need to supply for this component are:
-
resultsprop, which is the list of selectable items used to populate the autocomplete dropdown. We'll bind oursuggestionsarray to this prop. -
inputevent, which is called whenever the user enters a value into the autocomplete field. We'll handle this with theonAddressInputmethod which, you'll recall from the previous section, will send the value to the Lob address autocomplete API via the composition function we created. -
debounceprop, which ensures theinputcallback is not called more often than the interval specified. This will prevent unnecessary over-calling of the API. -
onSelectedevent, which is called when the user selects an address suggestion. Let's assign an event handlerselectedto this (we'll define it in the next section). -
refattribute, which we'll set to ouraddressreactive data variable.
You can learn more about the config properties of the Autocomplete component in the docs.
src/App.vue
Now that this has been set up, if we type into the address field we'll see a dropdown list appear after a second or so.
Handling selection
The final thing to do is create the selected event handler. This is called when the user selects one of the address suggestions. Here we want to fill the form fields with the address suggestion.
You'll recall from when we created the composition function that the suggestion object contains the address properties in the data subproperty. All we need to do now is assign each of those to our form inputs.
Firstly, the address line itself. To set this, we'll need to call the setText method of the Autocomplete component which is accessible via the address ref. We can simply pass the address (primary_line) property to this.
Then we assign the city, state, and zip values. With this done, we'll empty the selections array since that data is now stale.
src/App.vue
With this done, the selected function will be called once the user selects a value and the form will be automatically filled.
Conclusion
If your application requires users to enter their addresses, why not provide a smoother user experience that keeps your database clean from bad addresses that could cause errors further down the line.

Posted on November 30, 2021
Join Our Newsletter. No Spam, Only the good stuff.
Sign up to receive the latest update from our blog.


