leogdion
Posted on August 26, 2020

Most of the APIs from Apple come from an era of Objective-C and the Delegation Pattern. With this in mind, the challenge is figuring how to adapt for SwiftUI. Specifically we want to create Publishers from delegates using Combine.
For instance, my app Heartwitch is an Apple Watch app for live streamers. In this case, It uses HealthKit which implants the delegation pattern frequently. Additionally, I am using newer technologies such as Vapor 4, Independent Watch Apps, and most importantly SwiftUI.
In this series of articles, I’d like to go into detail regarding the process of adapting an older API for Combine. Specifically we are going to be building a basic SwiftUI app which displays your latitude and longitude with CoreLocation. This includes:
- Creating Publishers from Delegates
- Using Function Reactive Programming to Transform Values
- Understanding FlatMap and Built-In Publishers
For this part, we'll be getting into how to create a Protocol and Class which will act as a go-between for the Delegation Pattern and the Reactive Functional Programming of SwiftUI and Combine.
Gonna Delegate Like It’s 2009
For over a decade, Apple frequently used the Delegation Pattern for giving developers the ability to respond, update, and act in place of a UI object. This pattern has a plethora of benefits especially in Objective-C. However, with Swift and especially SwiftUI, this pattern becomes awkward.
This is where it becomes necessary to make a delegate respond in such a way that SwiftUI can handle updates.
With Apple’s older APIs, we typically see this:
protocol NSDelegate : NSObjectProtocol {
  func manager(_ manager: NSManager, doneWith data: AnyObject)
  func manager(_ manager: NSManager, grantedPermission: Bool)
}
class NSManager : NSObject {
  weak var delegate : NSDelegate?

  func requestAuthorization() {}
  func doThing () {}
}
In the case of CoreLocation we see this:
protocol CLLocationManagerDelegate : NSObjectProtocol {
  func locationManager(_: CLLocationManager, didUpdateLocations locations: [CLLocation])
  func locationManager(_: CLLocationManager, didChangeAuthorization status: CLAuthorizationStatus)
}
class CLLocationManager : NSObject {
  weak var delegate : CLLocationManagerDelegate?

  func requestWhenInUseAuthorization() {}
  func startUpdatingLocation () {}
}
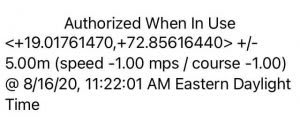
In other words, we’ll need to create Combine Publishers which our ObservableObject can listen or react to. Once the ObservableObject reacts properly, then the View will update accordingly. In the end, we should see this in our application:
Before we setup our publishers, let's scaffold our View and ObservableObject.
SwiftUI Scaffolding
Let's first start by building our SwiftUI View. In this case, we'll be creating a SwiftUI view along with an ObservableObject.
struct LocationView: View {
  // CLLocationManager is basically a singleton so an EnvironmentObject ObservableObject makes sense
  @EnvironmentObject var locationObject: CoreLocationObject
  var body: some View {
    VStack {
      // use our extension method to display a description of the status
      Text("\(locationObject.authorizationStatus.description)")
        .onTapGesture {
          self.locationObject.authorize()
        }
      // use Optional.map to hide the Text if there's no location
      self.locationObject.location.map {
        Text($0.description)
      }
    }
  }
}
This LocationView will simply display one line with a description of the location with a line describing the CLAuthorizationStatus using this extension:
extension CLAuthorizationStatus: CustomStringConvertible {
public var description: String {
switch self {
case .authorizedAlways:
return "Always Authorized"
case .authorizedWhenInUse:
return "Authorized When In Use"
case .denied:
return "Denied"
case .notDetermined:
return "Not Determined"
case .restricted:
return "Restricted"
@unknown default:
return "🤷♂️"
}
}
}
Now let's go ahead and define our ObservableObject, named CoreLocationObject:
import Combine
import CoreLocation
import SwiftUI
class CoreLocationObject: ObservableObject {
  @Published var authorizationStatus = CLAuthorizationStatus.notDetermined
  @Published var location: CLLocation?
  init() { }
}
Lastly, make sure that you set the EnvironmentObject in your application using:
LocationView().environmentObject(CoreLocationObject())
Now, we have our scaffolding setup, let's plug-in CoreLocation.
Extending Delegates into Combine Publishers
With the Delegation Pattern, the Delegate (in this case CoreLocationManagerDelegate) will receive location updates. Therefore it is the ideal object to create publishers for our ObservableObject.
In order for our ObservableObject to react to CoreLocation changes, the delegate will have to create Publishers for us. With this in mind, I have extended to delegate to be a Publicist. That is to say the Delegate will also be a Publisher Factory.
protocol CLLocationManagerCombineDelegate: CLLocationManagerDelegate {
  func authorizationPublisher() -> AnyPublisher<CLAuthorizationStatus, Never>
  func locationPublisher() -> AnyPublisher<[CLLocation], Never>
}
In the case of our application, we are displaying the authorization status of Core Location as well as the latitude and longitude. Therefore, we only need two methods implemented for our publishers.
Here is the implementation of our new protocol:
class CLLocationManagerPublicist: NSObject, CLLocationManagerCombineDelegate {
  let authorizationSubject = PassthroughSubject<CLAuthorizationStatus, Never>()
  let locationSubject = PassthroughSubject<[CLLocation], Never>()
  func authorizationPublisher() -> AnyPublisher<CLAuthorizationStatus, Never> {
    return Just(CLLocationManager.authorizationStatus())
      .merge(with:
        authorizationSubject.compactMap { $0 }
      ).eraseToAnyPublisher()
  }
  func locationPublisher() -> AnyPublisher<[CLLocation], Never> {
    return locationSubject.eraseToAnyPublisher()
  }
  func locationManager(_: CLLocationManager, didUpdateLocations locations: [CLLocation]) {
    locationSubject.send(locations)
  }
  func locationManager(_: CLLocationManager, didFailWithError _: Error) {
    // Implement to avoid crashes
    // Extra Credit: Create a publisher for errors :/
  }
  func locationManager(_: CLLocationManager, didChangeAuthorization status: CLAuthorizationStatus) {
    authorizationSubject.send(status)
  }
}
Let’s breakdown how this class works.
The Power of Type Erasing Publishers
Our Publicist doesn’t need to hold onto any values. In the end, it solely serves the purpose of transforming data from the CoreLocationManager to the ObservableObject. For this reason, we’ll be using a PassthroughSubject for the CLLocation and CLAuthorizationStatus. That is to say, PassthroughSubject doesn't hold any values as they receive values but passes them on.
With the PassthroughSubject properties in place, our delegate can send the values received from the delegate methods to the subjects.
Creating our first publisher for CLLocation is fairly simple:
class CLLocationManagerPublicist: NSObject, CLLocationManagerCombineDelegate {
...
  let locationSubject = PassthroughSubject<[CLLocation], Never>()
  func locationPublisher() -> AnyPublisher<[CLLocation], Never> {
    return locationSubject.eraseToAnyPublisher()
  }
  func locationManager(_: CLLocationManager, didUpdateLocations locations: [CLLocation]) {
    locationSubject.send(locations)
  }
...
}
What’s important to realize is that we need to implement type erasure using eraseToAnyPublisher. The introduction of SwiftUI and Combine included improvements to Swift. These improvement allow for powerful transformations which can result in fairly complex Generic Types. For instance our authorizationPublisher has a return type AnyPublisher:
  func authorizationPublisher() -> AnyPublisher<CLAuthorizationStatus, Never> {
    return Just(CLLocationManager.authorizationStatus())
      .merge(with:
        authorizationSubject.compactMap { $0 }
      ).eraseToAnyPublisher()
  }
Without eraseToAnyPublisher, the return type would be:
Publishers.Merge<Just<CLAuthorizationStatus>, Publishers.CompactMap<PassthroughSubject<CLAuthorizationStatus, Never>, CLAuthorizationStatus>>
Likewise with the locationPublisher, the return type would be:
PassthroughSubject<[CLLocation], Never>
In the end, this makes creating Protocols and Return Types fairly complex. As far as the ObservableObject is concerned, it doesn’t care how the publisher is transformed but the result types returned.
Therefore our Protocol only needs a AnyPublisher return type. In the end, we can both simplify and hide the method of functional transformation using eraseToAnyPublisher. Likewise, the implementation calls eraseToAnyPublisher to reduce the return type and match the Protocol's method signature.
Now that we have figured out how to creating matching Publisher types, let’s transform CLAuthorizationStatus so it is usable within the view.
Transforming Authorization Status into a Publisher
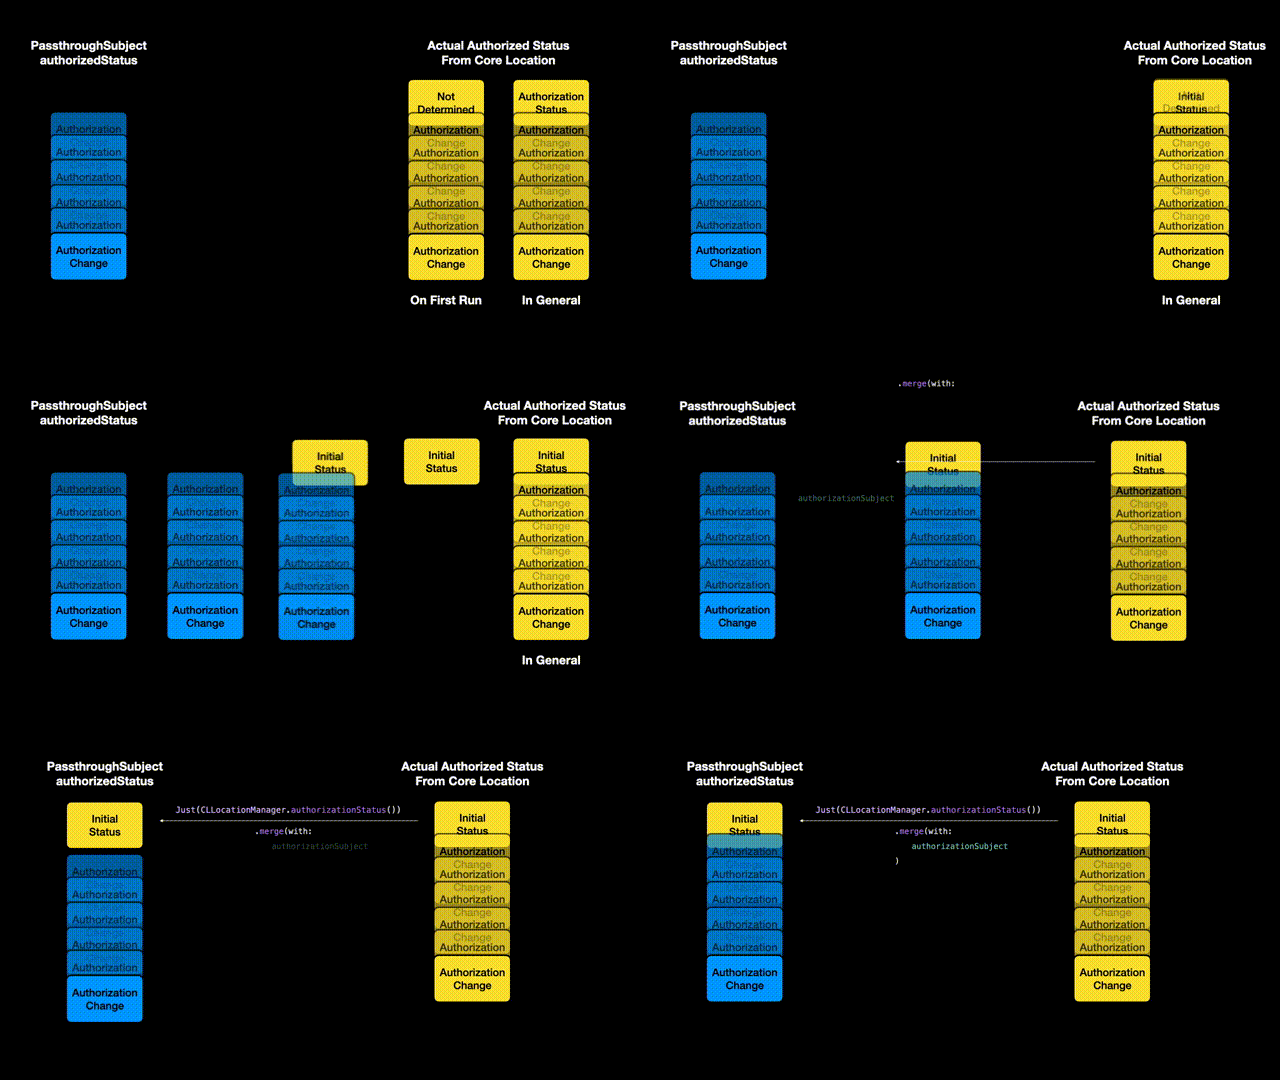
While our locationSubject reflects the values from CoreLocation, the authorizationSubject will be out of sync from the reality of CoreLocation’s status. For this reason, we’ll need to write some code include the initial status along with whatever the PassthroughSubject receives.
  func authorizationPublisher() -> AnyPublisher<CLAuthorizationStatus, Never> {
    return Just(CLLocationManager.authorizationStatus())
      .merge(with:
        authorizationSubject
      ).eraseToAnyPublisher()
  }
While CoreLocationManagerDelegate sends updates to authorizationStatus, we need to have access to the initial status via CLLocationManager.authorizedStatus. Luckily, Combine includes a built-in Publisher for single values using Just.
Just gives us the initial value published however we need to include the remaining published values from our PassthroughSubject. For this reason, we can use merge to join the intial value with the result from the our authorizationSubject:
We have the publisher factories setup now!
Interested in learning more about Combine, check out my podcast episode with Donny Wals:
What's Next?
In our next part in this series, we'll learn how to use this implementation in our ObservableObject CoreLocationObject. Specifically, we'll be getting into power of function programming within Reactive Functional Programming. Enjoy!

Posted on August 26, 2020
Join Our Newsletter. No Spam, Only the good stuff.
Sign up to receive the latest update from our blog.
Related

February 10, 2024


