Will Vincent
Posted on February 15, 2020
In this tutorial we will implement basic search in a Django website and touch upon ways to improve it with more advanced options.
Note: I gave a version of this tutorial at DjangoCon US 2019. You can see the video here:
Complete source code can be found on Github.
To start let's create a new Django project (see here if you need help with this). On your command line, enter the following commands to install the latest version with Pipenv, create a project called citysearch_project, set up the initial database via migrate, and then start the local web server with runserver.
$ pipenv install django==3.0.3
$ pipenv shell
$ django-admin startproject citysearch_project .
$ python manage.py migrate
$ python manage.py runserver
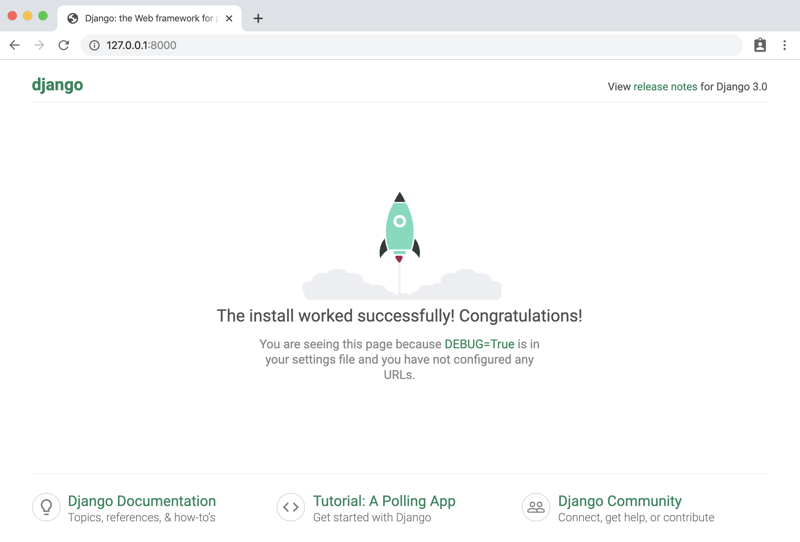
If you navigate to http://127.0.0.1:8000/ you'll see the Django welcome page which confirms everything is configured properly.
Cities app
Now we'll create a single app called cities to store a list of city names. We're keeping things intentionally basic. Stop the local server with Control+c and use the startapp command to create this new app.
$ python manage.py startapp cities
Then update INSTALLED_APPS within our settings.py file to notify Django about the app.
# citysearch_project/settings.py
INSTALLED_APPS = [
    ...
    'cities.apps.CitiesConfig', # new
]
Now for the models. We'll call our single model City and it will have just two fields: name and state. Since the Django admin will be default pluralize the app name to Citys we'll also set verbose_name_plural. And finally set __str__ to display the name of the city.
# cities/models.py
from django.db import models


class City(models.Model):
    name = models.CharField(max_length=255)
    state = models.CharField(max_length=255)

    class Meta:
      verbose_name_plural = "cities"

    def __str__(self):
        return self.name
Ok, all set. We can create a migrations file for this change, then add it to our database via migrate.
$ python manage.py makemigrations cities
$ python manage.py migrate
There are multiple ways to populate a database but the simplest, in my opinion, is via the admin. Create a superuser account so we can log in to the admin.
$ python manage.py createsuperuser
Now we need to update cities/admin.py to display our app within the admin.
# cities/admin.py
from django.contrib import admin

from .models import City

class CityAdmin(admin.ModelAdmin):
    list_display = ("name", "state",)

admin.site.register(City, CityAdmin)
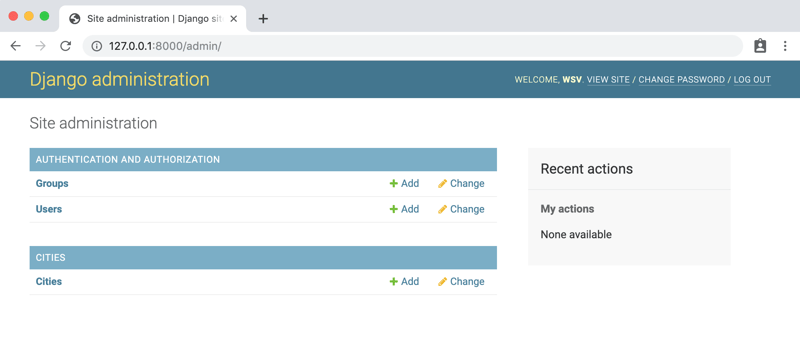
Start up the server again with python manage.py runserver and navigate to the admin at http://127.0.0.1:8000/admin and log in with your superuser account.
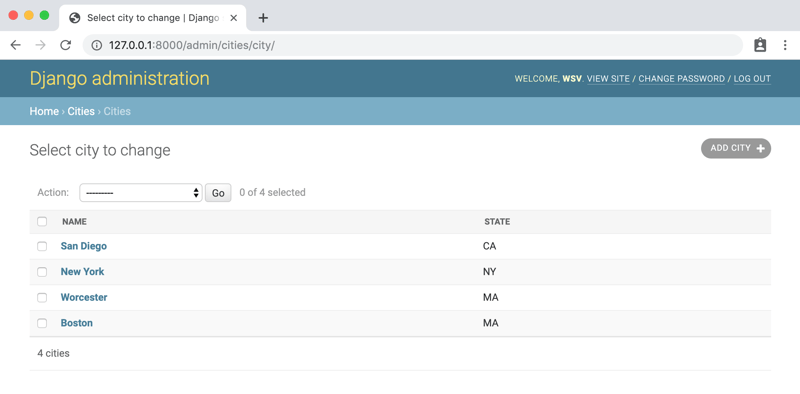
Click on the cities section and add several entries. You can see my four examples here.
Homepage and Search Results Page
We have a populated database but there are still a few steps before it can be displayed on our Django website. Ultimately we only need a homepage and search results page. Each page requires a dedicated view, url, and template. The order in which we create these doesn't really matter; all must be present for the site to work as intended.
Generally I prefer to start with the URLs, add the views, and finally the templates so that's what we'll do here.
First, we need to add a URL path for our cities app which can be done by importing include and setting a path for it.
# citysearch_project/urls.py
from django.contrib import admin
from django.urls import path, include # new

urlpatterns = [
    path('admin/', admin.site.urls),
    path('', include('cities.urls')), # new
]
Second, we need a urls.py file within the cities app however Django doesn't create one for us with the startapp command. No worries, we can create that now from the command line as well. Stop the server with Control+c if it is still running.
$ touch cities/urls.py
Within this file we'll import yet-to-be-created views for each--HomePageView and SearchResultsView--and set a path for each. Note as well that we set an optional URL name for each.
Here's what it looks like:
# cities/urls.py
from django.urls import path

from .views import HomePageView, SearchResultsView

urlpatterns = [
    path('search/', SearchResultsView.as_view(), name='search_results'),
    path('', HomePageView.as_view(), name='home'),
]
Third, we need to configure our two views. The homepage will just be a template with, eventually, a search box. Django's TemplateView works nicely for that. The search results page will list the results we want which is a good fit for ListView.
# cities/views.py
from django.views.generic import TemplateView, ListView

from .models import City


class HomePageView(TemplateView):
    template_name = 'home.html'

class SearchResultsView(ListView):
    model = City
    template_name = 'search_results.html'
Fourth and finally, we need our templates. We could add the templates within our cities app but I find that creating a project-level templates folder instead is a simpler approach.
Create a templates folder and then both templates home.html and search_results.html.
$ mkdir templates
$ touch templates/home.html
$ touch templates/search_results.html
Note that we also need to update our settings.py to tell Django to look for this project-level templates folder. This can be found in the TEMPLATES section.
# citysearch_project/settings.py
TEMPLATES = [
    {
        ...
        'DIRS': [os.path.join(BASE_DIR, 'templates')], # new
        ...
    }
]
The homepage will just be a title at this point.
<!-- templates/home.html -->
<h1>HomePage</h1>
Start up the web server again with python manage.py runserver and we can see the homepage now at http://127.0.0.1:8000/.
Now for the search results page which will loop over object_list, the default name for the context object ListView returns. Then we'll output both the name and state for each entry.
<!-- templates/search_results.html -->
<h1>Search Results</h1>

<ul>
  {% for city in object_list %}
    <li>
      {{ city.name }}, {{ city.state }}
    </li>
  {% endfor %}
</ul>
And...we're done. Our search results page is available at http://127.0.0.1:8000/search/.
Forms and Querysets
Ultimately a basic search implementation comes down to a form that will pass along a user query--the actual search itself--and then a queryset that will filter results based on that query.
We could start with either one at this point but'll we configure the filtering first and then the form.
Basic Filtering
In Django a QuerySet is used to filter the results from a database model. Currently our City model is outputting all its contents. Eventually we want to limit the search results page to filter the results outputted based upon a search query.
There are multiple ways to customize a queryset and in fact it's possible to do filtering via a manager on the model itself but...to keep things simple, we can add a filter with just one line. So let's do that!
Here it is, we're updating the queryset method of ListView and adding a hardcoded filter so that only a city with the name of "Boston" is returned. Eventually we will replace this with a variable representing the user search query!
# cities/views.py
class SearchResultsView(ListView):
    model = City
    template_name = 'search_results.html'
    queryset = City.objects.filter(name__icontains='Boston') # new
Refresh the search results page and you'll see only "Boston" is now visible.
It's also possible to customize the queryset by overriding the get_queryset() method to change the list of cities returned. There's no real advantage to do so in our current case, but I find this approach to be more flexible than just setting queryset attributes.
# cities/views.py
...
class SearchResultsView(ListView):
    model = City
    template_name = 'search_results.html'

    def get_queryset(self): # new
        return City.objects.filter(name__icontains='Boston')
Most of the time the built-in QuerySet methods of filter(), all(), get(), or exclude() will be enough. However there is also a very robust and detailed QuerySet API available as well.
Q Objects
Using filter() is powerful and it's even possible to chain filters together. However often you'll want more complex lookups such as using "OR" which is when it's time to turn to Q objects.
Here's an example where we set the filter to look for a result that matches a city name of "Boston" or a state name that contains with "NY". It's as simple as importing Q at the top of the file and then subtly tweaking our existing query.
# cities/views.py
from django.db.models import Q # new
...

class SearchResultsView(ListView):
    model = City
    template_name = 'search_results.html'

    def get_queryset(self): # new
        return City.objects.filter(
            Q(name__icontains='Boston') | Q(state__icontains='NY')
        )
Refresh your search results page and we can see the result.
Now let's turn to our search form to replace the current hardcoded values with search query variables.
Forms
Fundamentally a web form is simple: it takes user input and sends it to a URL via either a GET or POST method. However in practice this fundamental behavior of the web can be monstrously complex.
The first issue is sending the form data: where does the data actually go and how do we handle it once there? Not to mention there are numerous security concerns whenever we allow users to submit data to a website.
There are only two options for "how" a form is sent: either via GET or POST HTTP methods.
A POST bundles up form data, encodes it for transmission, sends it to the server, and then receives a response. Any request that changes the state of the database--creates, edits, or deletes data--should use a POST.
A GET bundles form data into a string that is added to the destination URL. GET should only be used for requests that do not affect the state of the application, such as a search where nothing within the database is changing, we're just doing a filtered list view basically.
If you look at the URL after visiting Google.com you'll see your search query in the actual search results page URL itself.
For more information, Mozilla has detailed guides on both sending form data and form data validation that are worth reviewing if you're not already familiar with form basics.
Search Form
But for our purposes, we can add a basic search form to our existing homepage right now. Here's what it looks like. We'll review each part below.
<!-- templates/home.html -->
<h1>HomePage</h1>

<form action="{% url 'search_results' %}" method="get">
  <input name="q" type="text" placeholder="Search...">
</form>
For the form the action specifies where to redirect the user after submission of the form. We're using the URL name for our search results page here. Then we specify the use of get as our method.
Within our single input--it's possible to have multiple inputs or to add a button here if desired--we give it a name q which we can refer to later. Specify the type which is text. And then add a placeholder value to prompt the user.
That's really it! On the homepage now try inputting a search, for example for "san diego".
Upon hitting Return you are redirected to the search results page. Note in particular the URL contains our search query http://127.0.0.1:8000/search/?q=san+diego.
However the results haven't changed! And that's because our SearchResultsView still has the hardcoded values from before. The last step is to take the user's search query, represented by q in the URL, and pass it in.
# cities/views.py
...
class SearchResultsView(ListView):
    model = City
    template_name = 'search_results.html'

    def get_queryset(self): # new
        query = self.request.GET.get('q')
        object_list = City.objects.filter(
            Q(name__icontains=query) | Q(state__icontains=query)
        )
        return object_list
We added a query variable that takes the value of q from the form submission. Then update our filter to use query on both a city name and state. That's it! Refresh the search results page--it still has the same URL with our query--and the result is expected.
If you want to compare your code with the official source code, it can be found on Github.
Next Steps
Our basic search is now complete! Maybe you want to add a button on the search form that could be clicked in addition to hitting return? Or perhaps add some form validation?
Beyond filtering with ANDs and ORs there are other factors if we want a Google-quality search, things like relevancy and much more. This talk DjangoCon 2014: From __icontains to search is a good taste of how deep the search rabbit hole can go!

Posted on February 15, 2020
Join Our Newsletter. No Spam, Only the good stuff.
Sign up to receive the latest update from our blog.


