Will Vincent
Posted on February 19, 2020
Django Rest Framework is a powerful library that sits on top of existing Django projects to add robust web APIs. If you have an existing Django project with only models and a database--no views, urls, or templates required--you can quickly transform it into a RESTful API with a minimal amount of code.
In this tutorial we'll create a basic Django To Do app and then convert it into a web API using serializers, viewsets, and routers.
Complete source code is available on Github.
Prerequisites
You should have a basic understanding of how Django works and a local development configuration with Python 3 and pipenv. I've written an entire book called Django for Beginners that introduces these topics and has a dedicated chapter on local dev setup.
Initial Setup
Let's start by creating a directory for our code, installing Django, and creating a new project. Execute the following on the command line.
$ cd ~/Destkop
$ mkdir todo && cd todo
$ pipenv install django==3.0.3
$ pipenv shell
(todo) $ django-admin startproject todo_project .
(todo) $ python manage.py startapp todos
We're placing the code on the Desktop but it can live anywhere you choose on your computer. We've used Pipenv to install Django and then enter a dedicated virtual environment. And finally created a new Django project called todo_project which has a todos app.
Since we have a new app, we need to update our INSTALLED_APPS setting. Open demo_project/settings.py with your text editor and add todos.apps.TodosConfig at the bottom of the list.
# todo_project/settings.py
INSTALLED_APPS = [
  ...
  'todos.apps.TodosConfig',
]
Perform our first migration to set up the initial database at this point.
(todo) $ python manage.py migrate
Next, we can create a basic model for our Todo app which will just have a title, description, and add a __str__ method.
# todos/models.py
from django.db import models


class Todo(models.Model):
    title = models.CharField(max_length=200)
    description = models.TextField()

    def __str__(self):
        return self.title
Then create a migration file and migrate our change to the project database.
(todo) $ python manage.py makemigrations todos
(todo) $ python manage.py migrate
The final step is to update the admin.py file so the todos app is visible when we log into the admin.
# todos/admin.py
from django.contrib import admin

from .models import Todo

admin.site.register(Todo)
In a normal Django app at this point we would need to add urls, views, and templates to display our content. But since our end goal is an API that will transmit the data over the internet, we don't actually need anything beyond our models.py file!
Let's create a superuser account so we can log into the admin and add some data to our model. Follow the prompts to add a name, email, and password. If you're curious, I've used admin, admin@email.com, and testpass123 since this example is for learning purposes. Obviously use a name and password that are more secure on a real site!
(todo) $ python manage.py createsuperuser
(todo) $ python manage.py runserver
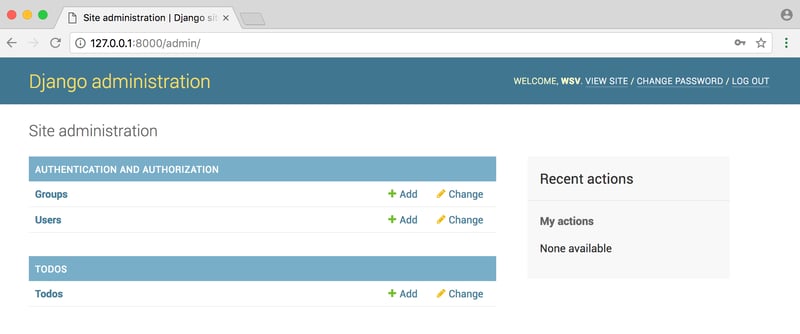
Navigate to http://127.0.0.1:8000/admin and log in with your new superuser account.
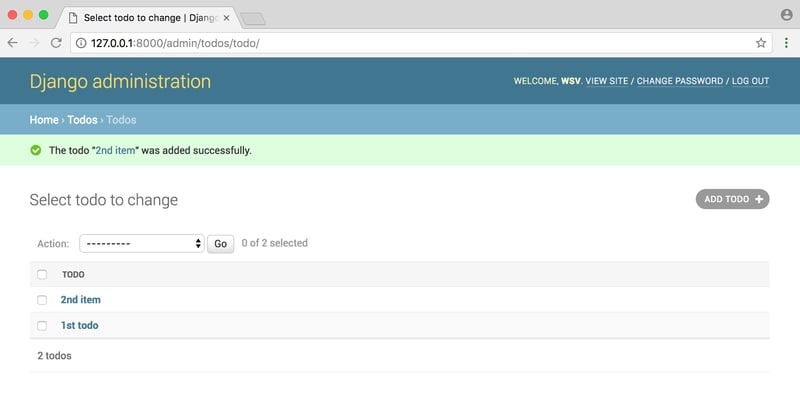
On the Admin homepage you should see the todos app. Click on "+ Add" button for Todos and add two new entries we can use. I've called mine the following:
- title: 1st todo; description: Learn DRF
- title: 2nd item; description: Learn Python too.
Now it's time for Django Rest Framework.
Django Rest Framework
The first step is to install Django Rest Framework and then create a new apis app. All of our API information will be routed through here. Even if we had multiple apps in our project, we'd still only need a single apis app to control what the API does.
On the command line stop the server with Control+c and then enter the following.
(todo) $ pipenv install djangorestframework==3.11
(todo) $ python manage.py startapp apis
Next add both rest_framework and the apis app to our INSTALLED_APPS setting. We also add default permissions. In the real-world we would set various permissions here so that only logged-in users could access the API, but for now we'll just open up the API to everyone to keep things simple. The API is just running locally after all so there's no real security risk.
# todo_project/settings.py
INSTALLED_APPS = [
    ...
    'rest_framework',
    'apis.apps.ApisConfig',
    'todos.apps.TodosConfig',
]

REST_FRAMEWORK = {
    'DEFAULT_PERMISSION_CLASSES': [
        'rest_framework.permissions.AllowAny',
    ]
}
A traditional Django app needs a dedicated url, view, and template to translate information from that database onto a webpage. In DRF we instead need a url, view, and a serializer. The url controls access to the API endpoints, views control the logic of the data being sent, and the serializer performs the magic of converting our information into a format suitable for transmission over the internet, JSON.
If you're new to APIs then serializers are probably the most confusing part of the equation. A normal webpage requires HTML, CSS, and JavaScript (usually). But our API is only sending data in the JSON format. No HTML. No CSS. Just data. The serializer translates our Django models into JSON and then the client app translates JSON into a full-blown webpage. The reverse, deserialization, also occurs when our API accepts a user input--for example submitting a new todo--which is translated from HTML into JSON then converted into our Django model.
So to repeat one last time: urls control access, views control logic, and serializers transform data into something we can send over the internet.
Within our apis app we need to create a serializers.py file.
(todo) $ touch apis/serializers.py
Much of the magic comes from the serializers class within DRF which we'll import at the top. We need to import our desired model and specify which fields we want exposed (usually you don't want to expose everything in your model to the public).
# apis/serializers.py
from rest_framework import serializers
from todos import models


class TodoSerializer(serializers.ModelSerializer):
    class Meta:
        fields = (
            'id',
            'title',
            'description',
        )
        model = models.Todo
Next up is our view. DRF views are very similar to traditional Django views and even come with several generic views that provide lots of functionality with a minimal amount of code on our part. We want a ListView as well as a DetailView of individual todo items. Here's what the code looks like.
# apis/views.py
from rest_framework import generics

from todos import models
from .serializers import TodoSerializer

class ListTodo(generics.ListCreateAPIView):
    queryset = models.Todo.objects.all()
    serializer_class = TodoSerializer


class DetailTodo(generics.RetrieveUpdateDestroyAPIView):
    queryset = models.Todo.objects.all()
    serializer_class = TodoSerializer
Again DRF performs all the heavy lifting for us within its generics class that we import at the top. This is quite similar to generic class-based views in traditional Django. We specify our model and serializer for each of the views.
All that's left is to update our URLs. At the project-level we want to include the apis app. So we'll add include to the second line imports and then add a dedicated URL path for it. Note that the format is apis/v1/. It's a best practice to always version your APIs since they are likely to change in the future but existing users might not be able to update as quickly. Therefore a major change might be at apis/v2/ to support both versions for a period of time.
# todo_project/urls.py
from django.contrib import admin
from django.urls import include, path


urlpatterns = [
    path('admin/', admin.site.urls),
    path('apis/v1/', include('apis.urls')),
]
Finally we need to add a new urls.py file in our our apis app to display our views. The list of all todos will be at apis/v1/. Individual todo items will be at their pk which is automatically set by Django for us. So the first todo will be at apis/v1/1/, the second at apis/v1/2/, and so on.
# apis/urls.py
from django.urls import path

from .views import ListTodo, DetailTodo

urlpatterns = [
    path('', ListTodo.as_view()),
    path('<int:pk>/', DetailTodo.as_view()),
]
Ok, we're done! That's it. We now have an API of our To do project. Go ahead and start the local server with runserver.
(todo) $ python manage.py runserver
Testing with the web browser
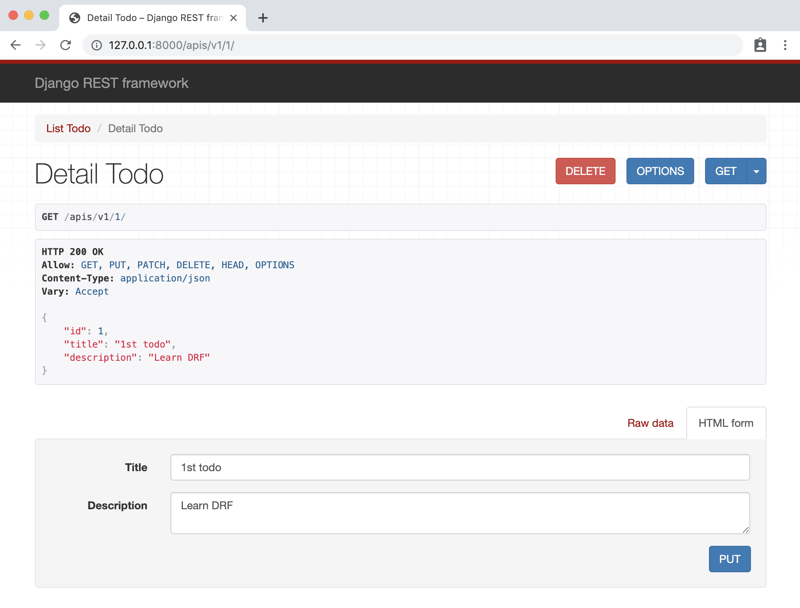
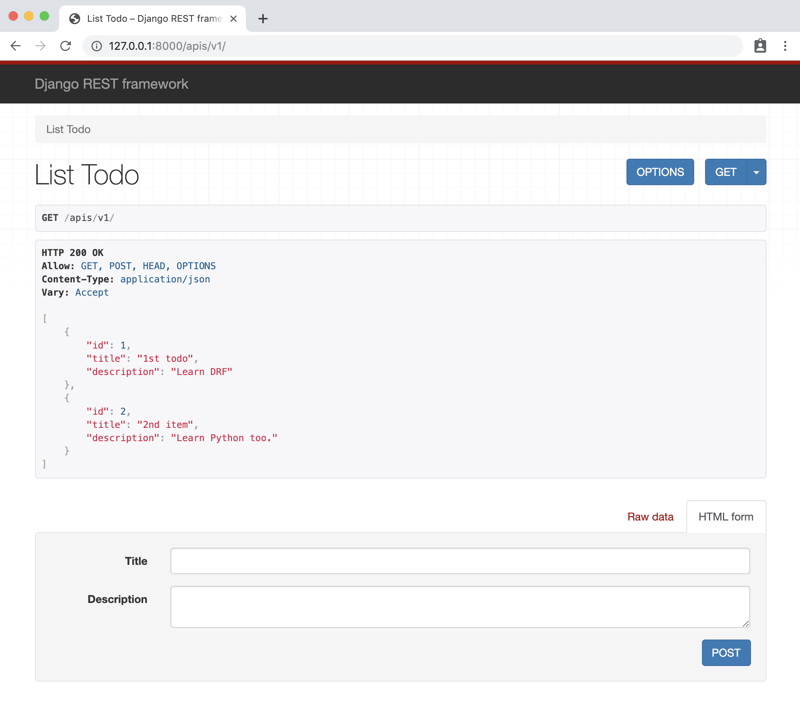
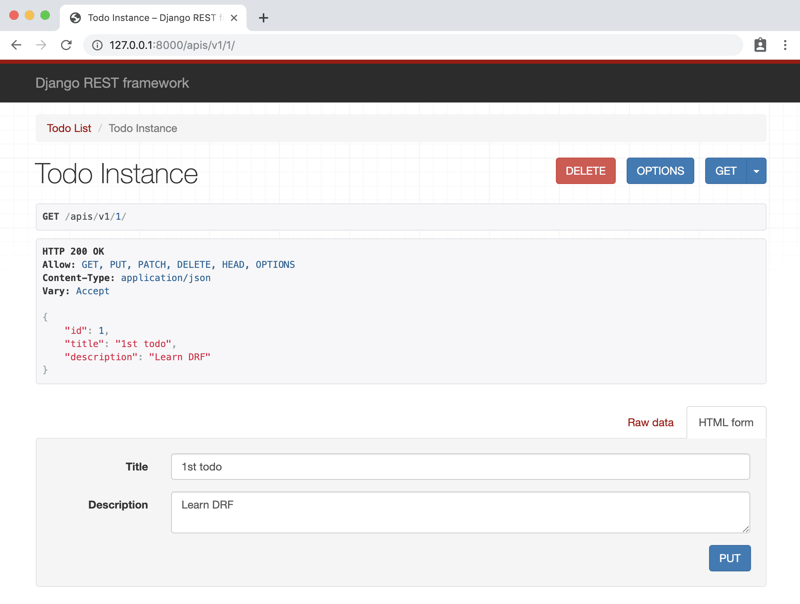
DRF comes with a very nice graphical interface for our API, similar in some ways to Django's admin app. If you simply go to an API endpoint you can see it visualized.
The list view of all items is at http://127.0.0.1:8000/apis/v1/.
And the DetailView is at http://127.0.0.1:8000/apis/v1/1/.
You can even use the forms on the bottom of each page to create, retrieve, destroy, and update new todo items. When your APIs become even more complex many developers like to use Postman to explore and test an API. But the usage of Postman is beyond the scope of this tutorial.
Viewsets
As you build more and more APIs you'll start to see the same patterns over and over again. Most API endpoints are some combination of common CRUD (Create-Read-Update-Delete) functionality. Instead of writing these views one-by-one in our views.py file as well as providing individual routes for each in our urls.py file we can instead use a ViewSet which abstracts away much of this work.
For example, we can replace our two views and two url routes with one viewset and one URL route. That sounds better, right? Here's what the new code for views.py looks like with a viewset.
# apis/views.py
from rest_framework import viewsets

from todos import models
from .serializers import TodoSerializer


class TodoViewSet(viewsets.ModelViewSet):
    queryset = models.Todo.objects.all()
    serializer_class = TodoSerializer
The viewsets class does all the magic here, specifically the method ModelViewSet which automatically provides list as well as create, retrieve, update, and destroy actions for us.
We can update our urls.py file to be much simpler too as follows.
# apis/urls.py
from django.urls import path

from .views import TodoViewSet
from rest_framework.routers import DefaultRouter

router = DefaultRouter()
router.register('', TodoViewSet, basename='todos')
urlpatterns = router.urls
Now if you look again at our pages you'll see that the list view at http://127.0.0.1:8000/apis/v1/ is exactly the same as before.
And our detailview at http://127.0.0.1:8000/apis/v1/1/has the same functionality--the same HTTP verbs allowed--though now it is called a "Todo Instance".
This saving of code may seem small and not worth the hassle in this simple example, but as an API grows in says with many, many API endpoints it often is the case that using viewsets and routers saves a lot of development time and makes it easier to reason about the underlying code.
Next Steps
This is a working, albeit basic implementation of a Todo API. Additional features might include user authentication, permissions, and more which are covered in my book Django for APIs. The first two chapters are available to read for free.

Posted on February 19, 2020
Join Our Newsletter. No Spam, Only the good stuff.
Sign up to receive the latest update from our blog.
