Text to GIF animation — React Pet Project Devlog

Kostia Palchyk
Posted on June 17, 2020

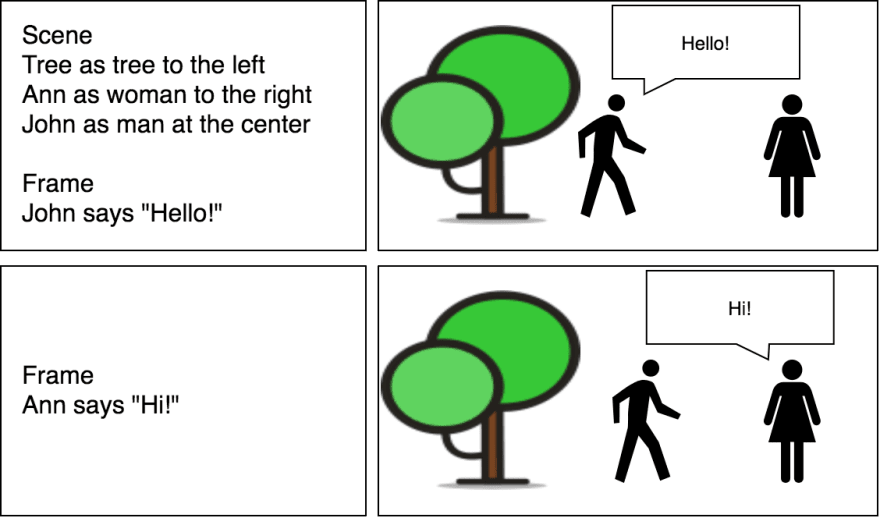
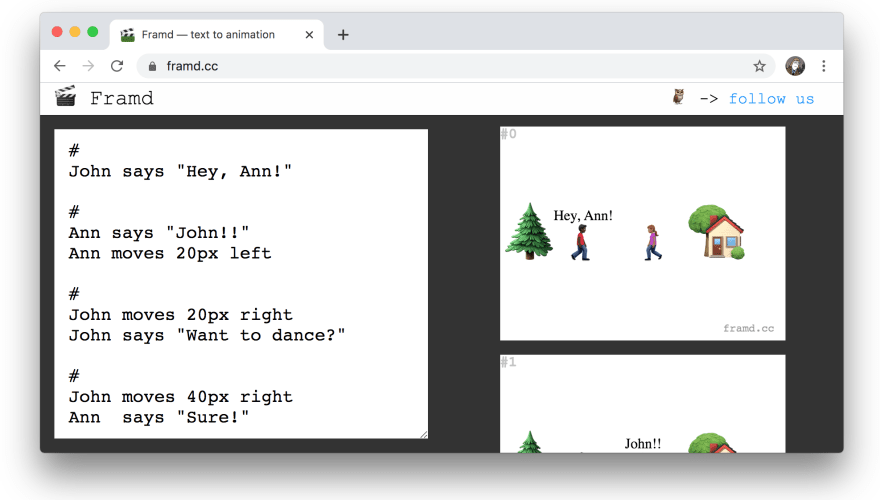
I had an idea that it'd be cool to create storyboards using simple text:
In this article, I'll share with you my thought and build process of this project.
And surely I'll show you the final result!
Spoiler: it didn't end as planned. tl;dr final result
0. Idea
I've started with visualizing the idea. First pen & paper, then draw.io (you can see one of the first concepts above), then writing a generic overview:
User defines scenes using simple English:
Scene
Ann as woman to the right
Frame
Ann says "Hello!"Scene definitions describe actors (decorations) and frames
Actors use preset sprites liketree,man,woman
Frames define actions that the actors performUsers will be able to share their stories and "like" and modify other's.
With the idea and language more-or-less defined it was time to draft the development plan:
- Set up — project preparation
- JSON to images — test out if I can create images as I want
- Images to GIF — ensure I can generate gifs on the client, try some libs
- Text to JSON — I'll need to create a parser for the language
- Backend — needed for login/save/share flows
- Publication
NOTE: For brevity reasons, I wont mention many dead-end ideas or stupid mistakes: so if you'll get a feeling that everything goes too smooth — thats only because of the editing. Also, I will cut a lot of code and use pseudocode-ish style to shorten the sources. If you'll have any questions — please, don't hesitate to ask!
Let's go!
1. Set up
I'll need a git repository to organize my dev process and a framework to speed it up. I used create-react-app and git init:
npx create-react-app my-app
cd my-app
# [skipped TypeScript adding process]
git init -y
git commit -m "initial"
npm start
Important thought: We need to test our ideas fast! And it doesn't really matter which language, framework, or VCS you use, as soon as you're comfortable and productive with it.
2. JSON to images
I started with defining a simple JSON to test out if I can render images based on this structure.
The JSON should describe:
-
sprites— image URLs for our actors and decorations -
scenes— should contain and position actors and decorations - and
frames— should contain actions, like "Ann moves left"
({
  sprites: { name: 'http://sprite.url' },
  scenes:
    // scene descriptions
    { scene_ONE:
        { entries:
            /* entries with their sprites and position */
            { Ann: { sprite: 'woman'
                   , position: { /* ... */ }
                   }
            }
        },
    },
  frames:
    [ { scene_name: 'scene_ONE'
      , actions: [
          { target: 'Ann'
          , action: 'move'
          , value: {x, y}
          }
        ]
      }
    , // ...other frames
    ]
})
For the actors I've defined three preset sprites: tree, woman and man and added relevant images to the project.
-
Now for each frame we'll perform all the actions (move and talk)
// for each frame
const computedFrames = frames.map(frame => {
  // clone entries
  const entries = _.merge({}, frame.scene.entries);
  // perform actions on the target entry
  frame.actions.forEach(action => {
    const entry = entries[action.target];

    if (action.type == 'talk') {
      entry.says = action.value;
    }

    if (action.type == 'move') {
      entry.position = action.value;
    }
  });

  return { entries };
});
-
And for drawing entry sprites we'll surely use canvas:
// draw the entries
const images = computedFrames.map(frame => {
  const canvas = document.create('canvas');
  const ctx = canvas.getContext('2d');
  frame.entries.forEach(entry => {
    ctx.drawImage(entry.sprite); // for sprites
    ctx.fillText(entry.says);    // for speech
  });
  // return rendered frame URL
  return URL.createObjectURL(canvas.toBlob());
})
Canvas can export it's contents as a dataURL or a blob — we'll need this to generate .gif later!
^ In reality, the code is a bit more asynchronous: toBlob is async and all the images should be downloaded before ctx.drawImage, I used a Promise chain to handle this.
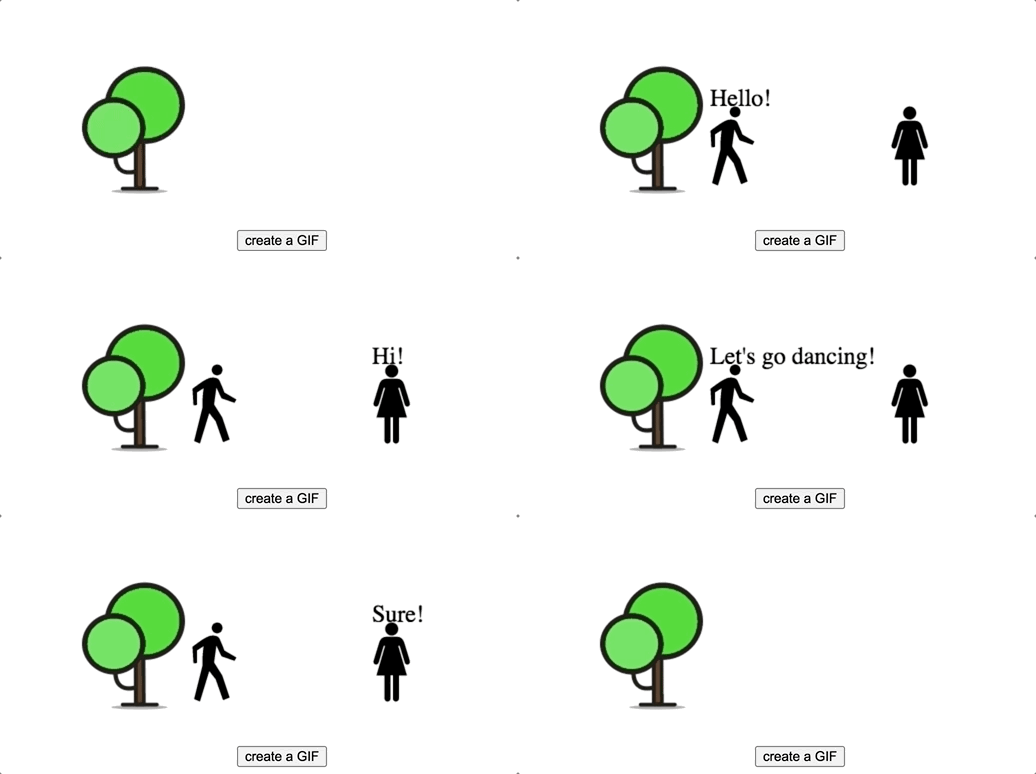
At this point I have proved that the images can be rendered as intended:
So we can move on:
3. Images to GIF
This required some research on available libraries. I've ended up with gif.js. Alas, it hasn't been updated for about a year atm, but it did it's job quite fine (demo).
To generate a .gif file — we need to feed every image to the gif.js generator and then call render() on it:
const gif = new GIF({ /* GIF settings */ });

images.forEach(imgUrl => {
  const img = new Image();
  img.src = imgUrl;
  gif.addFrame(img, { delay: 1000 });
});

gif.on('finished', blob => {
  // Display the blob
  updateGifURL(URL.createObjectURL(blob));
});

gif.render();
Awesome, now we can generate and download the .gif:
4. Text to JSON
I wanted users to type in commands in simple English. And this was the hard part for me, as I didn't even know where to start:
- create my own parser?
-
input.split(/\n/)and then use regexes? - use some English grammar parser?
Luckily, after searching around I came across this article "Writing a DSL parser using PegJS" that introduced me to PEG.js (@barryosull , thank you).
PEG.js is a simple-to-use parser builder:
- you define your language using regex-like rules
- it generates a
.jsfile with your personal fresh new parser - you plug this parser in and run it against your text
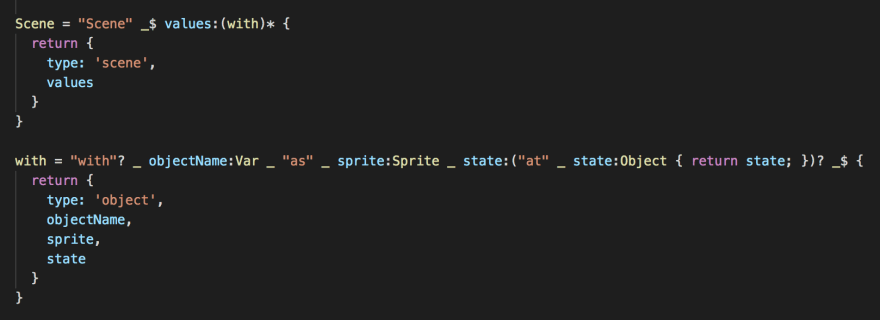
For example, here is an excerpt from my rules that parses Scenes:
These rules will parse this text:
Scene
with Tree as tree at { y: 160 scale: 1.5 }
to this JSON:
{
    "type": "scene",
    "values": [
      {
        "type": "object",
        "objectName": "Tree",
        "sprite": "tree",
        "state": {
            "y": 160,
            "scale": 1.5
        }
      }
    ]
}
In a couple of hours playing with PEG.js online version I ended up with a language and output structure I was fine to work with.
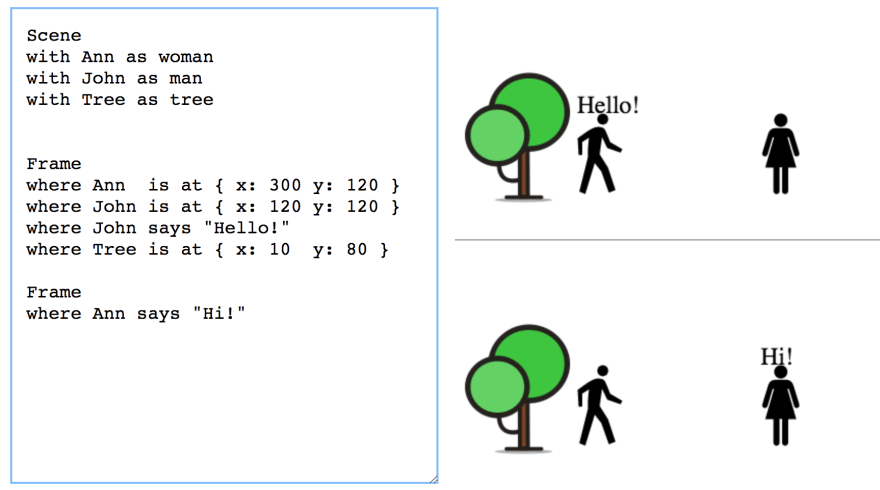
And after plugging it into the app I got this:
SIDE NOTE 1: at this point, I dropped the idea of fuzzy positioning Ann to the right and updated PEG.js to define a js-like object notation: Ann at { x: 100 y: 100 }.
SIDE NOTE 2: also, I couldn't keep re-generating GIF on every text update. It was too heavy. 100ms-UI-thread-blocking-on-every-keystroke heavy.
RxJS 😍 came to the rescue! debounce for input text updates and a simple timer, mapped to frame switch imgRef.current.src = next_frame to imitate the animation.
Actual .gif will be generated only when user hits the "download" button!
5. Backend
This pet-project already took me a weekend of development, so I had to drop all backend-related tasks and stick with static web-app for now.
6. Publication
I used GitHub Pages feature to deploy and share the project.
GitHub Pages will serve your website under their domain http://username.github.io/repository. Since I might be adding a backend later — I needed to buy a domain so that all links I share now would still be valid in the future.
Picking names is always hard for me. After an hour struggling I ended up with:
Go give it a try framd.cc! 🙂
Outro
Plot twist: After deploying and sharing project with friends — I've found that I'm short on sprites! Turns out people can't tell a lot of stories using just man, woman, and a tree image. So I decided to use emoji as sprites 👻 . And now you have a ton of these 🌳👩🚀🌍 to tell your story right!
The end
That's it! Thank you for reading this! 🙏
Have any questions? Post em in the comments section, I'll be glad to answer!
If you enjoyed reading — please, consider giving this article and this tweet a ❤️
 Kos Palchyk@kddsky
 "Text to GIF animation — React Pet Project Devlog"
from idea to production in 4 days
dev.to/kosich/text-to…
6 min read
#React #canvas #js #ts #dsl #devlog #creativity #DEVCommunity18:08 PM - 17 Jun 2020
It helps a lot!
Thanks!
P.S: some gif examples:

Posted on June 17, 2020
Join Our Newsletter. No Spam, Only the good stuff.
Sign up to receive the latest update from our blog.
