Dev.to Writing: The Two Editors

Nathan Kallman
Posted on July 27, 2020

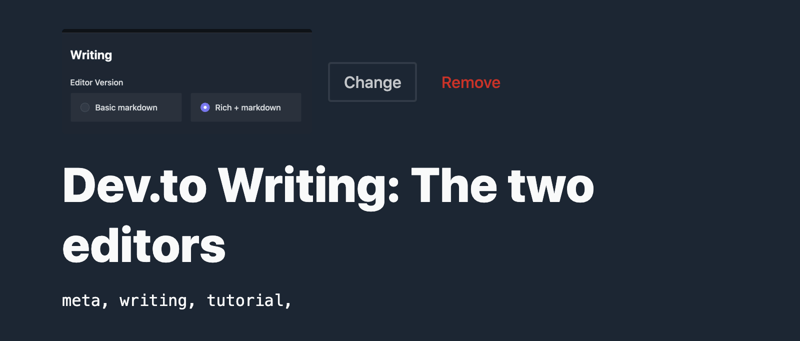
When you start writing on Dev.to, the first thing you need to choose is which editor you'd like to use (there's two!).
Choose which you want before writing in Settings > UX.
You can use either the "Basic markdown" editor or the "Rich + markdown" editor. (Personally, I've always used the "Rich + markdown" for all my posts; and I would recommend it to start learning Dev.to)
The Basic markdown editor
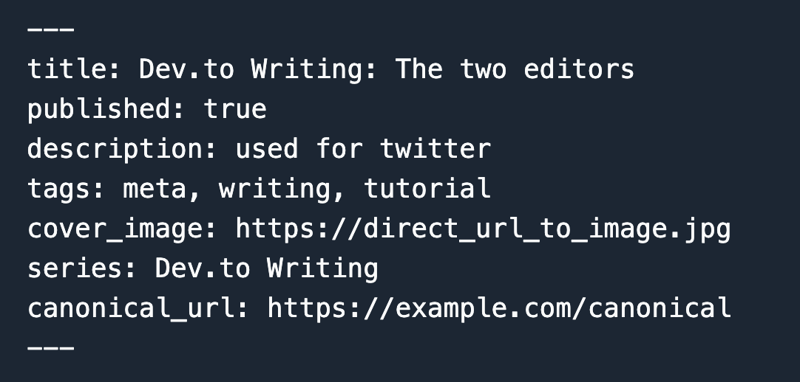
As the name implies, this editor is bare bones. Just an image upload section, a large input for your article and front-matter (i.e. all the meta information like title and tags), and a button to save and a button to revert changes.
If you want to learn more about the front matter or what dev.to supports in article writing, check out the editor guide.
The Rich + markdown editor
A much "nicer" UX from the Basic editor (and by "nicer" I mean more helpful hints and more guiding of the user in how to use it). Instead of one gigantic input for both article content and meta-data; there's a set of form fields for (most of*) the front-matter; The title, the cover image (which can be a gif!), and tags.
The image uploader has stayed the same, and is above the article writing area.
The remaining* "front matter" is located at the bottom of the editor.
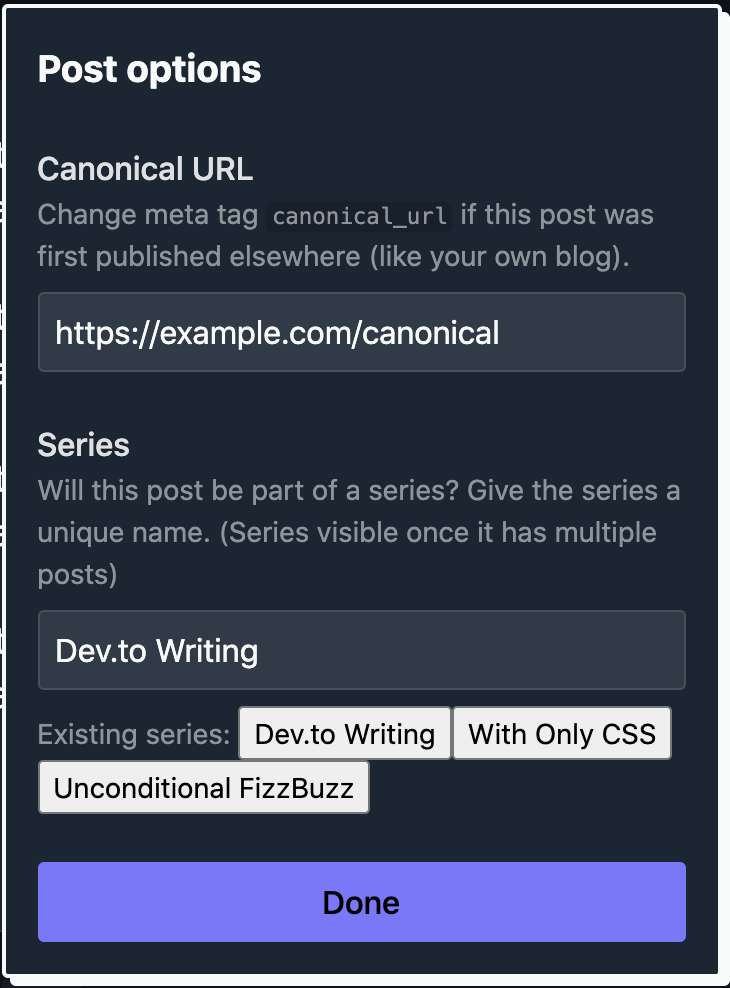
A Publish button (does what you think), similar save and revert buttons as the basic editor, and a hexagon with a circle in it (aka Post options).
Clicking that Post options button will pop up a widget to allow editing the canoncial url and the series (series creates a nice ordered list of posts at the top and bottom of every article that is a part of the series, like this article has; canonical url points to where the article was originally published if you're re-publishing from your personal blog or Medium or ...).
* the "description" piece of front matter is available in the basic editor but as of writing doesn't seem to be editable from the Rich + markdown editor
Other things
Dev.to articles are written in Markdown, but also support Liquid tags for extra special content. Read all about it in the editor guide.
And if you're ever unsure about how Markdown and Liquid tags will work or look, the editor has a preview option above and to the right.
When you upload an image, a box containing the appropriate Markdown to include the image in the post will appear (if you've uploaded multiple at once, the Markdown gets appended for each one). Make sure to set the Alt Text for accessibility when you copy/paste the Markdown into the appropriate place in your article.
Hope this mini-tutorial helped encourage you to start writing here on DEV. Be sure to checkout the next post in this series: Making a series! It came from a question here on dev.to.
If you have your own question, just ask in a comment. I read all of them and would love to add another post in this series that will actually help other writers in this awesome community!

Posted on July 27, 2020
Join Our Newsletter. No Spam, Only the good stuff.
Sign up to receive the latest update from our blog.


