SPO600 Lab3 - 6502 Assembly Language Math Lab

Joyce Wei
Posted on November 1, 2021
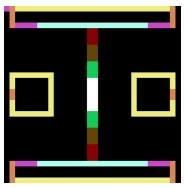
In lab3 we are making a kaleidoscope program using 6502 assembly language. The bitmap screen is break down into 4 quadrants and user will be able to draw pixels on second quadrant(top-left) using arrow keys on keyboard. The pixels drawn will be reflect to other 3 quadrants.
Source Code
 ; zero-page variable locations
 define ROW     $20 ; current row
 define COL     $21 ; current column
 define POINTER     $10 ; ptr: start of row
 define POINTER_H   $11

 ; constants
 define DOT     $01 ; dot colour location
 define CURSOR      $04 ; purple colour


setup:  lda #$0f    ; set initial ROW,COL
    sta ROW
    sta COL
    LDA #$01
    STA DOT

draw:   jsr draw_cursor

getkey:
    ldx #$00    ; clear out the key buffer
    lda $ff     ; get a keystroke
    stx $ff

    cmp #$30
    bmi getkey
    cmp #$40
    bpl continue

    SEC
    sbc #$30
    tay
    lda color_pallete, y
    sta DOT
    jmp done

continue:
    cmp #$43    ; handle C or c
    beq clear
    cmp #$63
    beq clear

    cmp #$80    ; if not a cursor key, ignore
    bmi getkey
    cmp #$84
    bpl getkey

    pha     ; save A

    lda DOT ; set current position to DOT
    sta (POINTER),y
    jsr draw_on_quads

    pla     ; restore A

    cmp #$80    ; check key == up
    bne check1

    dec ROW     ; ... if yes, decrement ROW
    jmp done

 check1:
    cmp #$81    ; check key == right
    bne check2

    inc COL     ; ... if yes, increment COL
    jmp done

 check2:
    cmp #$82    ; check if key == down
    bne check3

    inc ROW     ; ... if yes, increment ROW
    jmp done

 check3:
    cmp #$83    ; check if key == left
    bne done

    dec COL     ; ... if yes, decrement COL
    clc
    bcc done

 clear:
    lda table_low   ; clear the screen
    sta POINTER
    lda table_high
    sta POINTER_H

    ldy #$00
    tya

 c_loop:
    sta (POINTER),y
    iny
    bne c_loop

    inc POINTER_H
    ldx POINTER_H
    cpx #$06
    bne c_loop

 done:
    clc     ; repeat
    bcc draw


 draw_cursor:
    lda ROW     ; ensure ROW is in range 0:0F
    and #$0f
    sta ROW

    lda COL     ; ensure COL is in range 0:0F
    and #$0f
    sta COL

    ldy ROW     ; load POINTER with start-of-row
    lda table_low,y
    sta POINTER
    lda table_high,y
    sta POINTER_H

    ldy COL     ; store CURSOR at POINTER plus COL
    lda #CURSOR
    sta (POINTER),y

    rts

 draw_on_quads:
    LDA POINTER ;; save the pointer to the
    PHA     ;; original location in top_left_quad
    LDA POINTER_H
    PHA

; top right quadrant
    LDA #$10
    CLC
    SBC COL
    CLC
    ADC #$10
    TAY
    LDA DOT
    STA (POINTER),y

    TYA
    PHA     ; save the y offset

; bottom left quadrant
    lda #$10    ; load POINTER with start-of-row
    CLC
    SBC ROW
    CLC
    ADC #$10
    TAY

    lda table_low,y
    sta POINTER
    lda table_high,y
    sta POINTER_H

    ldy COL     ; store CURSOR at POINTER plus COL
    lda DOT
    sta (POINTER),y

    PLA
    TAY

; bottom right quadrant
    lda DOT
    sta (POINTER),y

    PLA
    STA POINTER_H
    PLA
    STA POINTER

    RTS

 ; these two tables contain the high and low bytes
 ; of the addresses of the start of each row

 table_high:
 dcb $02,$02,$02,$02,$02,$02,$02,$02
 dcb $03,$03,$03,$03,$03,$03,$03,$03
 dcb $04,$04,$04,$04,$04,$04,$04,$04
 dcb $05,$05,$05,$05,$05,$05,$05,$05,

 table_low:
 dcb $00,$20,$40,$60,$80,$a0,$c0,$e0
 dcb $00,$20,$40,$60,$80,$a0,$c0,$e0
 dcb $00,$20,$40,$60,$80,$a0,$c0,$e0
 dcb $00,$20,$40,$60,$80,$a0,$c0,$e0

color_pallete:
dcb $01,$02,$03,$04,$05,$06,$07,$08,$09,$0a
The subroutines:
"draw_cursor" is restricting the area where the cursor is allowed to go which is second quadrant only by setting the range of row and column to [$00 : $0F]
"draw_on_quads" is reflecting the pixels in the second quadrant to other 3 quadrants by storing a copy of the current position and adding the x or y offset to the cursor.

Posted on November 1, 2021
Join Our Newsletter. No Spam, Only the good stuff.
Sign up to receive the latest update from our blog.
Related

November 30, 2024
November 30, 2024


