Getting Started with Gatsby

Jarret Bryan
Posted on October 20, 2018
So a little while back, I wrote about the basics of starting a site using Jekyll. I built my first personal site using Jekyll! I really liked the simplicity.
But times have changed. Tastes have changed. I'm rebuilding my site, and this time I'm using Gatsby!
Like Jekyll, Gatsby can be used as a static site generator. It's great for portfolio sites, blogs, personal sites, etc. And static sites are easy to deploy using Github pages, Netlify, Surge, etc. But what makes Gatsby particularly exciting for me is its a site generator for React.
If you know React, if you've used React to build build a dynamic web application, you already are in business - Gatsby is using the React library.
So like I did with Jekyll before, let's do a quick run through to get started with Gatsby.
Assuming you have Node and Node Package manager all set and ready to go on your machine, let's jump into the command line, and install Gatsby's CLI tool, and generate a new site.
$ npm install --global gatsby-cli
$ gatsby new my-new-site https://github.com/gatsbyjs/gatsby-starter-default
Our first line here just installs the Gatsby CLI package on our machine. Our second line is the interesting bit here:gatsby newis our command to generate a new site. 'my-new-site' will be the directory name that's generated. And inside this directory we'll have all our tools to get started. And that URL at the end? That's our 'starter'. A starter is essentially a theme, or a template for our site.. We're using the default here.
Here's the file structure that we're given:
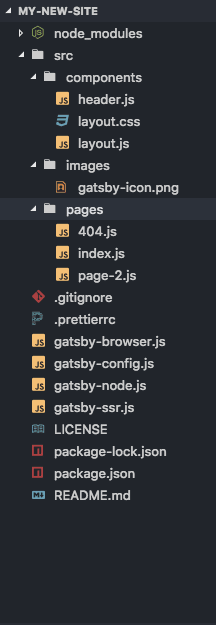
It looks a little more complex than a Jekyll set up!
At this stage we can use a whole set of commands that Gatsby provides us with.
gatsby develop - This will set up a local development environment that reloads on every change!
gatsby build - This will generate a production build, your static site, to deployed at your service of choice (surge, Netlify, etc.)
gatsby serve - This will set up a test environment for your built site.
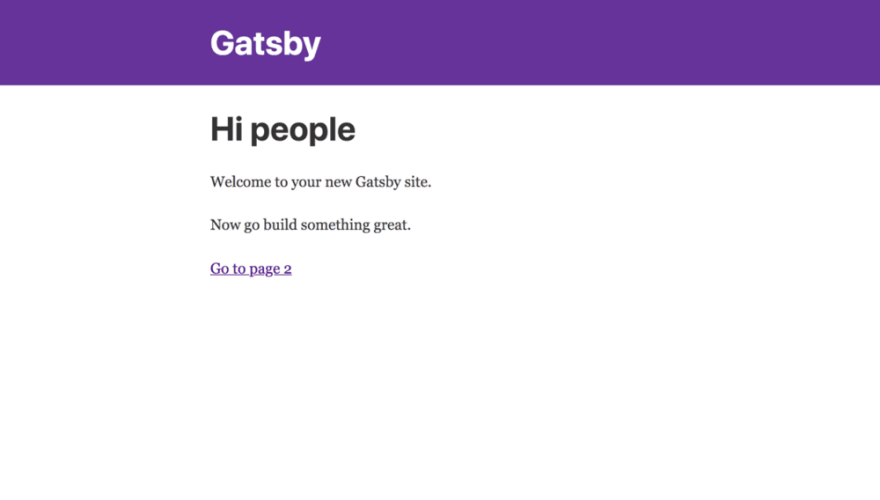
Let's focus on gatsby develop - run this one, and you'll have a server started at Localhost:8000. Mine looked like this!
All of this content was provided to us using the default Gatsby starter? So how do you drill down and actually do some editing? You can go straight to the src folder, and edit the components, just like any old React App! To illustrate, I'll add a very basic component.
If you're unfamiliar with React Components, the quick, sloppy explanation is it's just a Javascript function that returns HTML. It's a little more than that, but that will do for our purposes.
So our default layout looks like the below:

I'm going to create a new .js file in our src/components folder to build this example component like so:
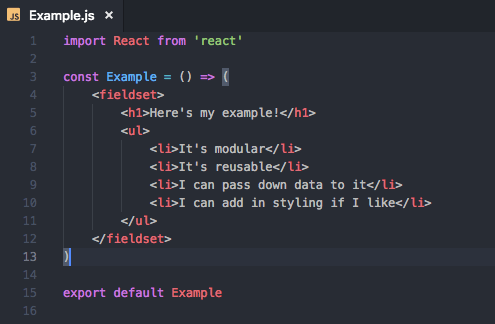
(Note that I imported React to build this component! It's all just React.
Then let's import my new Example Component into my index.
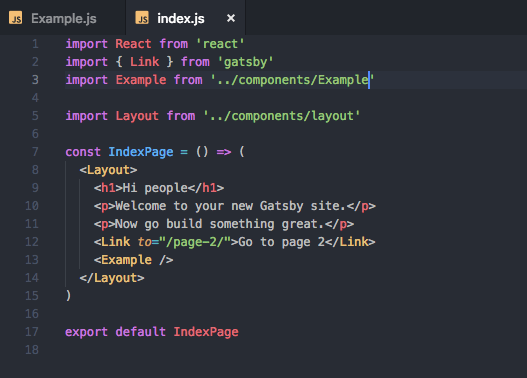
That was pretty easy! And what does our site look like now?
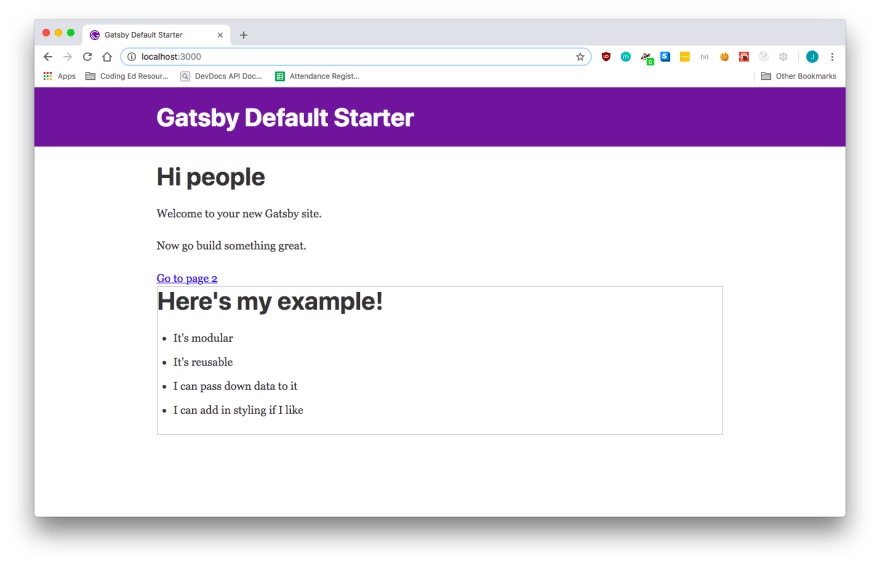
Ok... so it's not the prettiest - but we see how easy it is to build HTML content and place it on our page! And just like React, we can pass down props to children Components, import libraries, build class based components or functionals ones, and so much more.
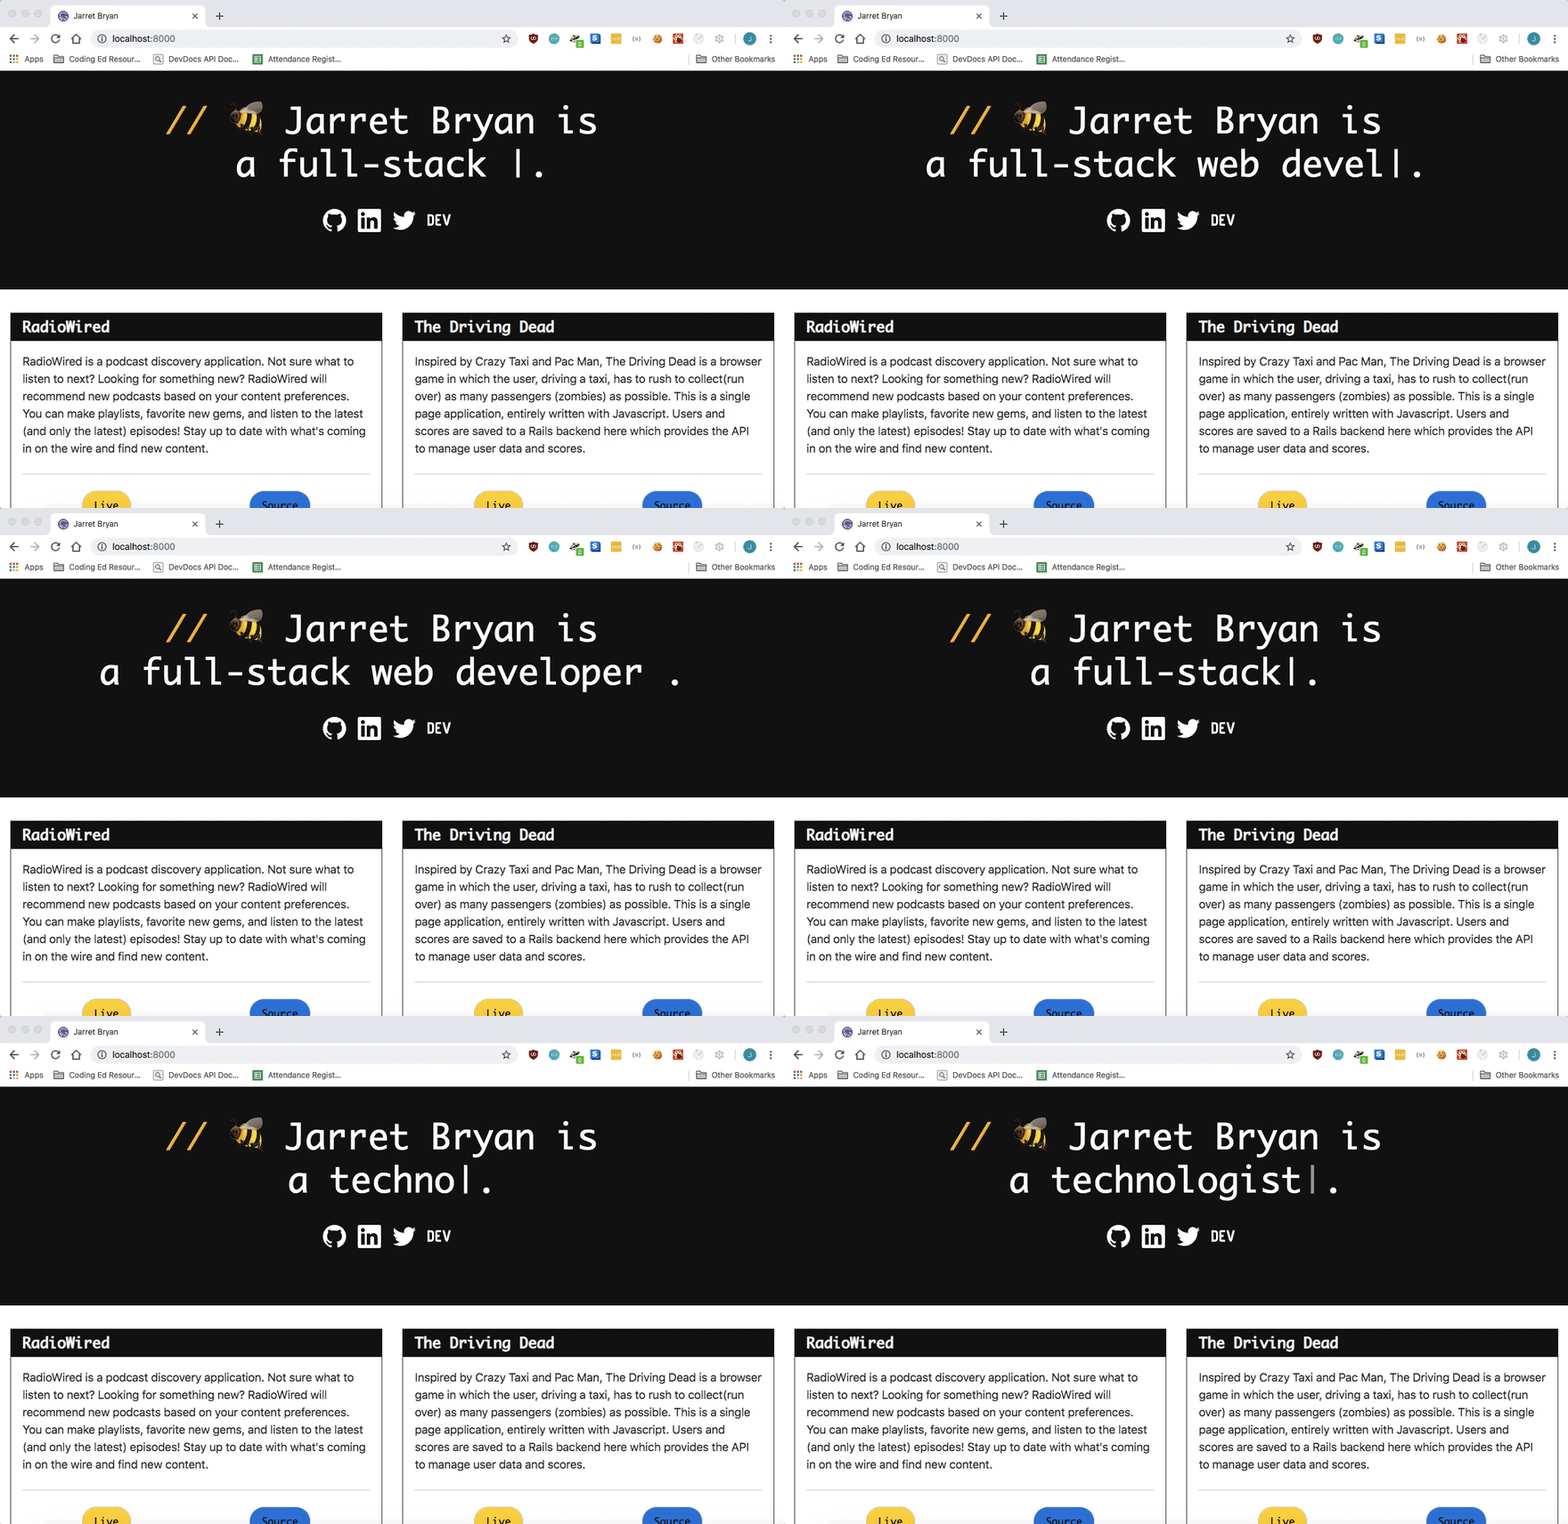
I'm currently building a new portfolio site, so here's a peak at the work in progress, built using Gatsby:
I'm not done! It's a work in progress. But this was so easy to make because of the modular component structure of the React library, and the flexibility it offers me. It's a simple paradigm, but an incredibly powerful one and lends itself to so much customization.
When I'm ready, I'll run gatsby build which will generate a public folder - and I can deploy that to the static service of my choice! It's really that straightforward.
Dig into the Gatsby and React docs below, and get building!

Posted on October 20, 2018
Join Our Newsletter. No Spam, Only the good stuff.
Sign up to receive the latest update from our blog.
