Building Web Extensions with Reactjs - from 0 to publish!

Yash Soni
Posted on June 29, 2020

Web Extensions - you might have heard of it, most probably you're already using it - example? AdBlock, Grammarly, Save to Pocket, etc. In this article, we will build a Web Extension from scratch using Reactjs.
We are going to bake a New Tab Greeting Extension and publish it on Chrome Web Store and Firefox Addon Dashboard.
Step 1 - Creating the App:
Let's create a React app with CRA:
npx create-react-app greetings-web-extension
cd greetings-web-extension
Let's do some quick cleanup:
Under the src folder, remove everything else other than App.js, index.js, and index.css.
From the public folder - remove everything else other than index.html and favicon.ico.
In the end, we should have the following directory structure:
- greetings-web-extension
- node_modules
- public
- favicon.ico
- index.html
- src
- App.js
- index.css
- index.js
- .gitignore
- package.json
- README.md
- others
Step 2 - Preparing the App:
Quickly modify a few files as follows:
- /src/index.js
import React from "react";
import ReactDOM from "react-dom";
import "./index.css";
import App from "./App";

ReactDOM.render(
  <React.StrictMode>
    <App />
  </React.StrictMode>,
  document.getElementById("root")
);
- /src/index.css
html,
body,
#root {
  height: 100%;
}

body {
  margin: 0;
  text-align: center;
  font-family: -apple-system, BlinkMacSystemFont, 'Segoe UI', 'Roboto', 'Oxygen',
    'Ubuntu', 'Cantarell', 'Fira Sans', 'Droid Sans', 'Helvetica Neue',
    sans-serif;
  -webkit-font-smoothing: antialiased;
  -moz-osx-font-smoothing: grayscale;
}

.App {
  height: 100%;
  background: linear-gradient(to bottom right, #7b4397, #dc2430);
  color: white;
  text-align: center;
  display: flex;
  justify-content: center;
  align-items: center;
}
- /src/App.js
import React from "react";

const greetings = {
  morning: "Good morning",
  noon: "Good afternoon",
  evening: "Good evening",
  night: "Good night",
};
class App extends React.Component {
  constructor() {
    super();
    this.state = {
      greeting: greetings.morning,
    };
    this.startTime = this.startTime.bind(this);
  }

  componentDidMount() {
    this.startTime();
  }

  startTime() {
    let today = new Date();
    let h = today.getHours();
    let greeting;
    if (h > 6 && h < 12) {
      greeting = greetings.morning;
    } else if (h >= 12 && h < 17) {
      greeting = greetings.noon;
    } else if (h >= 17 && h < 20) {
      greeting = greetings.evening;
    } else {
      greeting = greetings.night;
    }
    this.setState({ greeting });
    setTimeout(this.startTime, 1000);
  }

  render() {
    return (
      <div className="App">
        <h1>{this.state.greeting}</h1>
      </div>
    );
  }
}

export default App;
- /public/index.html
<!DOCTYPE html>
<html lang="en">
<head>
  <meta charset="utf-8" />
  <link rel="icon" href="%PUBLIC_URL%/favicon.ico" />
  <meta name="viewport" content="width=device-width, initial-scale=1" />
  <meta name="theme-color" content="#000000" />
  <meta name="description" content="Web site created using create-react-app" />
  <title>Greetings</title>
</head>
<body>
  <noscript>You need to enable JavaScript to run this app.</noscript>
  <div id="root"></div>
</body>
</html>
Step 3 - Testing React App:
Let's do a quick test of what we have at hand.
Fire it up with npm start.
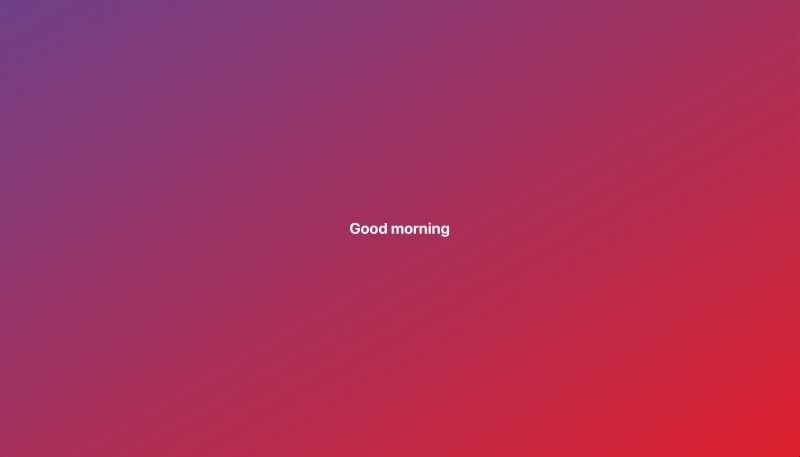
You should see something like this in your browser:
Step 4 - preparing the Web Extension:
The first thing we need is a manifest.json file - which is a descriptor file for the web extension we are building.
Create a directory extras, create a new file manifest.json under it and Copy/Paste the following content:
{
  "name": "greetings",
  "offline_enabled": true,
  "short_name": "greetings",
  "description": "Everyday greetings",
  "version": "1.0.0",
  "chrome_url_overrides": {
    "newtab": "index.html"
  },
  "manifest_version": 2
}
- offline_enabled: duh!
- chrome_url_overrides: we want this extension to override our
newtabwith theindex.html. Hence...
Now, let's create a build for our react-app:
INLINE_RUNTIME_CHUNK=false react-scripts build
Why INLINE_RUNTIME_CHUNK=false?
Because if we don't do this, the final index.html will contain an inline script as a result of the build process. Extension recommends using external scripts and discourages using the inline script. With INLINE_RUNTIME_CHUNK env variable, we will bypass the above-mentioned issue.
The above command will result in a build folder generated at the root of our project.
Now, Copy/Paste the manifest.json file we created into this new build folder. (Why didn't we create the file inside the build folder directly? Because the build folder is purged and re-created every time you run the build commands. Hence keeping it under extras.)
Step 5 - testing the Extension:
Now fire up Chrome Browser, go to chrome://extensions/ and enable Developer mode.
Now click on the Load unpacked Button and point to the build folder of our project.
Test by opening a new tab in Chrome.
Step 6 - packaging for Chrome and Firefox:
Chrome packaging is simply a zip command.
Firefox packaging can be done using a recommended tool called web-ext. Install this globally using npm i -g web-ext.
To help you eliminate the manual steps of copying/pasting manifest.json file, running commands for Firefox and Chrome packaging, etc. I have created a small node.js script that does the job.
Create a new file at the root of the project, let's call it buildPackage.js. Put the following content into it.
const { execSync } = require("child_process");

// FILENAMES
const manifestFileName = "manifest.json";

// DIRECTORIES
const buildDir = "./build/";
const extensionDir = "./extras/";
const outputs = "./";

// OUTPUTS
const chromeOutput = "greetings-chrome.zip";

console.log("Building Extension Packages");

console.log("***COPYING MANIFEST FILE***\n\n");
execSync(
  `cp ${extensionDir}${manifestFileName} ${buildDir}${manifestFileName}`
);

execSync(`zip -r ${outputs}${chromeOutput} ${buildDir}`);
console.log("***CHROME BUILT SUCCESSFULLY***\n\n");

execSync(`web-ext build -s ${buildDir} -a ${outputs} --overwrite-dest`);
console.log("***FIREFOX BUILT SUCCESSFULLY***");
Modify the package.json to run this script as a part of build process. In package.json under scripts tag, modify as shown:
"build": "INLINE_RUNTIME_CHUNK=false react-scripts build && node buildPackage.js",
Now trigger the build script using npm run build and you should see 2 new files created at the root of the project:
- greetings-chrome.zip // for Chrome
- greetings-1.0.0.zip // for Firefox
Step 7 - Publishing:
Chrome:
- Go to Google Chrome Developer Dashboard
- Sign in with your Google account or create a new one
- Click on + New Item Button
- Add the
greetings-chrome.zipfile created in the previous step - Fill up the required details and submit for review
(Usually takes around 12 hours to publish)
Firefox:
- Go to Mozilla Add-ons Dashboard
- Sign in with your Mozilla account or create a new one
- Click on Submit a New Add-on Button
- For distribution, select
On this siteand continue - Add the
greetings-1.0.0.zipfile created in the previous step - Fill up the required details and submit for review
(Usually takes around 6-10 mins to publish)
Final notes:
- You need an icon for your extension, create one icon of size 128x128 (name it icon_128.png), and put it in the build directory. Add the following to
manifest.json:
  "icons": {
    "128": "icon_128.png"
  },
- In some cases, your Web Extension might need to store and retrieve data. Though you can use browser localStorage, it is highly discouraged for Web Extension. Instead, you should use a designated DB storage area for extensions which is more reliable. Read more here.
- This is a very basic extension that we created, generally, it can be a bit more complicated - with API calls, Storage, Background scripts, etc. All of this is possible!
- Try and keep the Web Extension light - meaning an Extension should load fast, should serve a single purpose, should be accessible, etc.
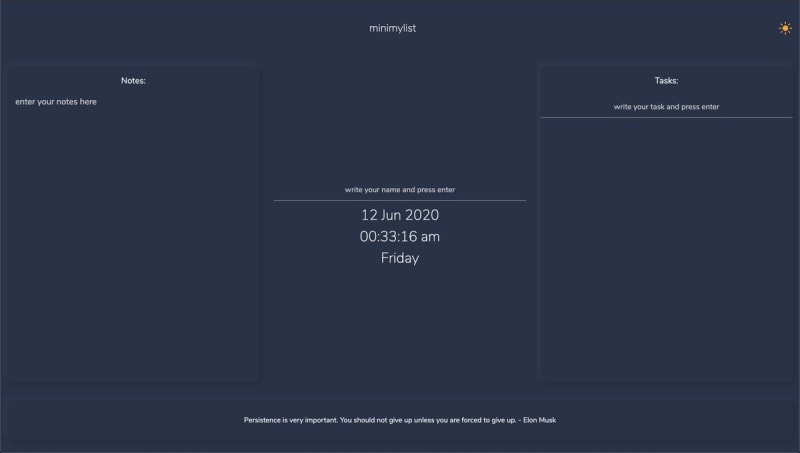
I've created a Web Extension for Chrome and Firefox - minimylist. Do check it out and share it if you liked.

 Yash Soni@iyash_soni
 Is Dark Mode your poison?
minimylist - new update live. 👨💻👩💻
Download now:
Chrome: rb.gy/vdhlo2
Firefox: rb.gy/ot5bba08:26 AM - 13 Jun 2020

Posted on June 29, 2020
Join Our Newsletter. No Spam, Only the good stuff.
Sign up to receive the latest update from our blog.


