How I escaped from Microsoft Office tools as a Computer Science student

Do Hoang
Posted on December 11, 2019

This post was originally published on thecodecousins.
Motivation
I have used beamer quite a lot to prepare slides for both research and class presentations.
I have started to use LaTeX to content in beamer presentation for two years.
Sometimes I was concerned about the high ratio of markup to content in beamer presentations.
I used to type thousands lines of code just to create a presentation slide which was tiring and time consuming.
Thus, I did some research and found a combination of pandoc, markdown, and LaTeX to simplify my process.
In my point of view, markdown in syntax is straightforward, easy to read and modify.
Moreover, pandoc has the ability to convert markdown files into LaTeX, hence enabled me to customise my slides greatly later on.
In this blog, I want to discuss about the creation of beamer presentations using a combination of markdown, pandoc, and LaTeX.
This workflow offers the potential to reduce typing and increase readability of beamer presentation source code.
After reading this blog, you would be able to create a slide by using both Markdown and LaTeX and without having to rely on Powerpoint.
Why Pandoc For Presentation?
Presentation shouldn’t get in the way of content.
-
With a word processor, you spend valuable time agonizing over
what font size to make the section headings.→ With Pandoc, you just tell it to start a new section.
-
With a word processor, changing the formatting means you have to
change each instance individually.→ With Pandoc, you just redefine the relevant commands
-
With a word processor, you have to carefully match any provided
templates.→ With Pandoc, you can be sure you’ve fit the template, and switch
templates easily. Lower ratio of markup to content in beamer presentations comparing to LaTeX.
Beautiful.
Pretty Math Equation - From my point of view as a researcher.
Installation Guide
Integrated Software
Thus we want to make our slide looks like LaTeX typesets so a Basic LaTeX package is required. \
I strongly recommend not just installing the TeX compiler, but all TeX packages for your own convenience, so you have everything available offline.
On GNU/Linux:
On Debian-based distros (Ubuntu/Linux Mint):
sudo apt-get install texlive-full
For Arch-based distros (Manjaro, Parabola, Antergos):
sudo pacman -S texlive-most texlive-lang
On Windows
Download and install the packages here.
On MacOS
Download and install the packages here. Or via Brew:
brew cask install mactex
After installing LaTeX, the next step is to get Pandoc - a universal document converter.
On GNU/Linux
For each linux distribution, you might have a different pandoc package's name in your package manager.
For example in ArchLinux, we can install pandoc with:
sudo pacman -S pandoc
But if you want to get the latest version ( you might want to check whether the pandoc version in your package manager is not outdated ), we can get the binary package for amd64 architecture on the download page.
On MacOS
brew install pandoc
On Windows
You can get the latest version on the dowload page.
Getting started
We are computer scientists 😍😍😍, as I mentioned before, making an academic presentation without having to write LaTeX ( with tons of syntax,... ) is our main goal.
Pandoc provides us a way to convert between numerous markups and word processing formats, including, but not limited to, various flavors of Markdown, Latex, HTML.
To create a slide shows with Pandoc is quite simple because the basic syntax is Markdown which is a familiar language with all developers or computer scientist.
Let's create some slide with Pandoc !!! 🎉🎉🎉
Create a main.md file that contains:
# Section heading 1 slide
## Slide 1 of Section 1
- This is a list
- Another list item
- etc,...

# Section heading 2
...
Once you have pandoc and latex (with packages to run beamer) installed, you just have to use the following command to compile the presentation:
pandoc main.md -t beamer -o output.pdf
Pandoc converted main.md into a beamer latex file main.tex and after that they use the default way (pdflatex) to transfer beamer *.tex to a Presentation file.
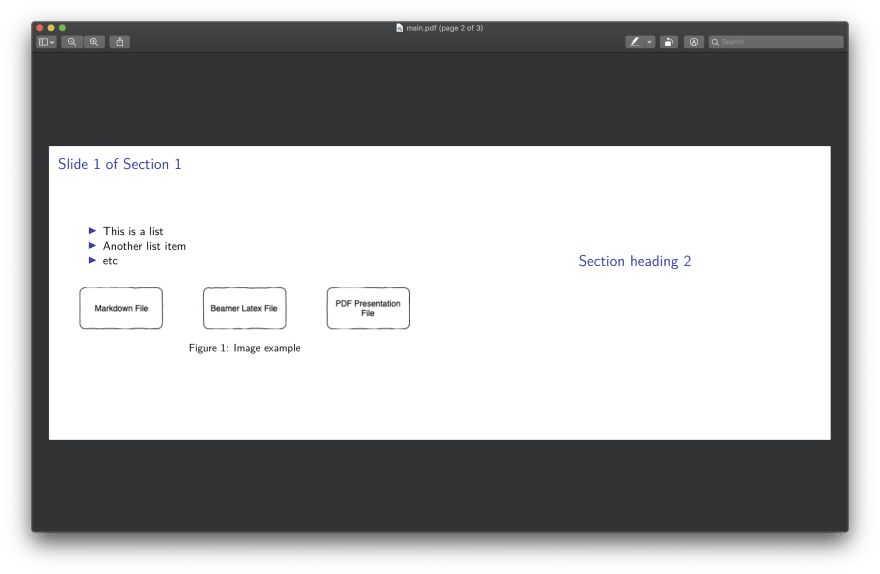
By default, pandoc will use slide-level=2, it means that level 1 markdown headings represents section headings - as the picture below ( line preceded with a single hash # Section heading 2).
And Level 2 headings represented a new slide with the title name. ( line preceded with double hash ## Slide 1 of Section 1).
So that the headings above the defined number in the hierarchy are used to divide the slide show into sections; the headings below the defined number create subheads within a slide.
You might want to read more about Structuring the slide show.
Code explaination
- The first line adds a section title. This is not part of the slide, but can be used to generate table of contents, and in-slide navigation.
- The second line creates a new slide with the slide title.
- To create a
itemizeas LaTeX, we can use the same method in markdown. - Also we can use the same method in markdow to create a figure, table inside a slide.
Result
Code comparation with LaTeX
\documentclass[t]{beamer}
\setbeamertemplate{navigation symbols}{}
\begin{document}
\section{Section heading 1 slide}
\begin{frame}
\frametitle{Slide 1 of Section 1}
\begin{itemize}
  \item {
    This is a list
  }
  \item {
    Another list item
  }
  \item{
    etc,...
  }
\end{itemize}
\begin{figure}
  \includegraphics{testImage.png}
\end{figure}
\end{frame}
\section{Section 2}
\end{document}
→ Markdown is muchhhhhhhhh shorter line of code comparing to LaTeX with the same content.
Advanced configuration
YAML
You might want a slide containing a Beamer's theme, an author name, a presentation name,... - all of LaTex beamer's feature but written in markdown.
To deal with that, we can add some YAML configuration at the beginning of the markdown file.\
Fill in all the necessary fields:
-
title: the presentation's name. -
author: your name. dateinstitute-
theme: Beamer theme, you can chose one at this site -
colortheme: theme colorscheme mainfont-
toc: table of content slide ( usetrueto enable this slide)
YAML example
---
title: "Pandoc Tutorial"
author: Do Duy Huy Hoang
date: \today{}
institute:
- The Code Cousins
theme:
- Ilmenau
colortheme:
- beaver
mainfont: "SourceSansPro-Regular"
toc:
- true
---
Result
🎉🎉🎉🎉🎉🎉🎉🎉🎉🎉🎉🎉🎉🎉🎉🎉🎉🎉🎉🎉🎉🎉🎉🎉🎉🎉🎉🎉🎉🎉🎉🎉🎉🎉🎉🎉🎉
Tips and Tricks
Image Scalling
The width and height attributes on images are treated specially.
When used without a unit, the unit is assumed to be pixels.
However, any of the following unit identifiers can be used: px, cm, mm, in, inch and %.
There must not be any spaces between the number and the unit.
For example:
{ width=50% }
Equal to LaTeX
\includegraphics[width=0.5\textwidth,height=\textheight]{file.jpg}
When no width or height attributes are specified, the fallback is to look at the image resolution and the dpi metadata embedded in the image file.
Slides with Columns in Pandoc
Current version of pandoc (i.e., pandoc 2.0 and later) supports fenced divs.
Specially named divs are transformed into columns when targeting a slides format:
# This slide has columns

::: columns

:::: column
left
::::

:::: column
right
::::

:::
But I found that it is quite buggy and you hard to control the width of each column easily.
Thus We can use both Markdown and LaTeX code inside our main file.
To create a slide that has columns, I recommend to use raw LaTeX code as the following code below:
\Begin{columns}
\Begin{column}{0.5\textwidth}
- Some content here
\End{column}
\Begin{column}{0.5\textwidth}

\End{column}
\End{columns}
But you need to add this code to your YAML file ( I will explain what is this code in the next section)
header-includes:
- \newcommand{\hideFromPandoc}[1]{#1}
- \hideFromPandoc{
    \let\Begin\begin
    \let\End\end
  }
Magical things is that you can also use Markdown inside a Raw LaTeX code \m/
And this is the result:
Preamble
Pandoc lets user include a custom preamble in the generated output.
If you have to use some packages in LaTeX ( not so much ), you can include it in the YAML header inside the header-includes: tag. \
For example I want to use package multicol in LaTeX, my header should look like:
header-includes:
- \usepackage{multicol}
These lines will be included before the document begin in LaTeX file.
Preamble in Pandoc gives you more features than just to import some packages.
We can also create our own PDF template. For presentation, we can re-config the Beamer theme.
For example, as the previous example above, I used Ilmenau theme for my slide.
By default, It does not have slide numbers ( frame number ).
So our goal now is to re-config the theme without changing the theme source code.
If you are using LaTeX then it quite easy to deal with that.
Either does Pandoc, instead of using header-includes tag, we can create a new file called preamble.tex - you can put all the configuration in LaTeX to this file the same way you use LaTeX to create a beamer presentation.
For example, I want to add the frame number to Ilmenau theme.
I need to redefine the footline template used by the Ilmenau, and also modify the sections/subsections in toc allowing you to change the appearance of the sections and subsections in the ToC.
At this point, you do need to know a little bit about LaTeX, but you will have your own Beamer Template.
You can also change the color, subsection, section,...
%%%% Create framenumber in footer
\newcommand{\frameofframes}{/}
\newcommand{\setframeofframes}[1]{\renewcommand{\frameofframes}{#1}}

\setframeofframes{of}
\makeatletter
\setbeamertemplate{footline}
  {%
    \begin{beamercolorbox}[colsep=1.5pt]{upper separation line foot}
    \end{beamercolorbox}
    \begin{beamercolorbox}[ht=2.5ex,dp=1.125ex,%
      leftskip=.3cm,rightskip=.3cm plus1fil]{author in head/foot}%
      \leavevmode{\usebeamerfont{author in head/foot}\insertshortauthor}%
      \hfill%
      {\usebeamerfont{institute in head/foot}\usebeamercolor[fg]{institute in head/foot}\insertshortinstitute}%
    \end{beamercolorbox}%
    \begin{beamercolorbox}[ht=2.5ex,dp=1.125ex,%
      leftskip=.3cm,rightskip=.3cm plus1fil]{title in head/foot}%
      {\usebeamerfont{title in head/foot}\insertshorttitle}%
      \hfill%
      {\usebeamerfont{frame number}\usebeamercolor[fg]{frame number}\insertframenumber~\frameofframes~\inserttotalframenumber}
    \end{beamercolorbox}%
    \begin{beamercolorbox}[colsep=1.5pt]{lower separation line foot}
    \end{beamercolorbox}
  }
Usage
pandoc main.md -H preamble.tex -t beamer -o main.pdf
Result
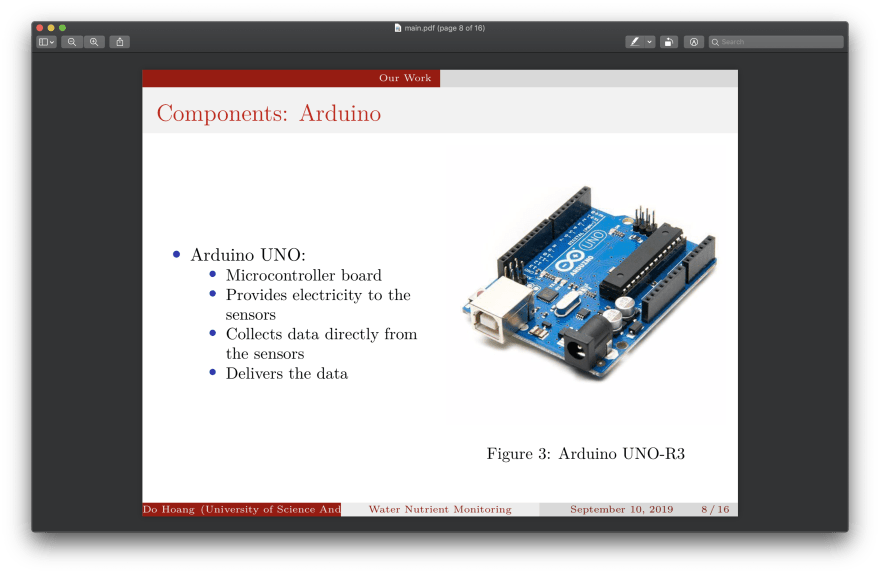
Ilmenau theme with frame number and a new look.
You can download my preamble example here
Source code
You can download all the source code in this blog in this site

Posted on December 11, 2019
Join Our Newsletter. No Spam, Only the good stuff.
Sign up to receive the latest update from our blog.


