Web Scraping with Python: A Complete Step-by-Step Guide + Code

GoLogin
Posted on April 6, 2023

Python is one of the most known languages for web scraping due to its simplicity, versatility, and abundance of libraries specifically designed for this purpose. With Python, you can easily create web scrapers that can navigate through websites, extract data, and store it in various formats.
It’s especially useful for data scientists, researchers, marketers, and business analysts, and it’s a valuable tool you must add to your skill set.
In this article, we’ll show you exactly how to perform web scraping with Python, review some popular tools and libraries, and discuss some practical tips and techniques.
Overview of Web Scraping and How it Works
Web scraping refers to searching and extracting data from websites using computer programs.
The web scraping process involves sending a request to a website and parsing the HTML code to extract the relevant data. This data is then cleaned and structured into a format that can be easily analyzed and used for various purposes.
Web scraping has numerous benefits, like:
- Saving time and effort on manual data collection
- Obtaining data that is not easily accessible through traditional means
- Gaining valuable insights into trends and patterns in your industry.
Doesn’t that sound super helpful? Let’s dive right in!
Types of Data That Can Be Extracted From Websites Using Data Scraping
You might be wondering — is data scraping limited to textual information only?
The answer is no. Data scraping can extract images, videos, and structured data such as tables and lists.
Text data can include product descriptions, customer reviews, and social media posts. Images and videos gathered through data scraping can be used to gather visual data, such as product images or videos of events. Information like product pricing, stock availability, or employee contact information can be extracted from tables and lists.
Furthermore, web scraping can extract data from multiple sources to create a comprehensive database.
This data can then be analyzed using various tools and techniques, such as data visualization and machine learning algorithms, to identify patterns, trends, and insights.
Now, it’s time to learn web scraping so that you can carry out all this cool stuff yourself!
Overview of Tools and Libraries Available for Web Scraping
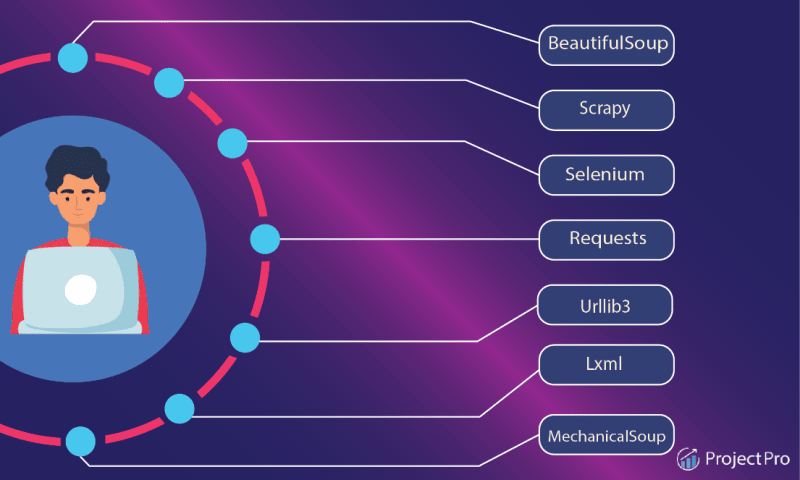
First, let’s go over the available tools and libraries that can help streamline the process and make web scraping more efficient and effective.
Beautiful Soup
With Beautiful Soup, you can easily navigate through website code to find the needed HTML and XML data and extract it into a structured format for further analysis.
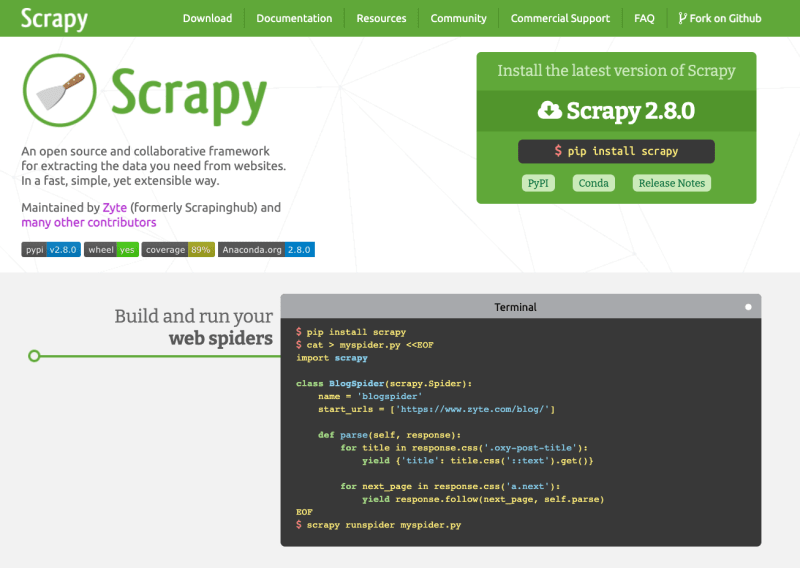
Scrapy
It is a Python framework that provides a complete web scraping solution. Scrapy allows you to crawl and scrape websites easily, including features such as automated data extraction, processing, and storage in various formats.
Selenium
Selenium is an open-source tool that automates web browsers, allowing you to simulate user behavior and extract data from websites that would be difficult or impossible to access using other tools. Selenium’s flexibility and versatility make it an effective and powerful tool for scraping dynamic pages.
Octoparse
It is a visual web scraping tool allowing easy point-and-click data extraction and automation into various formats, including CSV, Excel, and JSON.
ParseHub
It is a web scraping tool that provides a web-based and desktop solution for extracting data from websites. With ParseHub, you can easily create scraping projects by selecting the data you want to extract using a point-and-click interface.
LXML
Lxml is a powerful and efficient tool that can handle both HTML and XML documents. It can easily navigate complex website structures to extract specific elements like tables, images, or links, or you can create custom filters to extract data based on more complex criteria.
In the next section, we’ll show you how to set up your development environment for web scraping.
Let’s dive right into the fun stuff!
How To Set Up a Development Environment for Web Scraping With Python
Setting up a development environment for web scraping with Python involves installing the necessary software and libraries and configuring your workspace for efficient data extraction.
Here’s how you can do it:
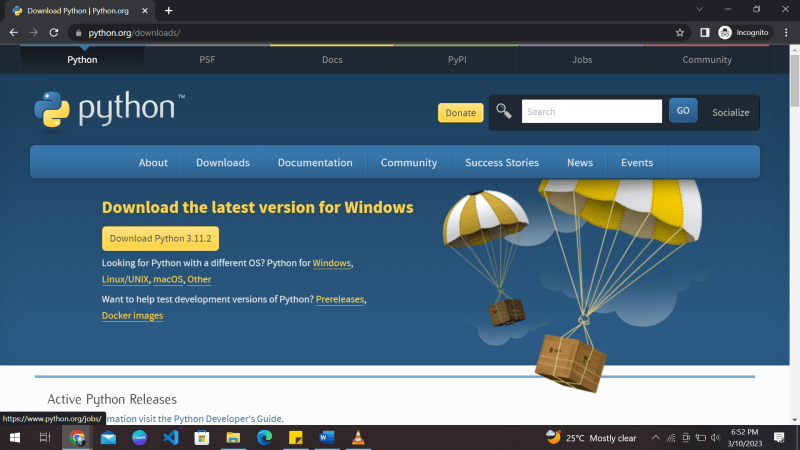
Step 1. Install Python
The first step is to install Python on your computer if you don’t already have it. You can download the latest version of Python from the official website and follow the installation instructions.
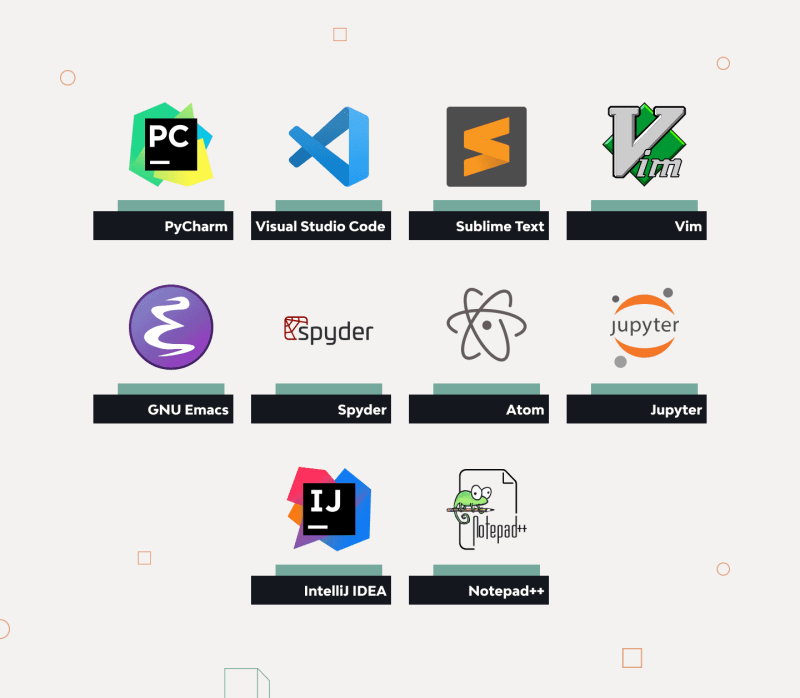
Step 2. Install a Text Editor or Integrated Development Environment (IDE)
You will need a text editor or an IDE to write Python code. Some popular options include Visual Studio Code, PyCharm, and Sublime Text.
Step 3. Install the Necessary Libraries
Several Python libraries, including Beautiful Soup, Scrapy, and Selenium, are commonly used for web scraping with Python. You can install these libraries using pip, the Python package manager.
Open your command prompt or terminal, and type:
pip install [library name]
To install Beautiful Soup, run the following command:
pip3 install beautifulsoup4
Note: You might have to prefix the installation command with sudo if you’re on Linux or macOS.
Step 4. Install a web driver
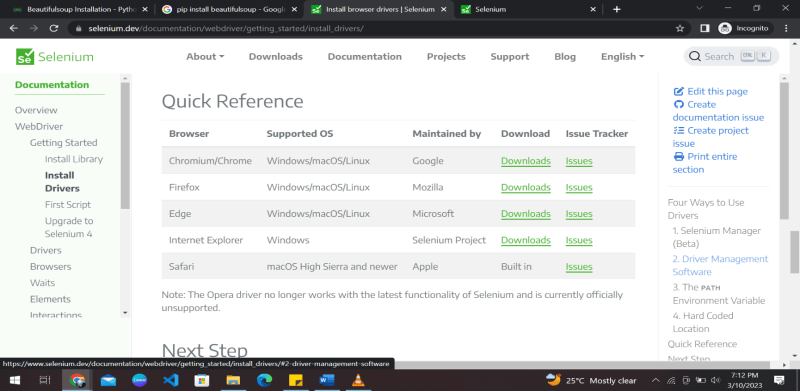
If you plan to use Selenium for web scraping, you must install a web driver corresponding to your preferred browser (e.g., Chrome, Firefox, or Safari).
You can download the appropriate web driver from the official Selenium website and add it to your system’s PATH.
(Optional) Step 5. Create a Virtual Environment
A virtual environment is recommended to keep your Python environment organized and avoid dependency conflicts.
You can create a virtual environment using the venv module with Python.
That’s it. You have the entire setup to start web scraping with Python right away. It’s time to start coding!
How to Send HTTP Requests to a Website and Handle Responses using Python
The requests library is a popular third-party library that provides an easy-to-use interface for sending HTTP/1.1 requests in Python. Here are the steps to follow:
Step 1: Install the Requests Library
Before you can use the requests library, you need to install it. You can install it using pip by running the following command:
pip install requests
Alternatively, you can also use the following command for virtual environments:
pipenv install requests
Step 2: Import the Requests Module
Once the requests library is installed, you can import it into your Python script using the following command:
import requests
Step 3: Send an HTTP Request
To send an HTTP request, you can use the requests library’s get(), post(), put(), delete() methods.
For example, to send a GET request to a website, you can use the following code:
response = requests.get('https://www.example.com')
This will send a GET request to https://www.example.com and store the response in the response variable.
In case you’re not already aware, here’s what GET, POST, PUT, and DELETE requests mean:
- GET: Used for requesting data. They’re stored in the browser history and shouldn’t be used for sensitive things.
- POST: Used for sending data to a server. They’re not stored in the browser history.
- PUT: Also used for sending data to a server. The only difference is that sending a POST request repeatedly will create data multiple times, which is not the case with PUT.
- DELETE: Delete the specified data.
Step 4: Handling the Response
The response from the website can be accessed via the response object.
You can get the response content, status code, headers, and other details. Here’s an example of how to get the content of the response:
content = response.content
This will get the content of the response as a byte string. If you want to get the content as a string, use the following code:
content = response.text
To get the response’s status code, you can use the following code:
status_code = response.status_code
This will return the status code as an integer. Here’s how you can get the response headers:
headers = response.headers
That’s a brief overview of sending HTTP requests to a website and handling responses using Python’s requests library. This may seem overwhelming, but once you get the hang of it, it becomes easy.
Introduction to parsing HTML using Beautiful Soup and extracting data from HTML tags
Beautiful Soup is a popular Python library used to pull any data out from HTML and XML files. It first creates a parse tree for parsed pages and then uses these pages to extract data from HTML tags.
Here is an introduction to parsing HTML using Beautiful Soup and extracting data from HTML tags:
Step 1: Installing Beautiful Soup
Before we can use Beautiful Soup in Python, we need to install it. Beautiful Soup can be installed using the “pip” shell command:
pip install beautifulsoup4
Step 2: Importing Beautiful Soup
Once we have installed Beautiful Soup, we can import it into our Python script using the following code:
from bs4 import BeautifulSoup
Step 3: Parsing HTML Content
The next step is to parse the HTML content using Beautiful Soup. This can be done by creating a BeautifulSoup object and passing the HTML content to it. Here’s an example
html_content = '<html><head><title>Example</title></head><body><p>
This is a sample HTML document.</p></body></html>'
soup = BeautifulSoup(html_content, 'html.parser')
Here, we have created a BeautifulSoup object called soup by passing the html_content string to the BeautifulSoup constructor.
We have also specified the parser to be used as ‘html.parser’.
Step 4: Extracting Data From HTML Tags
Once we have the BeautifulSoup object, we can use it to extract data from HTML tags. For example, to extract the text from the
tag in the HTML content, we can use the following code:
p_tag = soup.find('p')
p_text = p_tag.text
print(p_text)
This will output the text ‘This is an example HTML document.’ which is the content of the
tag in the HTML document.
Step 5: Using BeautifulSoup Functions
We can also extract attributes from HTML tags. For example, to extract the value of the href attribute from the a tag, we can use the following code:
a_tag = soup.find('a')
href_value = a_tag['href']
print(href_value)
This will output the value of the href attribute of the first a tag in the HTML document.
Moreover, we can also use the get_text() function to retrieve all the text from the HTML document.You can use the following code to get all the text of the HTML document:
soup.get_text()
Voila! You have learned how to use beautifulSoup with Python to scrape data successfully.
There are many other useful functions of BeautifulSoup that you can learn and use to add variations to your data scraper.
Overview of using regular expressions to extract data from web pages
Regular expressions (regex) are powerful for pattern matching and text manipulation.
They can be used to extract data from web pages by searching for specific patterns or sequences of characters.
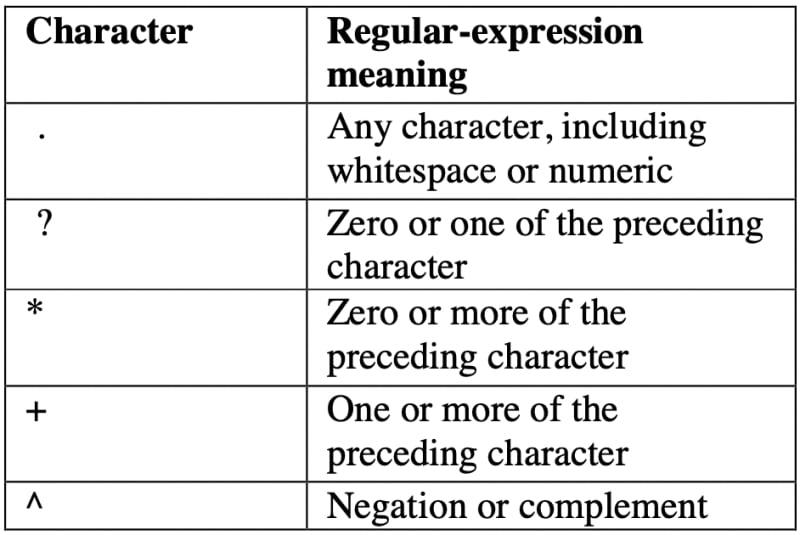
We have to use the following regex tokens to extract data.
Here is an overview of using regular expressions to extract data from web pages:
Step 1: Install the Appropriate Libraries
We will need to use requests and BeautifulSoup here as well. We will also import a library called re, a built-in Python module for working with Regular Expressions.
import requests
from bs4 import BeautifulSoup
import re
Step 2: Understanding Regular Expressions
Before using regular expressions to extract data from web pages, we need to have a basic understanding of them.
They are patterns that are used to match character combinations in strings. They can search, replace, and validate text based on a pattern.
Step 3: Finding the Pattern
To extract data from web pages using regular expressions, we need to first find the pattern we want to match. This can be done by inspecting the HTML source code of the web page and identifying the specific text or HTML tag that we want to extract data from.
page = requests.get('https://example.com/')
soup = BeautifulSoup(page.content, 'html.parser')
content = soup.find_all(class_='product_pod')
content = str(content)
Step 4: Writing the Regular Expression
Once we have identified the pattern we want to match, we can write a regular expression to search for it on the web page.
Regular expressions are written using a combination of characters and metacharacters that specify what we want to match. For example, to match a phone number on our example web page, we could write the regular expression:
number = r'\d{3}-\d{3}-\d{4}'
This regular expression matches a pattern that consists of three digits followed by a hyphen, three more digits, another hyphen, and four more digits.
This is just a small example of how we can use regular expressions and their combinations to scrape data. You can experiment using more regex tokens and expressions for your data-scraping venture.
How To Save Extracted Data to a File
Now that you have learned to scrape data from websites and XML files, we must be able to save the extracted data in a suitable format.
To save extracted data from data scraping to a file such as CSV or JSON in Python, you can follow the following general steps:
Step 1: Scrape and Organize the Data
Use a library or tool to scrape the data you want to save and organize it in a format that can be saved to a file. For example, you might use a dictionary or list to organize the data.
Step 2: Choose a File Format
Decide which file format you want to use to save the data. In this example, we will use CSV and JSON. A CSV (comma-separated values) file is a text file allowing data to be saved in a table format. The JSON data format is a file (.json) format used for data interchange through various forms of technology.
Step 3: Save Data to a CSV File
To save data to a CSV file, you can use the CSV module in Python. Here’s how:
import csv
# data to be saved
data = [
['Jay', 'Dominic', 25],
['Justin', 'Seam', 30],
['Bob', 'Lans', 40]
]
# open a file for writing
with open('data.csv', mode='w', newline='') as file:
# create a csv writer object
writer = csv.writer(file)
# write the data to the file
writer.writerows(data)
Step 4: Save Data to a JSON File
To save data to a JSON file, you can use the json module in Python. Here’s how:
import json
# data to be saved
data = [
{'name': 'John', 'surname': 'Doe', 'age': 25},
{'name': 'Jane', 'surname': 'Smith', 'age': 30},
{'name': 'Bob', 'surname': 'Johnson', 'age': 40}
]
# open a file for writing
with open('data.json', mode='w') as file:
# write the data to the file
json.dump(data, file)
In both cases, the code creates a file (if it doesn’t exist) and writes the extracted data in the chosen file format.
Tips and Best Practices for Developing Robust and Scalable Web Scraping Applications
It’s time to streamline the web scraping process.
Building a robust and scalable application can save you time, labor, and money.
Here are some tips and best practices to keep in mind when developing web scraping applications:
1. Respect Website Terms of Service and Copyright Laws
Before you start scraping a website, read its terms of service and copyright policies. Some websites may prohibit web scraping, and others may require you to credit the source of the data or obtain permission before using it.
Ignoring the terms of service or the robots.txt file can result in legal issues or getting blocked by the website’s server.
2. Understand the Website’s Structure and APIs
Understanding a website’s structure and content helps identify data to extract. Tools like Web Scraper can help inspect HTML and find data elements.
Website APIs offer structured and legal data access. So, be sure to use them whenever possible for scalability and compliance with ethical and legal standards.
3. Handle Errors Gracefully
When scraping a website, there may be times when the website is down, the connection is lost, or the data is unavailable. Hence, it becomes important to handle all these errors gracefully by adding error handling and retry mechanisms to your code. This will ensure that your application is robust and can handle unexpected situations.
One way to handle errors is to use try-catch blocks to catch and handle exceptions. For example, if a scraping request fails, you can retry the request after a certain amount of time or move on to the next request.
import requests
from bs4 import BeautifulSoup
url = "https://example.com"
try:
response = requests.get(url)
soup = BeautifulSoup(response.content, "html.parser")
# Code to extract data from the soup object
except requests.exceptions.RequestException as e:
# Handle exceptions related to the requests module
print("An error occurred while making the request:", e)
except Exception as e:
# Handle all other exceptions
print("An error occurred:", e)
finally:
# Clean up code (if any) that needs to run regardless of whether an exception was raised or not
In the above example, we’re using the requests library to request a website, and then using Beautiful Soup to extract data from the HTML content of the response. The try block contains the code that may raise an exception, such as a network error or an error related to HTML content parsing.
Logging is also a useful tool for debugging and troubleshooting errors.
4. Test Your Code Thoroughly
When developing a web scraping application, it’s important to test your code thoroughly to ensure it works correctly and efficiently. Use testing frameworks and tools to automate your tests and catch errors early in development.
Version control is a system that tracks changes to your code over time. It allows you to keep track of changes, collaborate with others, and revert to previous versions if necessary.
Git is a popular version control system widely used in the software development industry.
5. Use Appropriate Web Scraping Tools
As mentioned in the above sections, many web scraping tools exist in the market. Each tool has its strengths and weaknesses, and choosing the best tool for a particular project depends on various factors.
These factors include:
- the complexity of the website
- the amount of data to be scrapped
- the desired output format
Let’s take an overview of some web scraping tools and their use:
- Beautiful Soup is a great choice for simple web scraping projects that require basic HTML parsing.
- Scrapy is more suited for complex projects that require advanced data extraction techniques like pagination or handling dynamic content.
- Selenium is a powerful tool for scraping dynamic websites that require user interactions; it can be slower and more resource-intensive than other tools.
6. Avoid Detection by Websites
Web scraping can be resource-intensive and overload the website’s server, leading to you being blocked. To work around that, you can try changing proxies and user agents. It’s a hide-and-seek game, hiding from a website’s bot from blocking you.
If you’re wondering what proxies are, here’s a simple answer:
They are intermediaries that hide your IP address and provide a new one to the website’s server, making it harder for the server to detect that you are scraping the website.
User agents are strings that identify the web browser and operating system used to access the website.
By changing the user agent, you can make your scraping requests appear as if they are coming from different browsers or devices, which can help to avoid detection.
7. Manage Your Codebase and Handle Large Volumes of Data
Scraping can generate vast amounts of data. Store data wisely to avoid system overload by considering databases like PostgreSQL, MySQL, or SQLite and cloud storage.
Use documentation tools like Sphinx and Pydoc, and linters like Flake8 and PyLint to ensure readability and catch errors.
Caching and chunking techniques help reduce website requests and handle large datasets without memory issues. Chunking is breaking up large files or datasets into smaller, more manageable chunks.
8. Introduction to Scraping Websites That Require Authentication
Access acquisition for data scraping refers to obtaining permission or authorization to scrape data from a website or online source. It is important to obtain access because scraping data without permission may be illegal or violate the website’s terms of use.
One must have valid authentication to use any data from an online platform and ensure to use it only for ethical and legal purposes.
Scraping websites that require authentication can be more challenging than scraping public websites since they require a user to be authenticated and authorized to access certain information.
However, there are several ways to authenticate and scrape such websites.
Web Scraping Frameworks
One common method is using web scraping frameworks like Scrapy or Beautiful Soup and libraries like Requests to authenticate and access the website’s content.
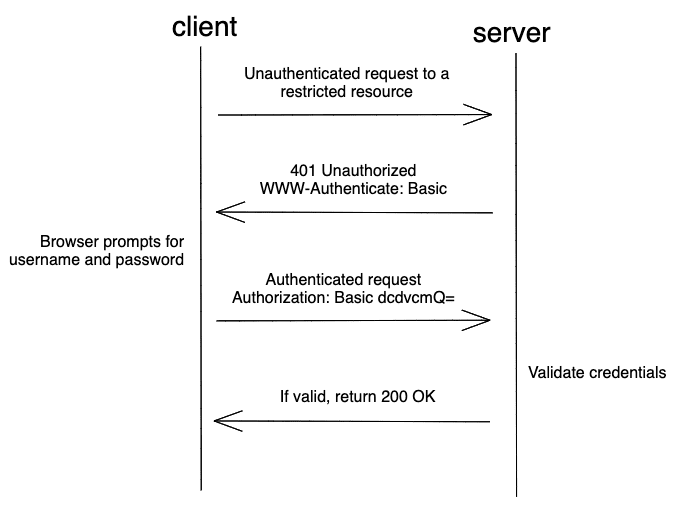
The authentication process involves submitting a username and password to the website’s login form, usually sent as a POST request.
After successful authentication, the scraped data can be extracted from the website’s HTML using parsing libraries like Beautiful Soup or lxml.
Web Automation Tools
Web automation tools like Selenium or Puppeteer simulate user interactions with the website.
These tools can automate the entire authentication process by filling in the login form and clicking the submit button.
Once authenticated, the scraper can use web automation tools to navigate the website and extract data.
Handle Cookies and Session Management
Many websites use cookies to manage sessions and maintain user authentication. When scraping websites that require authentication, it’s crucial to handle cookies correctly to maintain the session’s state and avoid being logged out. You can use libraries like Requests Session or Scrapy Cookies Middleware to manage cookies automatically.
Whenever a website is visited, a bot automatically stores cookies about what you did and how you used the website. Scrapy cookies middleware can disable the cookies for a while so that data scraping can be achieved successfully.
Some websites limit the number of requests you can make in a given time frame, which can result in IP blocking or account suspension.
To avoid being rate-limited, you can use techniques like random delays, rotating proxies, and user agent rotation.
Overview of GoLogin as a powerful anti-detect browser for web scraping
We have learned about data scraping, its uses, how to use it, and which tools to use. But there is one more tool that you must be familiar with while scraping data off of the Internet.
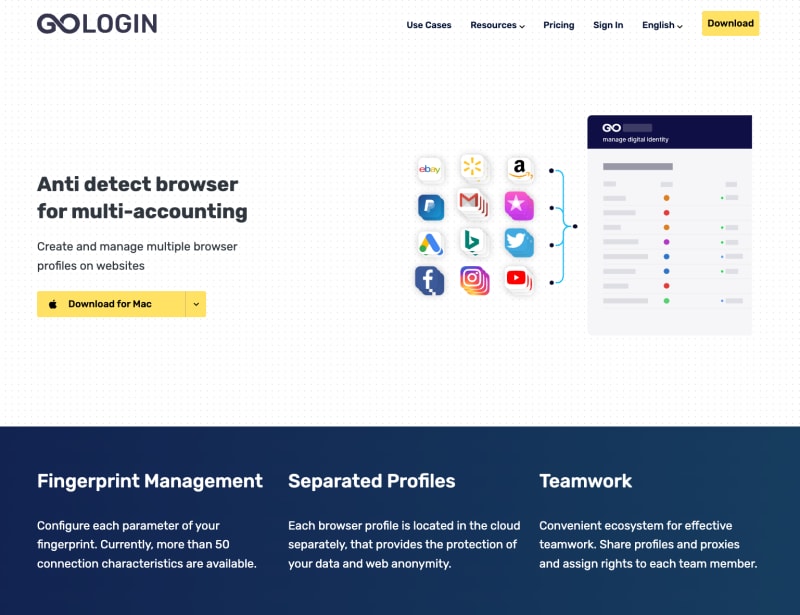
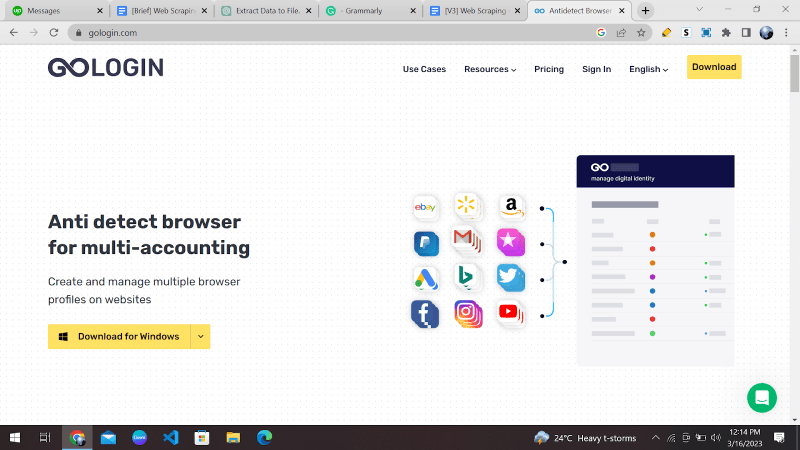
GoLogin is a powerful tool for multiple accounts - a privacy browser that can be used for web scraping with Python. It is designed to help users avoid detection while scraping websites by allowing them to rotate IP addresses, browser fingerprints, user agents, etc.
Here are some features of GoLogin that make it a powerful tool for web scraping:
1. Top Tier Data Protection Technology:
GoLogin uses advanced anti-detect technology to make it difficult for websites to identify the bot-like behavior of web scrapers.
2. Browser Fingerprinting:
This anonymous browser allows users to create and rotate browser fingerprints, which are unique identifiers that websites use to track users. By rotating fingerprints, users can avoid being detected as scrapers.
3. IP Rotation:
GoLogin is a powerful software that allows users to rotate IP addresses, which helps to avoid detection by websites that track IP addresses.
4. Multiple Browser Profiles:
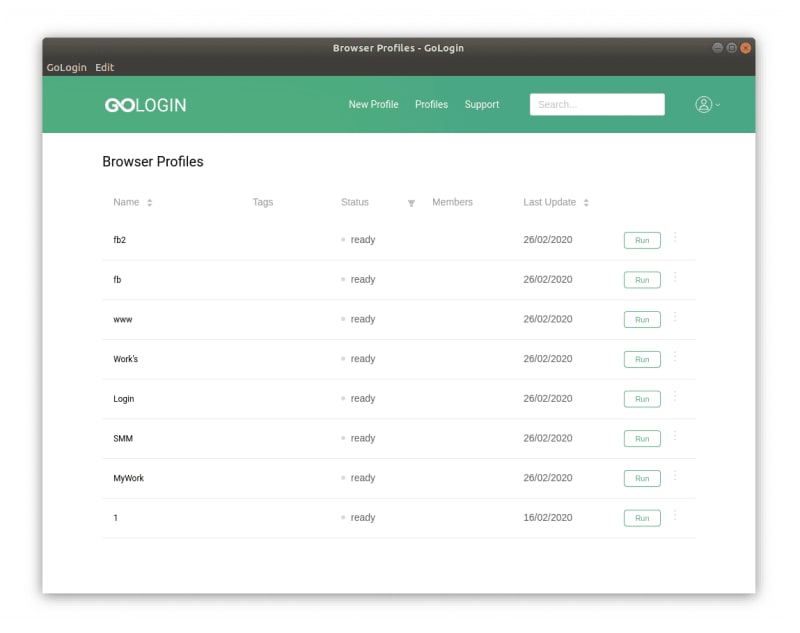
GoLogin acts as a multi-account browser that allows users to create and manage multiple browser profiles, each with its own set of browser fingerprints, IP addresses, and user agents.
How To Set Up GoLogin and Use Its Proxy Manager and Fingerprint Manager
Let’s see how to use its features and functionalities.
Step 1: Download and install GoLogin
You can download GoLogin from their website and follow the installation instructions. Click here to download it.
Step 2: Create a new profile
Once you have installed GoLogin, open the application and create a new profile by clicking the “Add profile” button. Give the profile a name and move on to settings tabs. Keep to GoLogin recommended fingerprint settings for best results: even one option changed at your wish may affect your browser anonymity.
Step 3: Configure proxies
In the profile settings, click on the “Proxy Manager” tab. Here you can add and manage proxies.
Click on “Add” to add a new proxy. All common proxy types are supported.
You can add proxies manually, mass import them from a file or use GoLogin built-in proxies. The latter ones can be bought and topped up in the top right corner (Buy Proxy button).
Step 4: Use the profile for web scraping with Python
Once you have configured the fingerprint and proxy managers, you can use the profile for web scraping. Go to the “Profiles” tab and select a profile.
Click on the “Launch” button to open a new browser window with the profile. Use this browser window for your web scraping activities.
By configuring the fingerprint and proxies in GoLogin, you can create a highly customized and secure environment for web scraping.
Automating web scraping tasks using GoLogin’s API
GoLogin’s application programming interface (API) allows you to automate web scraping tasks by providing programmatic access to the features of the GoLogin application.
With the API, you can automate tasks such as creating and managing profiles, managing proxies and fingerprints, and launching browser windows. For example, maybe you have an online shopping site where you want to scrape the product information daily.
To get things started, you’ll need to get an API token, as described here. Next, download GoLogin’s Python wrapper (or simply download directly from GitHub):
git clone https://github.com/gologinapp/pygologin.git
Your Python script should be within the same directory as the “gologin.py” file. Below, we’ll break down and explain the sample code.
Step 1: Authenticate your API Key
Connect with GoLogin using the API token you got earlier. Once authenticated, you can start to create profiles and launch browser sessions.
import time
from selenium import webdriver #Installing selenium is explained in Step 4. under How To Set Up a Development Environment for Web Scraping With Python
from selenium.webdriver.chrome.options import Options
from gologin import GoLogin
from gologin import get_random_port

# random_port = get_random_port() # uncomment to use random port
gl = GoLogin({
"token": "yU0token", #The API token you generated earlier.
"profile_id": "yU0Pr0f1leiD",
# "port": random_port
})
#See Step 3 for continued code.
Step 2: Create a profile
Use the API to create a new profile with specific configurations, such as fingerprints and proxies. Those will make your browser session appear more human-like. For example, you might want to use a specific browser version, operating system, or language for your profile.
from gologin import GoLogin
gl = GoLogin({
"token": "yU0token",
})
profile_id = gl.create({
"name": 'profile_windows',
"os": 'win', #mac for MacOS, and lin for Linux systems.
"navigator": {
"language": 'en-US',
"userAgent": 'random', # Chrome, Mozilla, etc (if you don't want to change, leave it at 'random')
"resolution": '1920x1080',
"platform": 'Win32',
},
'proxyEnabled': True, # Specify 'false' if you are not using a proxy.
'proxy': {
'mode': 'gologin',
'autoProxyRegion': 'us'
# 'host': '',
# 'port': '',
# 'username': '',
# 'password': '',
},
"webRTC": {
"mode": "alerted",
"enabled": True,
},
})
profile = gl.getProfile(profile_id)
Step 3: Launch a browser window
This will open up a new browser session with the settings you specified in the profile. You can then interact with the browser window programmatically to scrape data from websites or perform other automated tasks.
debugger_address = gl.start()
chrome_options = Options()
chrome_options.add_experimental_option("debuggerAddress", debugger_address)
driver = webdriver.Chrome(executable_path=chrome_driver_path, options=chrome_options)
driver.get("THE URL TO BE SCRAPED")
#Your code here
driver.close()
time.sleep(3)
gl.stop()
Step 4: Scrape the website
Finally, combine GoLogin’s API with standard tools such as BeautifulSoup or Selenium, and you’ll have a powerful web scraper at your fingertips! Information like news headlines and product descriptions can be extracted and parsed into HTML or XML documents with ease.
Conclusion
And that concludes our step-by-step guide to web scraping with Python! Now that you’ve learned to extract data from websites using Python, the web is your game field.
From analyzing competitors’ prices to keeping track of social media mentions of your brand, the possibilities for using web scraping in your business or personal projects are endless.
Remember always to respect website owners and their terms of service when scraping data. Happy scraping, and may the data gods smile upon you!
Feel free to try out GoLogin, a powerful and professional privacy tool designed to make your web scraping experience easier and more efficient.

Posted on April 6, 2023
Join Our Newsletter. No Spam, Only the good stuff.
Sign up to receive the latest update from our blog.


