GitHub for Beginners: A Guide for All New Developers

Pieces 🌟
Posted on February 15, 2023

If you don't know how to use GitHub, this article is for you. GitHub is a well-known programming resource for code sharing. It’s free to all users, and allows developers from around the world to collaborate. Writing code can be complex, but it becomes easier with the right tools and support. In this article, we’ll cover how a newbie can learn to use GitHub.
What Is Git?
Linus Torvalds, the architect of the Linux operating system’s kernel, created Git in 2005 as an open-source version control system that enables developers to manage changes to a project's code. Version control is important when working on software projects because it is the system used to manage any changes to documents, computer programs, large websites, and other collections of information. Git records the changes made to code over time in a unique database called a repository so that developers can easily roll back a project to a previous state by looking at the project history and seeing who made what changes, when, and why. Constantly storing copies of the entire project in various folders without a version control system is very slow, especially if multiple people have to work on the same project. A highly useful tool, Git is free, super fast, scalable, and it supports collaboration.
Version Control Systems
There are two types of version control systems (VCS): centralized and distributed.
- Centralized Version Control Systems: All team members connect to a central server to obtain the most recent version of the code and share their modifications with other team members when using a centralized version control system. The drawback of centralized version control systems is that if the server goes down, you’re forced to wait until the server is back online before you can save snapshots of a project. Subversion (SVN) is an example of a centralized version control system.
- Distributed Version Control Systems: In distributed version control systems (DVCS), every team member has a copy of the project files with their history on their computer, so you don't need to rely on a central server to keep track of all the versions of a project's files. If the main server is unavailable, you can still synchronize your work with others directly. You can also save snapshots of your project locally on your computer. Git and Mercurial are two instances of distributed version control systems.
What Is GitHub?
On GitHub, you can star, watch, and fork various repositories. ”Fork” lets you make a copy of someone else's project without affecting the original, while “watch” gives you updates when changes are made to a project you’re following. Finally, “starring” is the GitHub version of the “like” button, similar to liking on Facebook.
Benefits of GitHub
GitHub Pages: You can display your work portfolio on beautiful websites. These websites may be customized to your liking, and are fully HTML compliant. You can also use both free and premium themes.
Backup: Regardless of what happens to your local machine, GitHub backups provide a straightforward solution to keep code and version history available online.
Collaboration: A great platform for collaborative development, GitHub helps solve problems by building software. It’s the top network for hosting software repositories, with more than 73 million software developers gathering on GitHub to store, manage, and contribute to their projects, as well as those of others.
If you're new to software development, you might not be familiar with GitHub. However, you'll quickly become accustomed to it once you start using it. People can view, contribute to, and share each other's work through the use of GitHub, which promotes interaction. This platform provides a system with which coders can keep track of the changes made throughout the coding process, as well as a networking site where developers can collaborate. It also provides an environment that encourages the improvement of code. GitHub is now the most significant cloud-based storage space for software projects. It allows programmers to duplicate code from a project and safely work on it without changing the code within the original project.
In addition, Hub has strong versioning software that makes branching and merging simple. Because the code will be saved in the same Git, other individuals can work on it simultaneously.
Markdown: GitHub supports Markdown for issue tracking and user comments. Markdown allows you to use a simple text editor to write formatted documents.
Getting Started With GitHub
In this article, we’ll be working on the website version of Github. So, let's get started with the demonstration!
Creating an Account on GitHub
To create an account, you’ll need to go to Github’s official site.
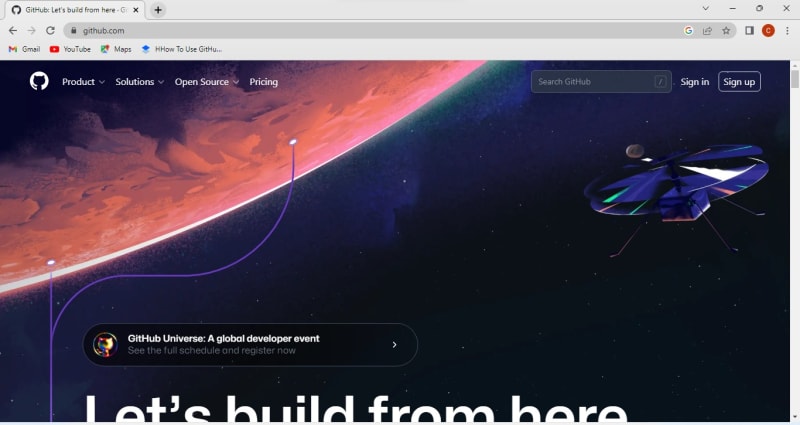
Go to Github.com. Click on “Sign up” if you don't have an account with GitHub. If you already have an account, click on “Sign In.”
Creating a Repository
All of your project files are stored in a repository. You can manage your work and cooperate with others by using repositories, which can be owned individually or shared by multiple developers in an organization. By choosing a repository's visibility, you can also limit who has access to it. Code files, text files, image files, and other file types can all be stored in a repository.
To create a GitHub repository, just follow to these easy steps:
Step 1: In the left corner of the page, click on “Create repository”:
Step 2: Type a name for your repository. In the example below, we call our repository “hello-world”:
Step 3: Add a description of your repository (optional). In this example, we’ll use “My Repository”:
Step 4: Choose repository visibility:
Step 5: Click on “Add a README file”:
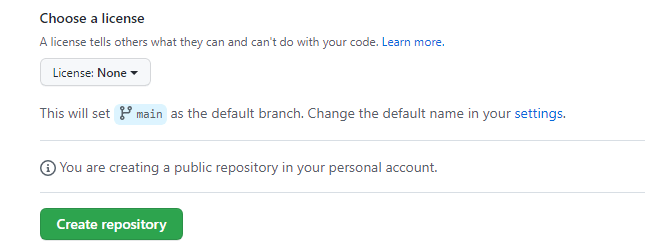
Step 6: Click on “Create repository.”
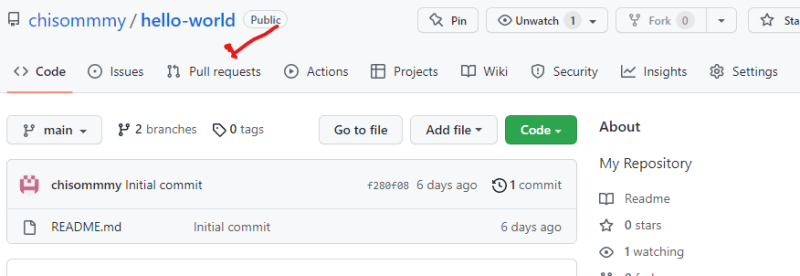
You’ve successfully created your repository and initialized it with a README file. It will look like the screenshot below:
Now, let's move forward to creating branches.
Creating a Branch in GitHub
You can experiment with new ideas, develop features, or fix bugs in a contained area of your repository by using branches. Each repository has a default branch, and you can have additional branches. You can publish a GitHub page using a branch. You need Write access to a repository to create a branch, open a pull request, delete a branch, or restore a branch. This feature allows you to work on multiple versions of a repository at once.
To create a branch in GitHub, follow the steps below:
Step 1: Go to the main page of the repository.
Step 2: Click “branches”:
Step 3: Click on “New branch”:
Step 4: Enter a branch name, and change the branch source:
Step 5: Click on “Create a branch”:
Once a new branch is created, there are two branches in your repository. The new branch is a copy of the main branch.
Creating a Commit
A commit is a record of changes to one or more files in your branch. You must include a commit message with every commit that details the changes you made.
To make your first commit, follow the steps below:
Step 1: Click on the file you just created:
Step 2: Click on the pencil icon in the right corner of the file:
Step 3: After clicking on the pencil icon, an editor will open where you can write your changes. Then, you write a commit message that describes your changes:
Step 4: Click on “Commit changes”:
We have made our first commit successfully.
Open and Merge Pull Requests
When you push changes to a branch in a repository, you can inform other developers about those changes by sending them a pull request (PR). After submitting a pull request, other team members can review your code, ask questions, provide feedback, and add commits directly in GitHub before your changes are merged into the branch.
Now, let's follow these simple steps to create or open a pull request.
Step 1: Go to the main page of the repository. Next, in your branch menu, choose the branch that contains your commit.
Step 2: Click on “Pull requests” in the list of files:
Step 3: Click on the “New pull request” option. This will allow you to compare the changes:
Step 4: There is a drop-down menu with options for the base branch and a comparison branch. The base branch is the master branch and is used to choose the branch into which you want to merge changes, while the compare branch is used to select the topic branch in which changes were made:
Step 5: Write a description for your pull request:
Step 6: Click on “Create Pull Request”:
Once a pull request has been made, you can push commits from your topic branch to the pull request to add them to it. Your pull request will display these commits in sequential manner, and the changes will be shown in the ”files changed” tab.
Merging Your Pull Request
Any GitHub pull request can be merged at any time, by default. A draft pull request cannot be merged, but there may be limitations on when you can merge a pull request into a certain branch. When you merge a pull request, the repository may be set up so that the head branch for that pull request is immediately deleted.
Let's follow these simple steps to merge a pull request:
Step 1: Click on “Pull requests” in your list of files:
Step 2: Click on the pull request you would like to merge.
Step 3: Click on “Merge pull request,” and then click on “Confirm merge.”
You have now successfully merged your pull request.
Conclusion
GitHub provides a user-friendly web-based interface with issue tracking, WIKIS, REST APIs, and command-line tools for Windows, Mac, Linux, and even mobile devices. With GitHub, you can create a profile, upload projects, and follow other users' accounts to share and connect with them. Additionally, Git is a cloud-based version control system and utility for managing the history of your source code. GitHub is a service used for projects that use Git, while Git itself is the tool.

Posted on February 15, 2023
Join Our Newsletter. No Spam, Only the good stuff.
Sign up to receive the latest update from our blog.
Related
November 30, 2024


