How to animate a sparkler in Flutter

flutter-clutter
Posted on July 18, 2020

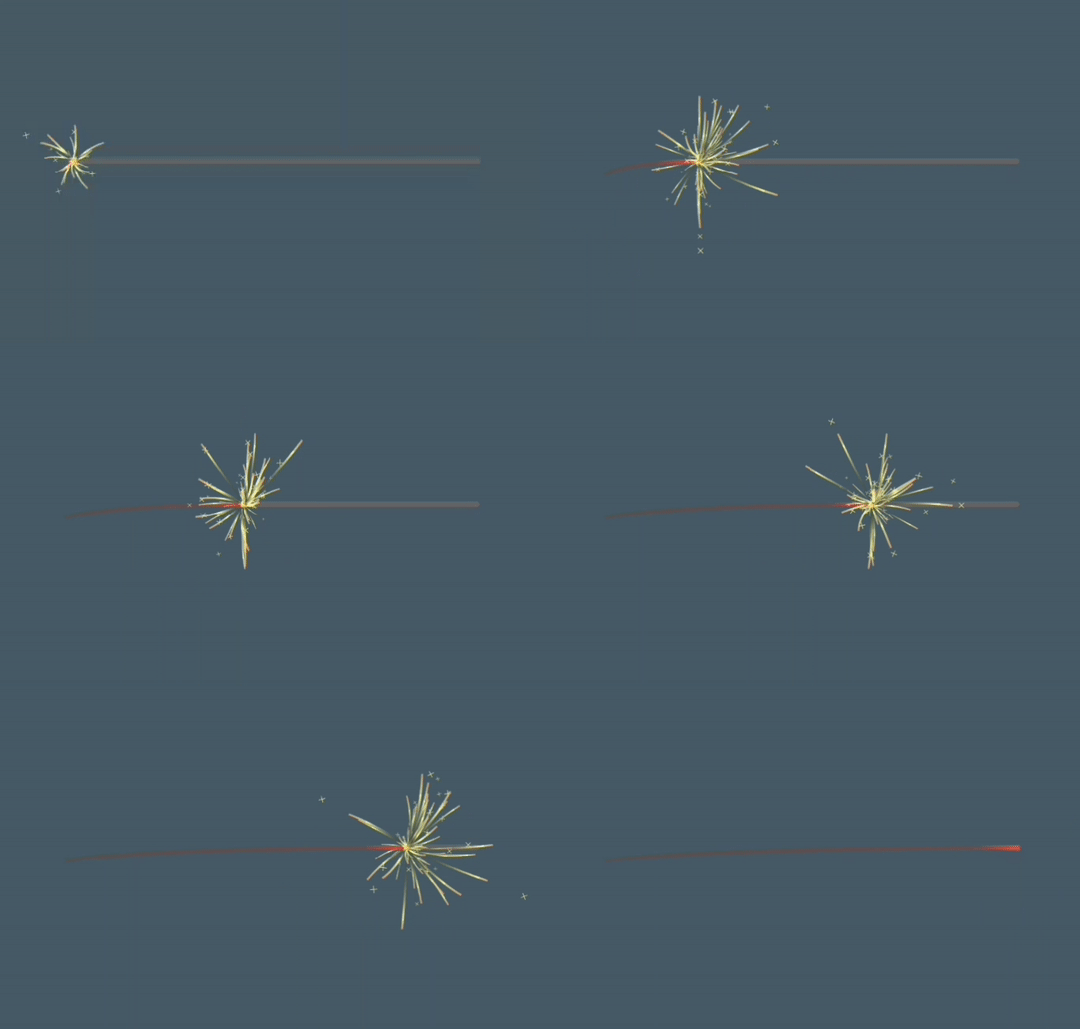
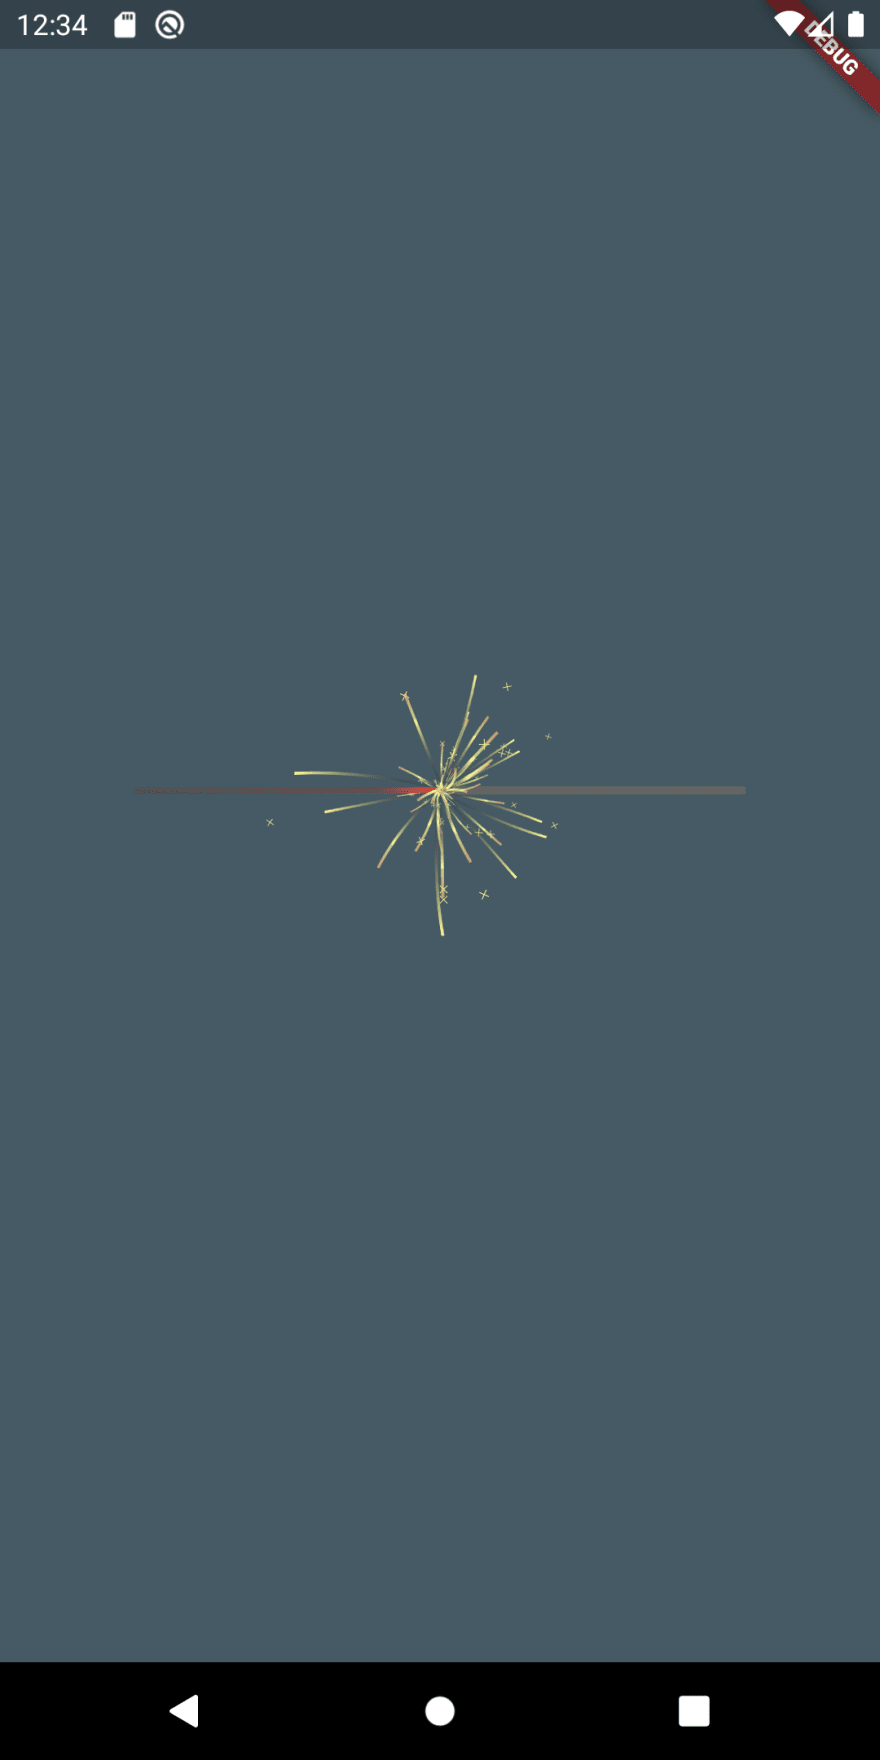
Let's be creative and implement a sparkler that could replace the usual loading indicator by burning from left to right.
The goal
The animation we aim for looks like this: a sparkler that has been lighted with sparks coming out of the focus, moving along.
The implementation
The spark
Let's handle the crucial part first: the spark. Before we implement, let's think for a second what's actually happening in the focus of a sparkler. A huge amount of sparks are shot in many directions. Because of their speed it occurs to the human eye that the spark creates a ray. They don't always fly a linear trajectory, it can be curvy sometimes. The sparks change their color towards the end and sometimes there are tiny "stars" appearing somewhere near the rays.
So let's go step by step and try to fulfill the following requirements when creating our spark:
- It starts as a small point and grows into a line
- The line moves in a certain direction
- The color is a gradient from yellow to red
- The trajectory is mostly straight but sometimes curvy
- Every spark has a unique length
- There are raondmly spread "stars"
Make something grow
class Particle extends StatefulWidget {
  Particle({
    this.duration = const Duration(milliseconds: 200)
  });

  final Duration duration;
  @override
  State<StatefulWidget> createState() {
    return _ParticleState();
  }
}
In order to create our first iteration we only need a single argument for the constructor of the widget. That is the duration from the appearance of the spark to the moment it disappears. We don't know yet what is a good value for that, but we know for sure that in reality this is much less than a second. Let's start with a default value of 200 milliseconds.
class _ParticleState extends State<Particle> with SingleTickerProviderStateMixin {
  AnimationController _controller;

  @override
  void initState() {
    super.initState();

    this._controller = new AnimationController(
      vsync: this,
      duration: widget.duration
    );

    _startNextAnimation();

    _controller.addStatusListener((status) {
      if (status == AnimationStatus.completed) {
        _startNextAnimation();
      }
    });

    this._controller.addListener(() {
      setState(() {});
    });
  }

  void _startNextAnimation([Duration after]) {
    Future.delayed(Duration(seconds: 1), () {
      _controller.forward(from: 0.0);
    });
  }

  @override
  dispose() {
    _controller.dispose();
    super.dispose();
  }

  @override
  Widget build(BuildContext context) {
    return SizedBox(
      width: 1,
      height: 80,
      child: CustomPaint(
        painter: ParticlePainter(
          currentLifetime: _controller.value,
        )
      )
    );
  }
}
Now we have a basic setup: the widget uses the SingleTickerProvider and has an AnimationController that uses the duration we set as the constructor argument. After an animation is completed, the next animation starts. In the widget tree we have a SizedBox with a fix size of 80. It contains a CustomPaint widget with a painter named ParticlePainter that is still to be defined. The crucial thing is the only parameter we provide to the painter: currentLifetime: _controller.value. This gives our painter the progress value of the animation (at the beginning 0.0 and at the end 1.0). That enables us to decide what to draw dependent upon the time.
class ParticlePainter extends CustomPainter {
  ParticlePainter({
    @required this.currentLifetime,
  });

  final double currentLifetime;

  @override
  void paint(Canvas canvas, Size size) {
    Paint paint = Paint();

    Rect rect = Rect.fromLTWH(
      0,
      0,
      size.width,
      -currentLifetime * size.height
    );

    LinearGradient gradient = LinearGradient(
        colors: [Colors.yellowAccent, Colors.orangeAccent, Color.fromARGB(30, 255, 255, 255), Color.fromARGB(30, 255, 255, 255)],
        stops: [0, 0.3, 0.9, 1.0],
        begin: Alignment.topCenter,
        end: Alignment.bottomCenter
    );
    paint.shader = gradient.createShader(rect);

      Path path = Path()
        ..addRect(
            rect
        );
      canvas.drawPath(path, paint);
  }

  @override
  bool shouldRepaint(CustomPainter oldDelegate) {
    return true;
  }
}
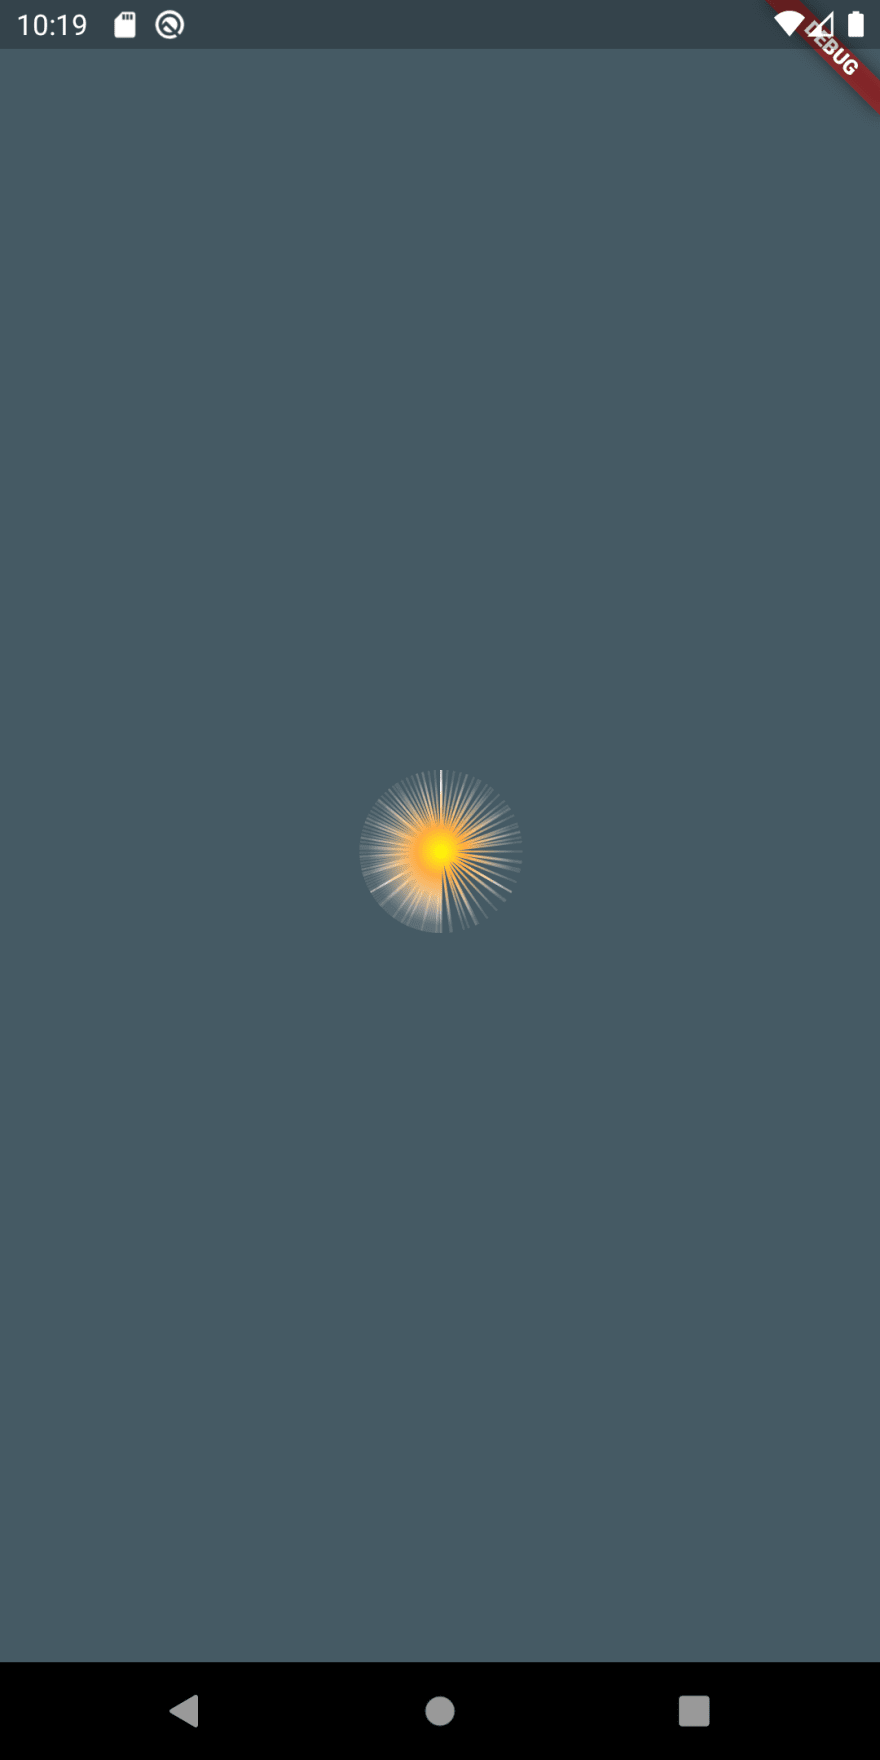
In the first iteration we just want to draw a tiny dot that transforms into a long line over time. For this, we paint a rectangle that has its upper left on the top left corner of the given size and fills the whole width. The height is crucial here: it's the negative currentLifetime times the size. That leads to the rectangle growing upwards starting with 0 * size.height and ending with -1.0 * size.height. So it's a linear growth from the beginning to the end of the animation.
We also give the rectangle a gradient that linearly transforms from yellow to orange and from ornage to a semi-transparent white.
To measure what it looks like, we quickly setup a widget to display a bunch of sparks in a circle like we want it to be animated later on in the context of the sparkler
class Sparkler extends StatefulWidget {
  @override
  _SparklerState createState() => _SparklerState();
}

class _SparklerState extends State<Sparkler> {
  final double width = 300;

  @override
  void initState() {
    super.initState();
  }

  @override
  Widget build(BuildContext context) {
    return Center(
        child: Container(
          width: width,
          child: SizedBox(
              height: 100,
              child: Stack(
                children: getParticles(),
              )
          ),
        )
    );
  }

  List<Widget> getParticles() {
    List<Widget> particles = List();

    int maxParticles = 160;
    for (var i = 1; i <= maxParticles; i++) {
      particles.add(
          Padding(
              padding: EdgeInsets.only(left: 0.5 * width, top: 20),
              child: Transform.rotate(
                  angle: maxParticles / i * pi,
                  child: Padding(
                      padding: EdgeInsets.only(top: 40),
                      child: Particle()
                  )
              )
          )
      );
    }

    return particles;
  }
}
We display 160 of the particles we have just created and display them clockwise in a circle. The angle at which the Particle is rotated via Transform.rotate is from zero to pi with 160 even gaps.
A single spark looks okay, but if we display the whole bunch of sparks it does not look a lot like a real spark. The main reason is that every spark appears at almost the same time and then performs exactly the same growth for the same duration. We need a little bit of randomness!
Adding randomness
There are some things we need to randomize in order to make it look more realistic:
- The delay after the first animation of every individual particle starts
- The delay between an animation and the next one
- The final size (length of the ray) of each particle
class _ParticleState extends State<Particle> with SingleTickerProviderStateMixin {
  AnimationController _controller;
  double randomSpawnDelay;
  double randomSize;
  bool visible = true;

  @override
  void initState() {
    super.initState();
    randomSpawnDelay = Random().nextDouble();
    randomSize = Random().nextDouble();

    this._controller = new AnimationController(
      vsync: this,
      duration: widget.duration,
    );

    _startNextAnimation(
      Duration(milliseconds: (Random().nextDouble() * 1000).toInt())
    );

    _controller.addStatusListener((status) {
      if (status == AnimationStatus.completed) {
        visible = false;
        _startNextAnimation();
      }
    });

    this._controller.addListener(() {
      setState(() {});
    });
  }

  void _startNextAnimation([Duration after]) {
    if (after == null) {
      int millis = (randomSpawnDelay * 300).toInt();
      after = Duration(milliseconds: millis);
    }

    Future.delayed(after, () {
      setState(() {
        randomSpawnDelay = Random().nextDouble();
        randomSize = Random().nextDouble();
        visible = true;
      });

      _controller.forward(from: 0.0);
    });
  }

  @override
  dispose() {
    _controller.dispose();
    super.dispose();
  }

  @override
  Widget build(BuildContext context) {
    return SizedBox(
      width: 1.5,
      height: 100,
      child: Opacity(
        opacity: visible ? 1.0 : 0.0,
        child: CustomPaint(
          painter: ParticlePainter(
            currentLifetime: _controller.value,
            randomSize: randomSize,
          )
        )
      )
    );
  }
}
class ParticlePainter extends CustomPainter {
  ParticlePainter({
    @required this.currentLifetime,
    @required this.randomSize,
  });

  final double currentLifetime;
  final double randomSize;

  @override
  void paint(Canvas canvas, Size size) {
    Paint paint = Paint();
    double width = size.width;

    Rect rect = Rect.fromLTWH(
      0,
      0,
      width,
      -currentLifetime * size.height * randomSize
    );

    LinearGradient gradient = LinearGradient(
        colors: [Colors.yellowAccent, Colors.orangeAccent, Color.fromARGB(30, 255, 255, 255), Color.fromARGB(30, 255, 255, 255)],
        stops: [0, 0.3, 0.9, 1.0],
        begin: Alignment.topCenter,
        end: Alignment.bottomCenter
    );
    paint.shader = gradient.createShader(rect);
    Path path = Path()
      ..addRect(
          rect
      );
    canvas.drawPath(path, paint);
  }

  @override
  bool shouldRepaint(CustomPainter oldDelegate) {
    return true;
  }
}
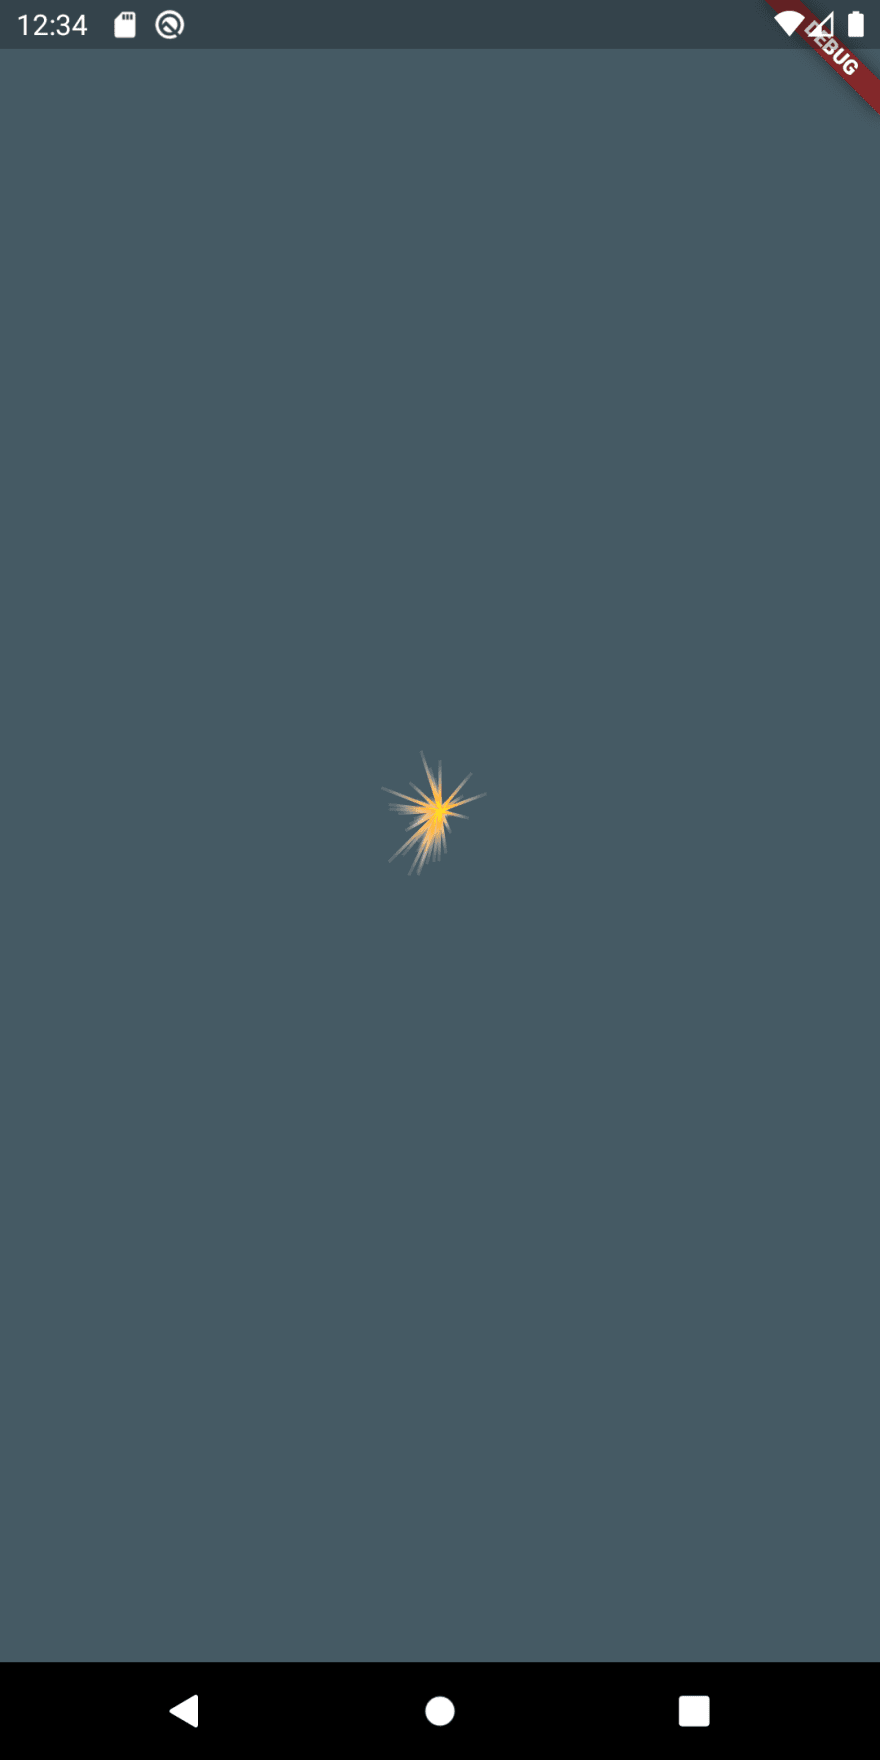
For this, we create a new variable called randomSpawnDelay that initially has a random double from 0.0 to 1.0. Every time the animation finishes, we reset the spawn delay to a new random value and make it the seconds until the next animation starts. Now since there is a delay between animations we have the problem that the particle stays there in the last animation state until the next animation starts. That's why we create a bool variable called visible which is initially true and set to false after the animation has finished. For a random ray length of the particles we add a random double called randomSize which we multiply in the painter with the height we have calculated so far.
Curves
Far from perfect but a lot more realistic than the first iteration. Now what is missing? If we have a look at our list we made at the beginning, we notice, that we haven't implemented that sometimes the trajectory of a spark should not be a line but rather a curve.
class _ParticleState extends State<Particle> with SingleTickerProviderStateMixin {
  …
  double arcImpact;
  …

  @override
  void initState() {
    super.initState();
    …
    arcImpact = Random().nextDouble() * 2 - 1;
    …

  void _startNextAnimation([Duration after]) {
    …
    Future.delayed(after, () {
      setState(() {
        …
        arcImpact = Random().nextDouble() * 2 - 1;
        …
      });
    …
    });
  }

  …

  @override
  Widget build(BuildContext context) {
    return SizedBox(
      …
        child: CustomPaint(
          painter: ParticlePainter(
            …
            arcImpact: arcImpact
          )
        )
      )
    );
  }
}
class ParticlePainter extends CustomPainter {
  ParticlePainter({
    @required this.currentLifetime,
    @required this.randomSize,
    @required this.arcImpact
  });

  final double currentLifetime;
  final double randomSize;
  final double arcImpact;

  @override
  void paint(Canvas canvas, Size size) {
    Paint paint = Paint();
    double width = size.width;
    double height = size.height * randomSize * currentLifetime;

    Rect rect = Rect.fromLTWH(
      0,
      0,
      width,
      height
    );

    Path path = Path();
    LinearGradient gradient = LinearGradient(
        colors: [Color.fromRGBO(255, 255, 160, 1.0), Color.fromRGBO(255, 255, 160, 0.7), Color.fromRGBO(255, 180, 120, 0.7)],
        stops: [0, 0.6, 1.0],
        begin: Alignment.topCenter,
        end: Alignment.bottomCenter
    );
    paint.shader = gradient.createShader(rect);
    paint.style = PaintingStyle.stroke;
    paint.strokeWidth = width;
    path.cubicTo(0, 0, width * 4 * arcImpact, height * 0.5, width, height);

    canvas.drawPath(path, paint);

  }

  @override
  bool shouldRepaint(CustomPainter oldDelegate) {
    return true;
  }
}
To do that, we add a new parameter arcImpact. It describes how far the curve should lean across the side. It should range from -1 to +1 where -1 means: lean left, 0: don't lean and 1: lean to the right.
Stars
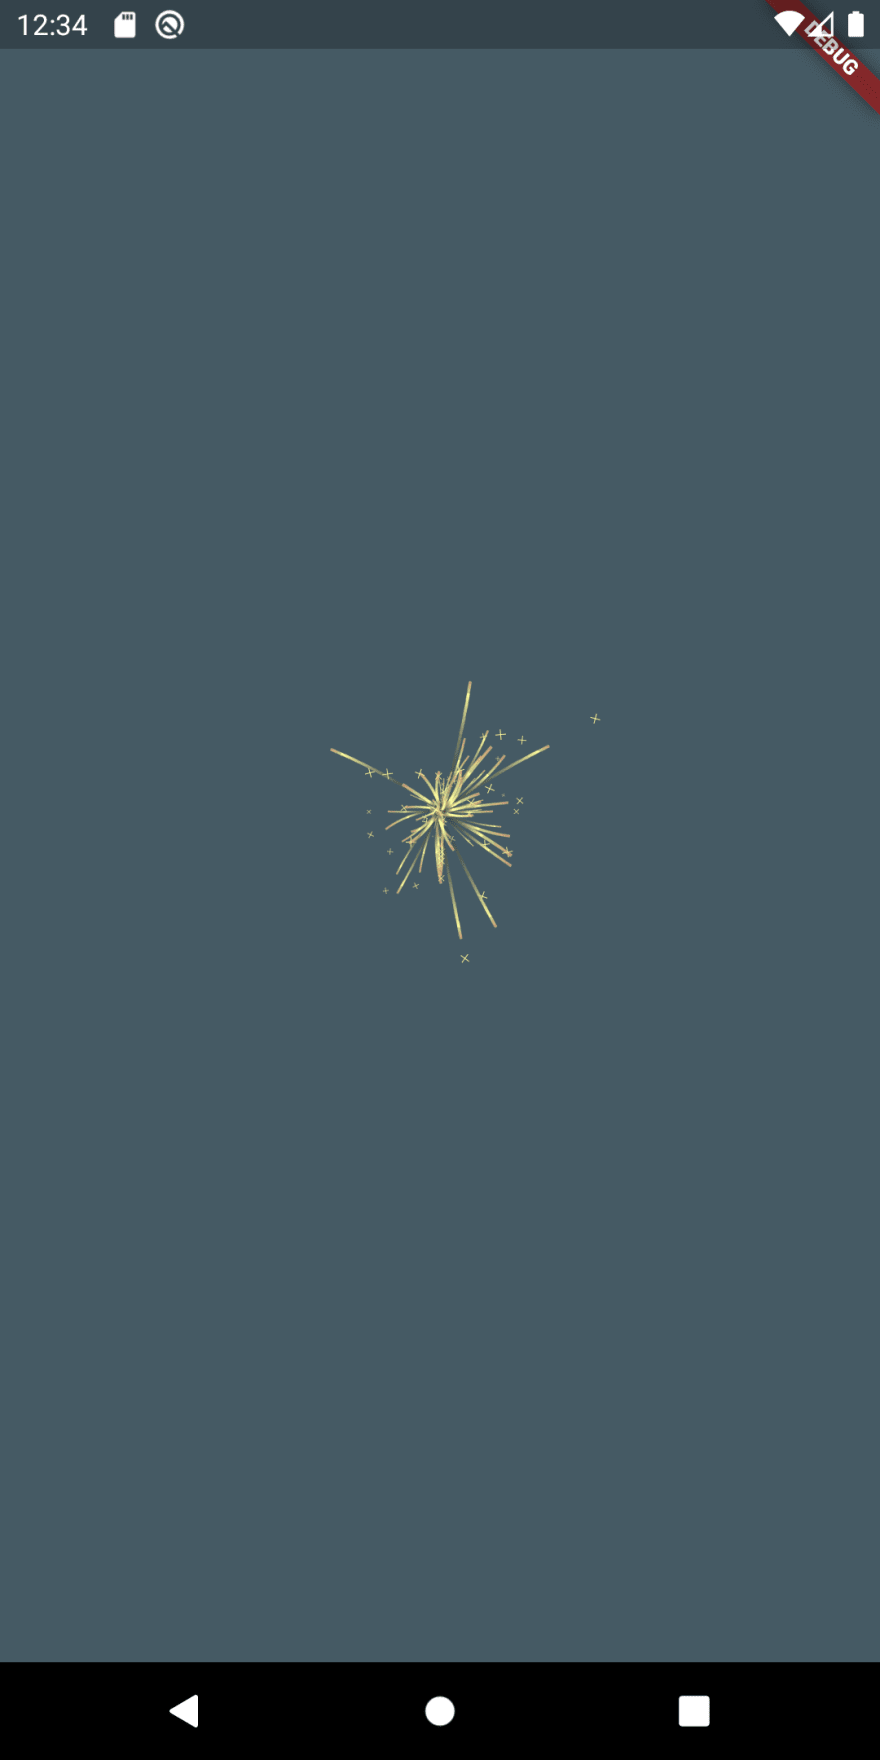
The curves look okay like that, but there are still a few things that could be more realistic. The first thing: the length of the rays compared to the whole size is a little bit too low. The other thing is something from our initial list: we wanted to have random spread stars!
  final bool isStar;
  final double starPosition;
  …
  isStar = Random().nextDouble() > 0.3;
  starPosition = Random().nextDouble() + 0.5;
double height = size.height * randomSize * currentLifetime * 2;

  if (isStar) {
    Path path = Path();
    paint.style = PaintingStyle.stroke;
    paint.strokeWidth = width * 0.25;
    paint.color = Color.fromRGBO(255, 255, 160, 1.0);

    double starSize = size.width * 2.5;
    double starBottom = height * starPosition;

    path.moveTo(0, starBottom - starSize);
    path.lineTo(starSize, starBottom);
    path.moveTo(starSize, starBottom - starSize);
    path.lineTo(0, starBottom);

    canvas.drawPath(path, paint);
  }
We introduce two new variables to our widget: isStar and starPosition. The first one is a bool type that determines whether this spark has a star or not. The second one determines the position of the star alongside the trajectory of the spark. It ranges from 0.5 to 1.5 at it is sometimes off in the reality. The height issue is solved by multiplying the height with 2.
We are almost there! But there is one last thing we should fix. The rays are now bound to the focus of the sparkler. It does not really create the illusion of them flying outwards. We can do a simple trick to solve that problem:
LinearGradient gradient = LinearGradient(
  colors: [Colors.transparent, Color.fromRGBO(255, 255, 160, 1.0), Color.fromRGBO(255, 255, 160, 0.7), Color.fromRGBO(255, 180, 120, 0.7)],
  stops: [0, size.height * currentLifetime / 30, 0.6, 1.0],
  begin: Alignment.topCenter,
  end: Alignment.bottomCenter
);
We change the gradient a little bit so that the first part of the path is always transparent. The stop value of that color grows as the time flies by. We ensure that by muliplying the size by our growing currentLifetime value and divide everything by 30 because we only want the first bit to move. We also slightly change the other colors in the gradient.
The sparkler
Now that we have taken care of the flying sparks, we now want to implement the sparkler this thing is going to run on so we can use it e. g. as a progress indicator. The progress in this case is supposed to be indicated by the burnt part of the sparkler which is accompanied by our sparks moving from left to right.
class StickPainter extends CustomPainter {
  StickPainter({
    @required this.progress,
    this.height = 4
  });

  final double progress;
  final double height;

  @override
  void paint(Canvas canvas, Size size) {

    double burntStickHeight =  height * 0.75;
    double burntStickWidth = progress * size.width;

    _drawBurntStick(burntStickHeight, burntStickWidth, size, canvas);
    _drawIntactStick(burntStickWidth, size, canvas);
  }

  void _drawBurntStick(double burntStickHeight, double burntStickWidth, Size size, Canvas canvas) {
    double startHeat = progress - 0.1 <= 0 ? 0 : progress - 0.1;
    double endHeat = progress + 0.05 >= 1 ? 1 : progress + 0.05;

    LinearGradient gradient = LinearGradient(
        colors: [
          Color.fromARGB(255, 80, 80, 80),
          Color.fromARGB(255, 100, 80, 80),
          Colors.red, Color.fromARGB(255, 130, 100, 100),
          Color.fromARGB(255, 130, 100, 100)
        ],
        stops: [0, startHeat, progress, endHeat, 1.0]
    );

    Paint paint = Paint();
    Rect rect = Rect.fromLTWH(
        0,
        size.height / 2 - burntStickHeight / 2,
        size.width,
        burntStickHeight
    );
    paint.shader = gradient.createShader(rect);

    Path path = Path()
      ..addRect(rect);

    canvas.drawPath(path, paint);
  }

  void _drawIntactStick(double burntStickWidth, Size size, Canvas canvas) {
    Paint paint = Paint()
      ..color = Color.fromARGB(255, 100, 100, 100);

    Path path = Path()
      ..addRRect(
          RRect.fromRectAndRadius(
              Rect.fromLTWH(
                  burntStickWidth,
                  size.height / 2 - height / 2,
                  size.width - burntStickWidth,
                  height
              ),
              Radius.circular(3)
          )
      );

    canvas.drawPath(path, paint);
  }
  @override
  bool shouldRepaint(CustomPainter oldDelegate) {
    return true;
  }
}
For the stick to be drawn we create a new CustomPainter called StickPainter. The StickPainter needs a height and a progress. progress is a value from 0 to 1 which indicates how far the stick has burnt yet. We use that information to draw two things: at first the burnt area that ranges from left to the point that is indicated by progress. Secondly we draw the intact stick on top, which ranges from the point denoted by progress to the right. We let the height of the burnt part be 75 % of the stick height. We create the illusion of the burnt part being hotter around the area it has just burned by implementing a gradient where the start and the end of the red color depend on the progress variable, making it start 5 % before the burning part and 10 % after that. Luckily, it's easy to implement because the stop values of a gradient expect values from 0 to 1 as well.
Now we need to add the StickPainter to the widget tree of the Sparkler. We take the Stack in which the particles are drawn and draw the StickPainter as the first object with the particles being drawn on top.
    particles.add(
      CustomPaint(
        painter: StickPainter(
          progress: progress
        ),
        child: Container()
      )
    );
Final words
Using a CustomPainter and a brief list of requirements that is backed by observations of the reality, we were able to implement a sparkler animation.
If we wanted to use this as a progress indicator, we could give the Sparkler widget a public method to increase the progress. This would immediately affect the animation and push the focus further to the right.

Posted on July 18, 2020
Join Our Newsletter. No Spam, Only the good stuff.
Sign up to receive the latest update from our blog.
