Increase your productivity with the Github CLI

Falcão
Posted on February 26, 2024

If you use Github on a daily basis and still don't know about the Github CLI, I recommend you to keep reading this article. Today we are going to learn how to increase our productivity and quality of life when working with issues, pull requests, actions, and more!
Table of contents
- Instalation
- Authenticating
- Repositories
- Issues
- Pull requests
- Aliases
- Actions
- Learning more
- Extensions
- Conclusion
Instalation
Before we start, we need to install the CLI to be able to use it, as there are many operating systems in this beautiful world, I will leave here a link to the installation guide from Github itself.
With the tool installed, we can check the version with the command:
gh --version
Authenticating
After installing, we need to authenticate to be able to enjoy the tool, this is done with the command:
gh auth login
To verify that you are indeed logged in, run this command:
gh auth status
A message saying that you are logged to Github in your account should appear.
Repositories
With the Github CLI, we can clone, fork, list, view a repository, and much more.
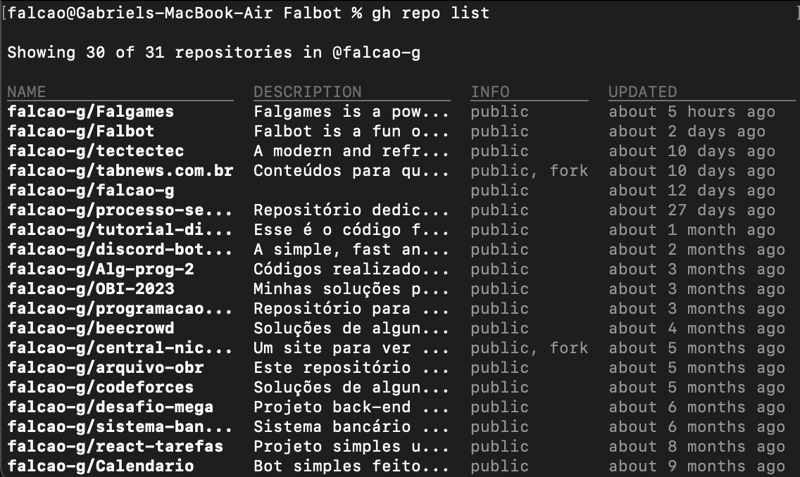
Let's say we would like to see all our repositories, we can use the gh repo list command.
This is the command output, a very friendly little table that shows the names, descriptions, and some other information of all my repositories, note that it says it is showing 30 of 31, this is because this command only shows repositories in which I am the owner, the 31st is a repository that I am only a contributor, so it is not shown.
We can also create a repository, with gh repo create, this command helps a lot to simplify the process of creating and setting up a completely new repository:
Cloning is also simplified, we can do it the way we are already used to with git, using the repository URL:
Or even better, doing gh repo clone OWNER/REPO:
With gh repo fork, the syntax is the same.
With this command, we can also archive, delete, rename, and sync repositories and more!
Issues
We work a lot with different issues daily, the CLI also makes our life easier in this regard, removing the need to leave the terminal to open/view/list/comment etc.
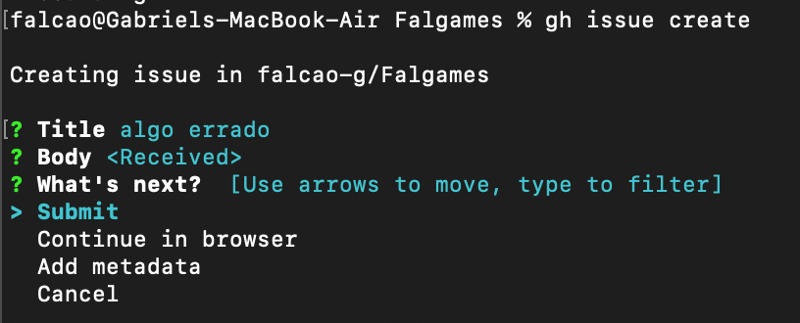
As expected, to create an issue, we use gh issue create:
Similarly, if we want to see the issues created, we use gh issue list:
If we want to see only issues with a specific label, we can use the --label flag, for example, to see only issues with the "bug" label, we can do gh issue list --label=bug (in my case the only issue is already a bug, but it works!).
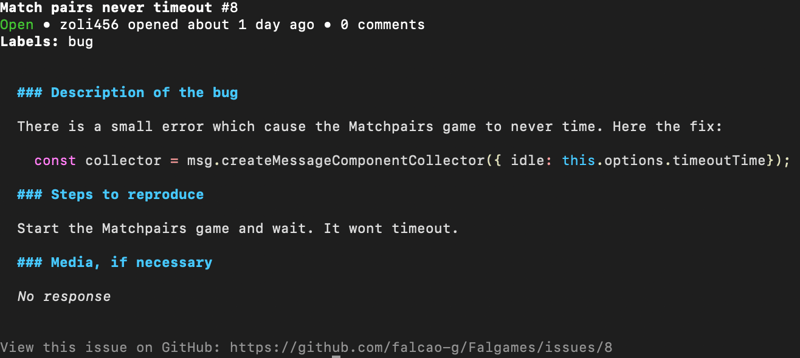
To get more information about a specific issue (for example, the real issue instead of just the title and label), we use the gh issue view <issue_number> command:
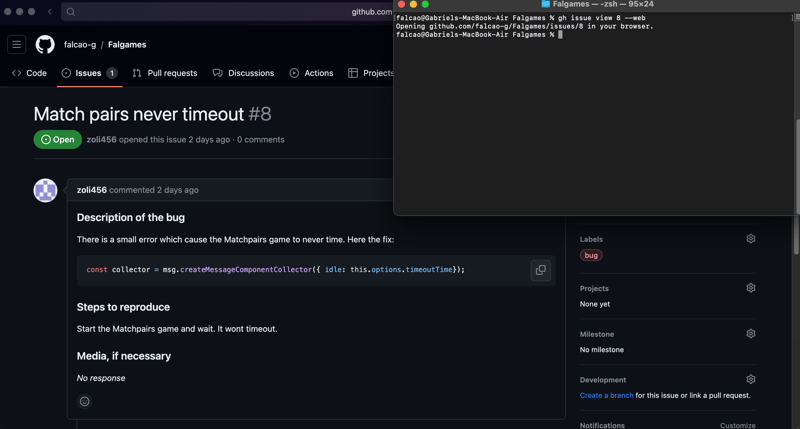
In this case, the information is easily understood by the terminal itself, however, sometimes we have larger media or texts and seeing the issue through github would be better, for that we can use the --web flag.
We can comment on open issues using the gh issue comment <issue_number> command:
Additionally, it is also possible to close, reopen, delete, pin issues and much more.
Pull requests
By far, what I like most about using the CLI is how much it simplifies working with pull requests, for example, let's say we have a new branch with changes already committed and now we want to create a PR for the repository, instead of going through the hassle of uploading a new branch and creating it through the site, we can simply do gh pr create.
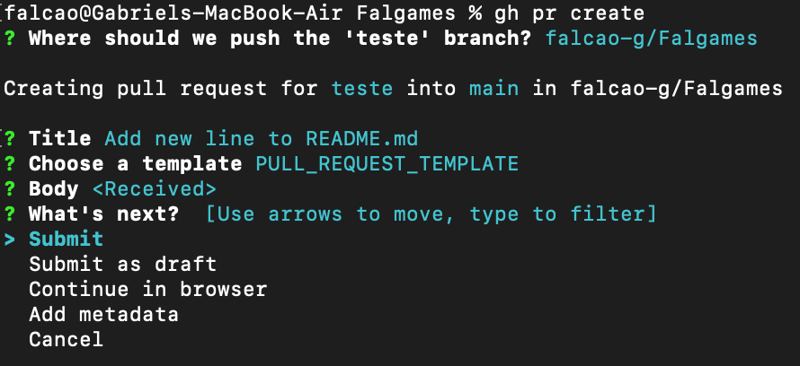
If we need to add some kind of media, we can simply continue in the browser, but all the information will already be there.
Just like in issues, we can also use gh pr list and gh pr view, to list all pull requests and see more details about a specific one respectively.
Imagine that someone has just opened a PR in the repository, and now? how to test the code? It is possible to check out locally with gh pr checkout <pr_number>, so your git will create a new branch in your local repository, with all the changes presented in the pull request:
It is also possible to comment on a pr with gh pr comment <pr_number>:
Now let's say you do have checks configured for new pull requests, such as linters or automated tests, you can check the status of a specific pr with gh pr checks <pr_number>:
In addition, we can also review, mark a pull request as ready for review, close, reopen, merge, and more, all through the terminal.
Aliases
Like any terminal tool, it's always good to create aliases for commands you use frequently, we can do this using the gh alias set command. For example, let's create an alias called "bugs", which will show us only the issues with the "bug" label, to achieve this just type in the terminal:
gh alias set bugs 'issue list --label=bug'
Now we can at any time type "gh bugs" in the terminal and see all related issues :)
Additionally, we can delete an existing alias with gh alias delete <name> or view all created aliases with gh alias list.
Actions
If you use Github Actions, another power of the CLI is the ability to control and view relevant information directly in the terminal, with gh run and gh workflow, the difference is that workflow refers to the files and run the runs that the actions have already had.
To list all recent runs, we use gh run list:
We can also see details of a run or jobs using gh run view:
The same goes for workflow, however, with this subcommand we can also use enable and disable, to enable and disable a specific workflow file.
If your workflow receives the workflow_dispatch event, it is possible to activate it manually with the command:
gh workflow run
Learning more
We only scratched the surface of what the Github CLI is capable of, some of the other features that we can manipulate with this tool include: releases, projects, organizations, labels, gists, Github Actions variables, and more!
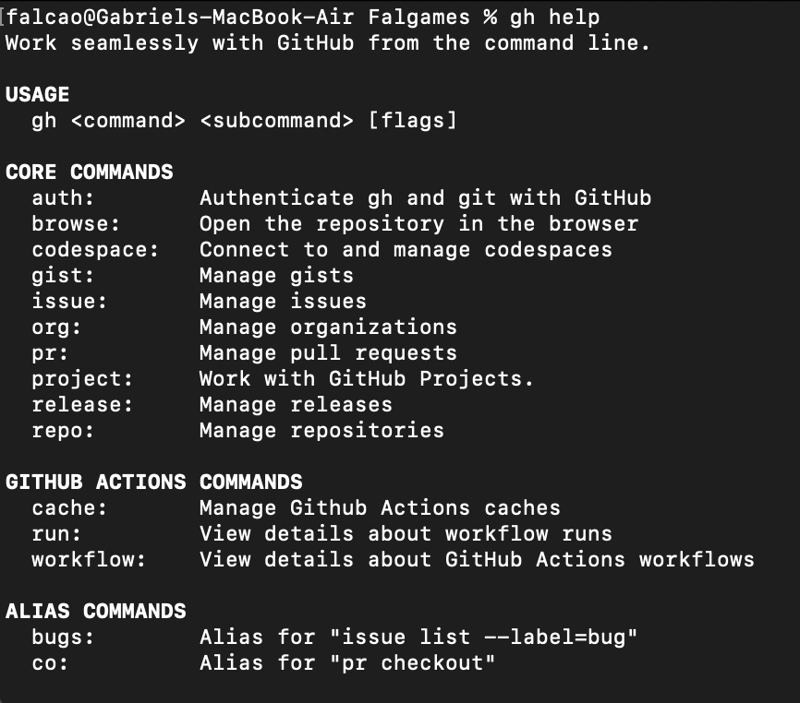
To better understand how it can help you in your day-to-day life as a developer, I recommend exploring the existing commands with gh help:
Note that our alias commands also appear here, which is a nice addition.
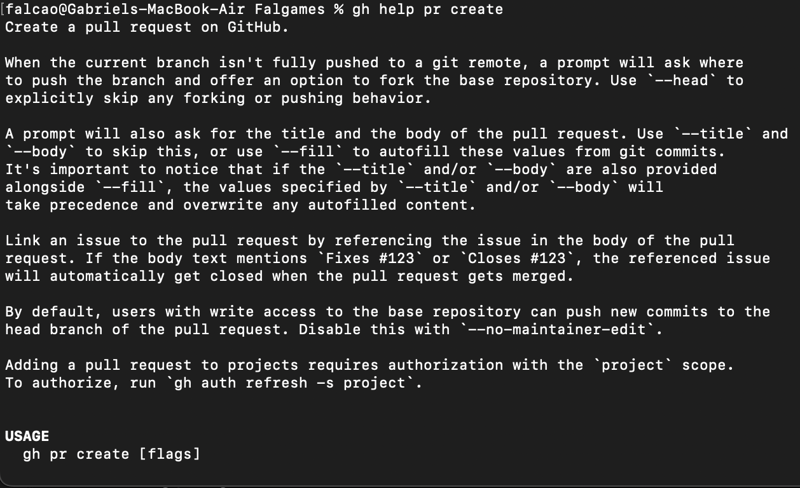
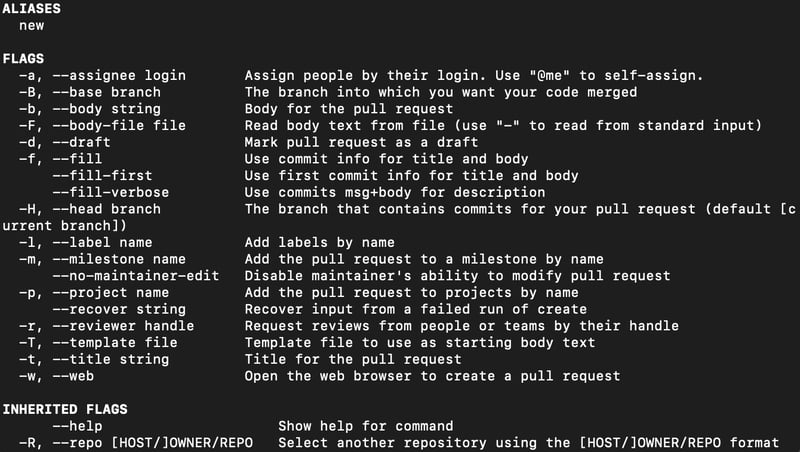
If our doubt is about a specific command or subcommand, we can always use the syntax gh help <command> <subcommand>, for example:
We got a super detailed description of exactly what this command does, the available flags, the aliases, examples, and more information!
Extensions
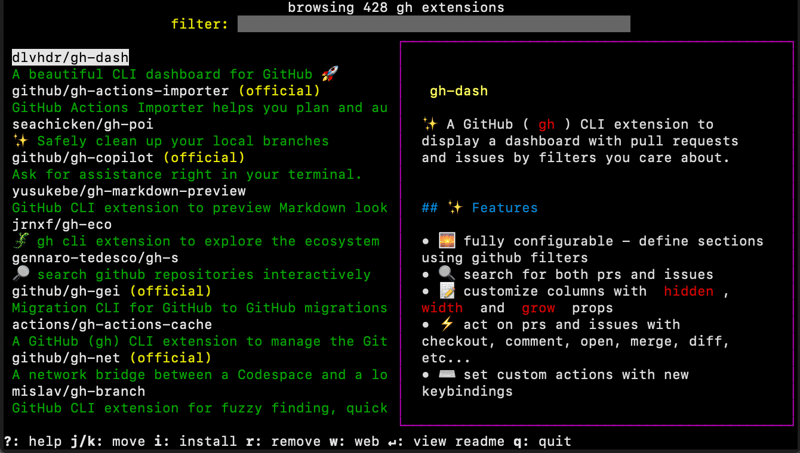
Every good tool needs to have extensions made by the community, and here it is no different, we have several official and community-made extensions to further boost your CLI. To start, use the command:
gh extensions browse
Here we can see all the extensions, see their repositories, and install them if we want, if you want to find a specific extension, you can use the search subcommand:
Installed an extension and now decided you don't want it anymore? No problem, just use the gh extensions list command to see all installed extensions and gh extensions remove to remove one of them:
Conclusion
I hope you enjoyed this article! I personally use this tool daily and it has helped me a lot, especially in open source projects, I hope it can help you too.
If you want to read more about it, here is the official manual.
If you have any questions, suggestions, or feedback, feel free to leave a comment, I will be happy to answer, thank you for reading!

Posted on February 26, 2024
Join Our Newsletter. No Spam, Only the good stuff.
Sign up to receive the latest update from our blog.
