Keeping OSS documentation with Docsify, Lefthook, and friends

Vladimir Dementyev
Posted on September 2, 2019
"A program is only as good as its documentation."—Joe Armstrong, the author of the Erlang programming language
What makes a good open source project? If you are into Ruby, you can check out all the best practices in one place at Gem Check (created by yours truly). But even regardless the language or the stack—one thing is vital for all OSS projects: documentation.
All open source projects, independently of the size, must be documented (even the now-deprecated, infamous left-pad is documented). In most cases, a well-crafted README is more than enough, but you can go further and create an "awesome readme".
However, as the project grows, README-backed documentation stops working. We might say "Rails README doesn't scale!". And we will be right.
This brings us to a question: "What scales better than a single markdown page?"
In this text, I am sharing my answer to that.
In the Beginning, There Was Chaos
Before we start talking about docsify, let me show you some other tools I used, before settling on the one and only.
GitHub Wiki
My first project to outgrow its README was AnyCable. Without giving it much thought, I started moving bits of documentation into the GitHub's built-in wiki (it's still there, for older versions of the gem). If we already have the tool—that's the way to go, right? Well, not necessarily.
It turned out that the fact that GitHub wiki is built-in is the only advantage, while the list of cons drags on:
- Updating code and docs independently is likely to lead to inconsistency.
- Web editor has much to be desired; you cannot easily upload images, for example (technically it is possible, but it requires cloning the wiki repo).
- Cross-references are easy to break just by changing a title; there is no way to have a permanent URL (or I was missing something).
docs folder
One way to resolve all the Wiki weak points (see the pun?) at once is to create a docs folder in the repo and populate it with markdown files. GitHub displays .md files with formatting when you open them in your browser. And you can also edit the contents right from the web UI! If that's the case, why use the wiki feature at all?
So, we found a good way to store the documentation contents. But what about the UI/UX? Don't we want to make our documentation more user-friendly (for example, add searching functionality)? Yes, we do.
Let's convert our GitHub-driven docs to web format.
Jekyll & GitHub Pages
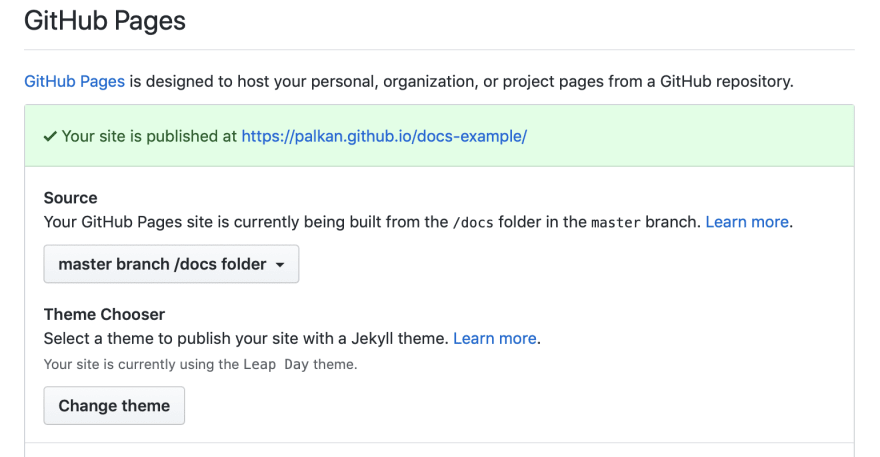
GitHub helps with setting up a documentation website backed by Jekyll in a few clicks: go to "Settings" -> "GitHub Pages," choose the source for the website (we use the docs folder) and pick a Jekyll theme to your liking.
Now visit the URL from the Settings page and find your brand new documentation website there!
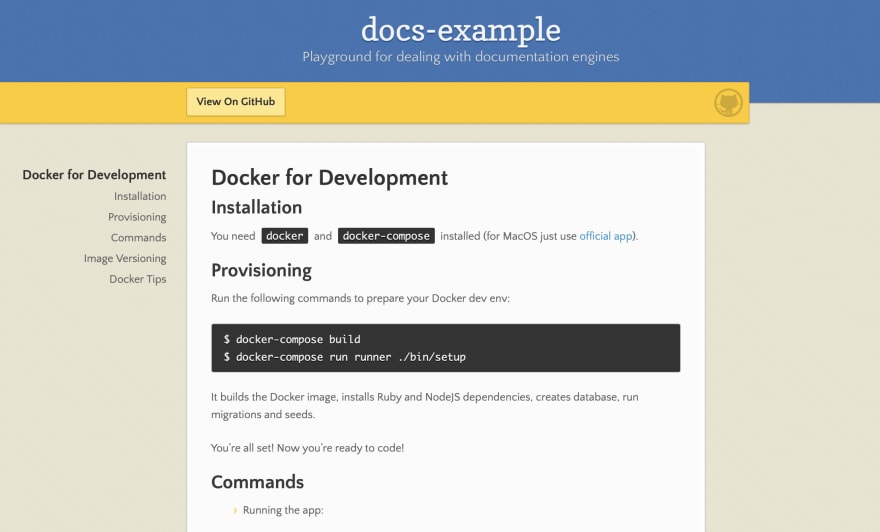
Unfortunately, the GitHub Pages Jekyll integration is limited, especially in terms of the available plugins. You cannot go far with it. And, in my opinion, Jekyll is a bit too complicated if you want to customize the looks of your page or add some interactivity.
Let's check out modern tools.
Docusaurus
The first modern documentation generator I have tried was Docusaurus. We built the Clowne's gem documentation with it.
But I have to admit that the experience was not so pleasant:
- Given the fact that the library is built with React, I expected it to have more straightforward customization options. However, you don't really get access to internals and library authors don't want you to do the serious tweaking.
- At the time of my first usage, it did not have the support for live reload, which is crucial for local development (now it seems to be fixed).
- It requires a separate building step (
yarn run build).
So I started looking for other options and found docsify.
Docsifying documentation
Docsify uses a different approach, compared to Jekyll or Docusaurus, to "generating" a website: it renders markdown files on the fly, and does not require a build phase.
There is also support for Server-side rendering and even for offline mode.
To "docsify" your docs, you need to do the following:
- Add
docs/.nojekyllfile to disable Jekyll. - Add
index.htmlthat loads and configure docsify:
<!DOCTYPE html>
<html>
<head>
  <meta http-equiv="X-UA-Compatible" content="IE=edge,chrome=1">
  <meta name="viewport" content="width=device-width,initial-scale=1">
  <meta charset="UTF-8">
  <link rel="stylesheet" href="//unpkg.com/docsify/themes/vue.css">
</head>
<body>
  <div id="app"></div>
  <script>
    window.$docsify = {
      loadSidebar: true,
      subMaxLevel: 2,
      repo: 'palkan/docs-example',
      basePath: '/docs-example/',
      auto2top: true,
      homepage: 'https://raw.githubusercontent.com/palkan/docs-example/master/README.md'
    }
  </script>
  <script src="//unpkg.com/docsify/lib/docsify.min.js"></script>
  <script src="//unpkg.com/prismjs/components/prism-bash.min.js"></script>
  <script src="//unpkg.com/prismjs/components/prism-ruby.min.js"></script>
</body>
</html>
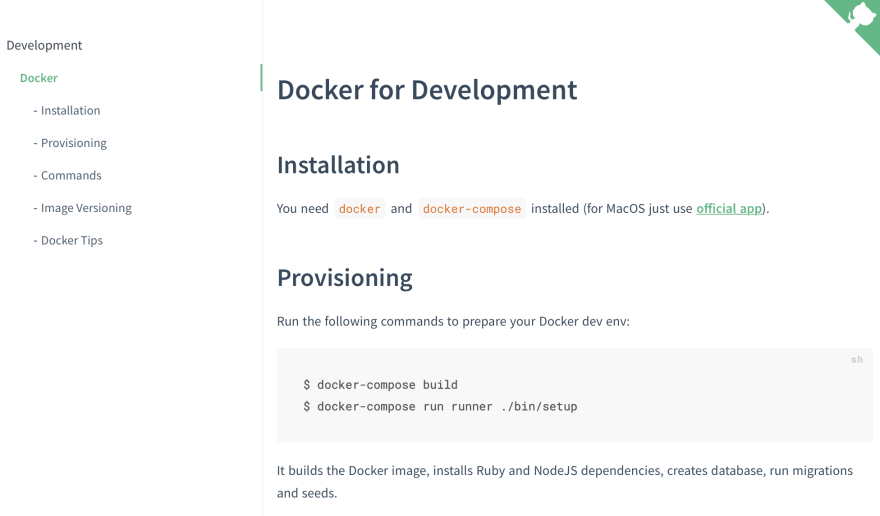
And that is it! Now you have something like this:
Note that I have added some specific configuration options:
-
basePath: '/docs-example/defines the root path of your website (which is the repo name for personal projects on GitHub Pages); -
homepage: '...'is set to the repo's README (by default docsify uses thedocs/README.mdfile); that allows us to keep both home pages (GitHub and web) in sync.
And that's just the beginning! One of the main advantages of docsify is the simplicity of adding useful features via plugins.
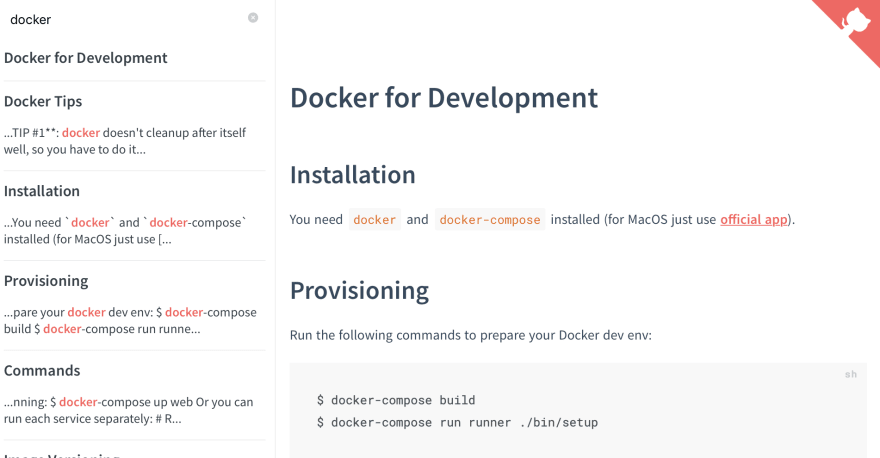
Let's add a searching functionality.
All we need is to add these two lines of code:
 window.$docsify = {
   loadSidebar: true,
   subMaxLevel: 2,
+  search: 'auto',
   repo: 'palkan/docs-example',
   basePath: '/docs-example/',
   auto2top: true,
   homepage: 'https://raw.githubusercontent.com/palkan/docs-example/master/README.md'
   }
 </script>
 <script src="//unpkg.com/docsify/lib/docsify.min.js"></script>
 <script src="//unpkg.com/docsify/lib/plugins/search.min.js"></script>
 <script src="//unpkg.com/prismjs/components/prism-bash.min.js"></script>
 <script src="//unpkg.com/prismjs/components/prism-ruby.min.js"></script>
And voilà! We can search through our documentation! The searching is implemented on the client side and is backed by indexes saved to localStorage.
Another thing I like about docsify is the ease of customizing styles: the library uses CSS properties, thus making it possible to change colors and layouts without building your own CSS!
You can change the color and font sizes right in your index.html:
<style>
  :root {
    --theme-color: #ff5e5e;
    --theme-color-light: #fd7373;
    --theme-color-dark: #f64242;
    --theme-color-secondary: #ff5e5e;
    --theme-color-secondary-dark: #f64242;
    --theme-color-secondary-light: #fd7373;
    --text-color-base: #363636;
    --text-color-secondary: #646473;
  }
</style>
<body>
  ...
</body>
Isn't it awesome?
The code for the example above could be found on GitHub: palkan/docs-example.
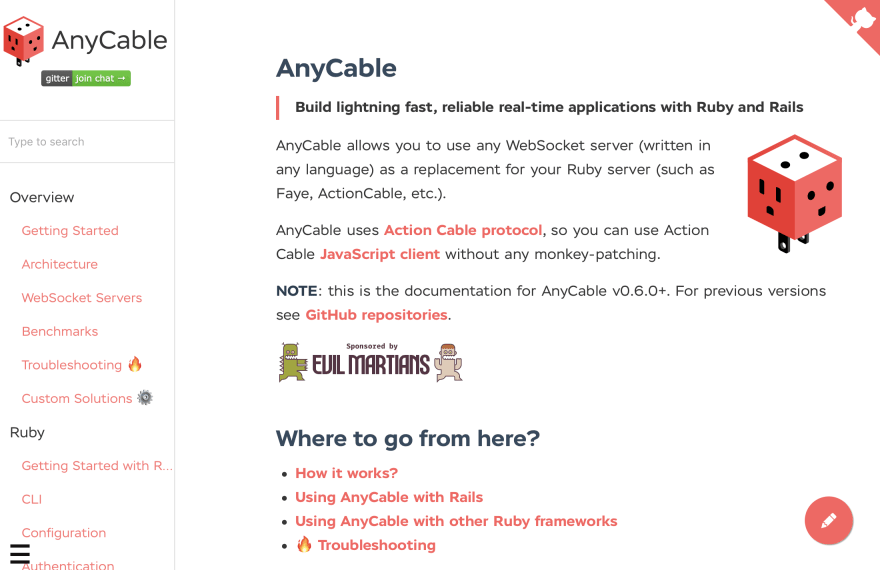
Check out AnyCable documentation website and the corresponding repo for a more advanced example!
Bonus*: you can find the implementation of the floating action button for "Edit on GitHub" functionality in this gist.
Keeping docs healthy with linters
In the second part of this tutorial, I would like to share my approach to keeping documentation in a healthy state. And by the "healthy state," I mean:
- Style consistency for source files (Markdown) and code examples (Ruby).
- Correct spelling.
- Valid code examples (from the syntax point of view).
- Valid links (no link should lead to 4xx/5xx).
It's not surprising that for all of the above there is an open source tool (and sometimes many).
Markdownlint helps me to enforce Markdown files style (there is also a NodeJS version and a VS Code plugin).
I also usually disable a couple of rules:
- Line length (
MD013)—modern editors (such as VS Code) could handle this by wrapping long lines. - HTML fragments—sometimes Markdown is not enough.
To do that I put a .mdlrc file in the project's root with the following contents:
rules "~MD013", "~MD033"
To deal with Ruby syntax I use RuboCop along with the rubocop-md plugin that I wrote specifically for this task. As a default style configuration, I've recently started using standard.
To make this setup work you need to:
- Install
standardandrubocop-mdgems (gem install standardandgem install rubocop-md) - Add a
.rubocop.ymlwith the following contents:
require:
  - standard/cop/semantic_blocks
  - rubocop-md

inherit_gem:
  standard: config/base.yml

Standard/SemanticBlocks:
  Enabled: false
- Run RuboCop.
For spellchecking, there is yet another Ruby tool—Forspell. It is a wrapper over a well-known Hunspell package.
Due to the number of technical terms, you may see a lot of warnings from Forspell during the first run:
$ forspell docs/

docs/development/lefthook.md:5: lefthook (suggestions: left hook, left-hook, leftmost)
docs/development/lefthook.md:9: lefthook (suggestions: left hook, left-hook, leftmost)
docs/development/lefthook.md:11: Hombrew (suggestions: Hombre, Hombres, Hombre w)
docs/development/lefthook.md:17: Golang (suggestions: Golan, Golan g, Angolan)
That could be easily fixed by running Forspell with the --gen-dictionary flag: it generates a forspell.dict file with all the unknown words. Don't forget to scan this file with your eyes and remove the actual typos.
Finally, to make sure that our documentation does not have any broken links, I use liche—a link checker for Markdown and HTML written in Go:
$ liche -r docs/

 ERROR    https://githb.com/palkan/anyway_config
                Dialing to the given TCP address timed out
Liche lacks some features I wish it had: for example, it does not warn about URLs responding with 404. Nevertheless, I found it a bit better than other existing tools.
In order to manage all these linters, I use Lefthook for local development and CircleCI for pull requests.
Here is the contents of my lefthook.yml, a file that stores Lefthook's configuration:
pre-commit:
  commands:
    mdl:
      glob: "**/*.md"
      run: mdl {staged_files}
    liche:
      glob: "**/*.md"
      run: liche -r docs
    forspell:
      glob: "**/*.md"
      run: forspell {staged_files}
    rubocop:
      glob: "**/*.md"
      run: rubocop {staged_files}
CirclCI configuration is a little bit more verbose, but does pretty much the same:
version: 2.1

workflows:
  version: 2
  build_and_test:
    jobs:
      - checkout
      - md_lint:
          requires:
            - checkout
      - links_lint:
          requires:
            - checkout
      - spelling:
          requires:
            - checkout
      - rubocop:
          requires:
            - checkout

executors:
  golang:
    docker:
      - image: circleci/golang:1.12.4-stretch
  ruby:
    docker:
      - image: circleci/ruby:2.5-stretch

jobs:
  checkout:
    executor: ruby
    steps:
      - restore_cache:
          keys:
            - project-source-v1-{{ .Branch }}-{{ .Revision }}
            - project-source-v1-{{ .Branch }}
            - project-source-v1
      - checkout
      - save_cache:
          key: project-source-v1-{{ .Branch }}-{{ .Revision }}
          paths:
            - .git
      - persist_to_workspace:
          root: .
          paths: .
  md_lint:
    executor: ruby
    steps:
      - attach_workspace:
          at: .
      - run:
          name: Install mdl
          command: gem install mdl
      - run:
          name: Markdown lint
          command: mdl docs
  links_lint:
    executor: golang
    steps:
      - attach_workspace:
          at: .
      - run:
          name: Install liche
          command: go get -u github.com/raviqqe/liche
      - run:
          name: Check links
          command: liche -r docs
  spelling:
    executor: ruby
    steps:
      - attach_workspace:
          at: .
      - run:
          name: Install hunspell
          command: sudo apt-get install hunspell
      - run:
          name: Install forspell
          command: gem install forspell
      - run:
          name: Check spelling
          command: forspell docs/
  rubocop:
    executor: ruby
    steps:
      - attach_workspace:
          at: .
      - run:
          name: Install standard
          command: gem install standard
      - run:
          name: Install rubocop-md
          command: gem install rubocop-md
      - run:
          name: Check Ruby style
          command: rubocop
The complete example can be found in the docs.anycable.io repo (see PRs #14 and #15).
It took me a while to come with this setup (literally, years). Now I can spin up a new documentation website in minutes. Hope you found this article useful and will consider using a similar approach next time you need web-based docs for your projects.
Documentation for the win!
Read more dev articles on https://evilmartians.com/chronicles!

Posted on September 2, 2019
Join Our Newsletter. No Spam, Only the good stuff.
Sign up to receive the latest update from our blog.


