How to fix CORS issue on AWS CloudFront + S3

Lloyd Marcelino
Posted on May 13, 2023

The error you're seeing, "No 'Access-Control-Allow-Origin' header", is related to a security feature in web browsers called the same-origin policy, which restricts how resources are shared between documents from different origins. This policy prevents a malicious script on one page from obtaining access to sensitive data on another web page through that page's DOM.
The error message is associated with CORS (Cross-Origin Resource Sharing), which allows many resources (e.g., fonts, JavaScript, etc.) on a web page to be requested from another domain outside the domain from which the resource originated.
In the context of Amazon CloudFront and S3, you often need to set up CORS correctly on your S3 bucket that you're using with CloudFront. Here's how you can do it:
Step 1: Set up CORS policy on your S3 bucket .
You need to add a CORS policy to your S3 bucket. This can be done in the AWS Management Console:
Sign in to your AWS Console account
Navigate to your bucket in the S3 console.
Click on the "Permissions" tab.
Scroll down to Cross-origin resource sharing (CORS) and click "Edit"
- Add a CORS policy. Here's a sample policy (this allows any domain to access your bucket, you might want to restrict this in a production environment):
[
    {
        "AllowedHeaders": [
            "*"
        ],
        "AllowedMethods": [
            "GET",
            "HEAD",
            "PUT",
            "POST",
            "DELETE"
        ],
        "AllowedOrigins": [
            "*"
        ],
        "ExposeHeaders": []
    }
]
- Click "Save changes"
Step 2: Modify your cache setting on CloudFront.
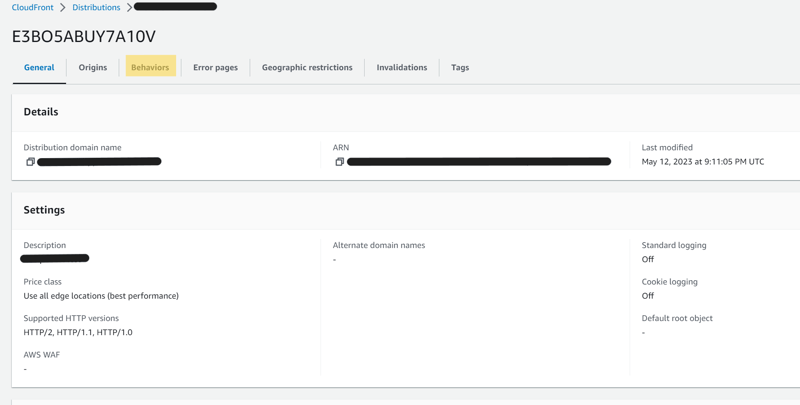
- Go to CloudFront and click your distribution.
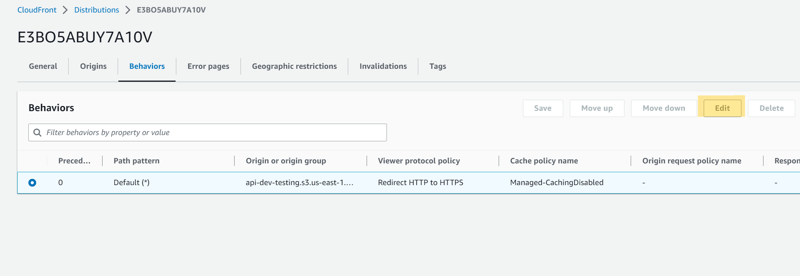
- Then from the menu click on "Behaviors"
- select your behavior and click "Edit"
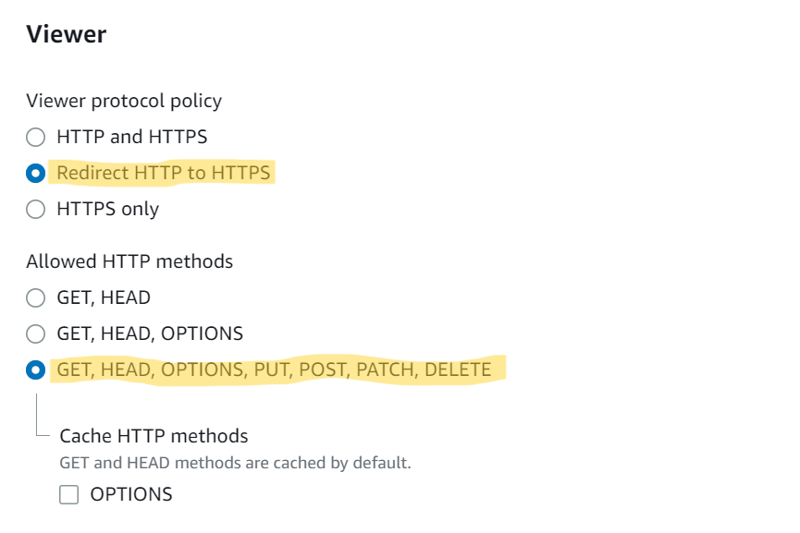
- scroll down to "Viewer", select "Redirect HTTP to HTTPS" and select "GET, HEAD, OPTIONS, PUT, POST, PATCH, DELETE"
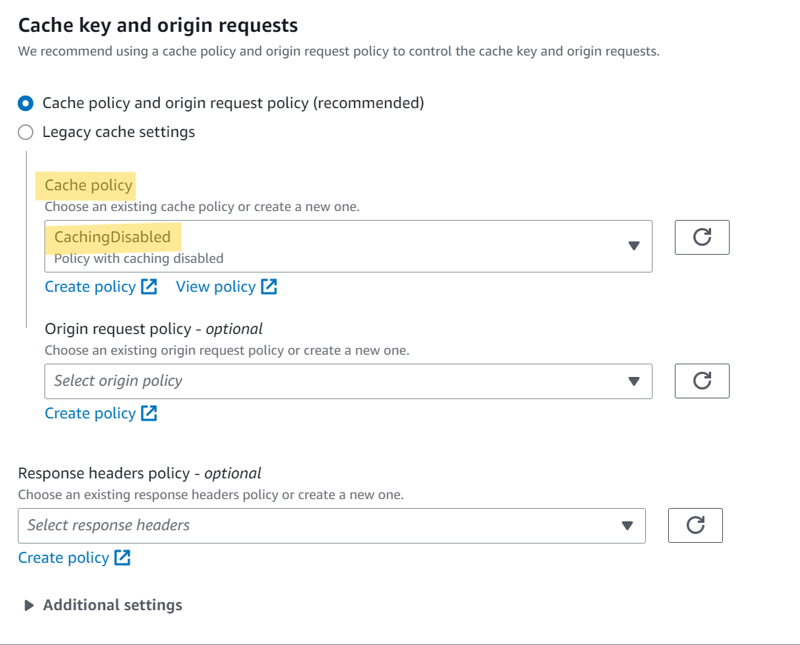
scroll down to Cache key and origin request, and select "CashingDisabled" from the Cache Policy dropdown.
click "Save changes"
wait for CloudFront to deploy (takes about 2-3 mins.) then YOU ARE DONE!
Please leave a comment below if you like these kind of blog post.

Posted on May 13, 2023
Join Our Newsletter. No Spam, Only the good stuff.
Sign up to receive the latest update from our blog.


