How to create a reactive form in Angular

Ennio Bozzetti
Posted on July 10, 2019
In this article, I will go over how to create an Angular reactive form. We will be making a login form. I will also demonstrate how we can easily add validation to our form.
Let’s set up our project
If you don’t have Angular already installed on your computer, go to Angular.io and follow the instructions on how to install Angular on your machine. You will also need an editor. My preferred editor is Visual Studio Code.
Let’s make a new Angular project. Open a command prompt and run the following command:
ng new <name>
Follow the steps on the prompt and once that is done you should have a new Angular application.
To test your new application, open the command prompt and type ng serve; wait a few seconds and then point your web browser to
Let’s do some coding
In your code editor, open app.component.html and replace all the code there with the following:
<div>
    <button [routerLink]="['/']">Home</button>
    <button [routerLink]="['login']">Login</button>
</div>
The above source code will add the login button. If you click on the login button you will get the following error: Error: Cannot match any routes. URL Segment: 'login' Error: Cannot match any routes. URL Segment: 'login'
To fix this error we need to make a new component and create a new route. Open your command prompt and enter the following command: ng g component /login to generate the login component code. Next, open app-routing.modules.ts file and make a new route called login. Your route should look like this
import { NgModule } from '@angular/core';
import { Routes, RouterModule } from '@angular/router';

import { AppComponent } from './app.component';
import { LoginComponent } from './login/login.component';

const routes: Routes = [
  {path: 'login', component: LoginComponent}
];

@NgModule({
  imports: [RouterModule.forRoot(routes)],
  exports: [RouterModule]
})
export class AppRoutingModule { }
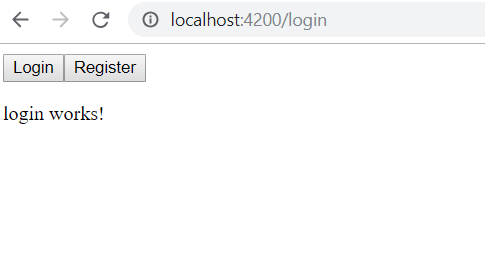
Type ng serve and open your browser. If you click on the login button now, you will not get the error message and you should see a message on the page saying login works!
Now that we have our route working let’s make an Angular reactive form. Open the login.component.ts file and type the following code:
import { Component, OnInit } from '@angular/core';

import { FormGroup, FormControl, Validator, Validators } from '@angular/forms';

@Component({
  selector: 'app-login',
  templateUrl: './login.component.html',
  styleUrls: ['./login.component.scss']
})
export class LoginComponent implements OnInit {

  loginForm = new FormGroup({
    userName: new FormControl('', Validators.compose([Validators.required])),
    password: new FormControl('', Validators.compose([Validators.required]))
  });

  constructor() { }

  ngOnInit() {
  }
}
We now have a FormGroup that contains two FormControls, one for the username input and another one for the password input. In our login.component.html we can use the following HTML code to display the form on the browser.
<form [formGroup]="loginForm" class="myForm">
  Username:
  <input type="text" formControlName="userName">
  Password:
  <input type="password" formControlName="password">
  <button type="submit">Login</button>
</form>
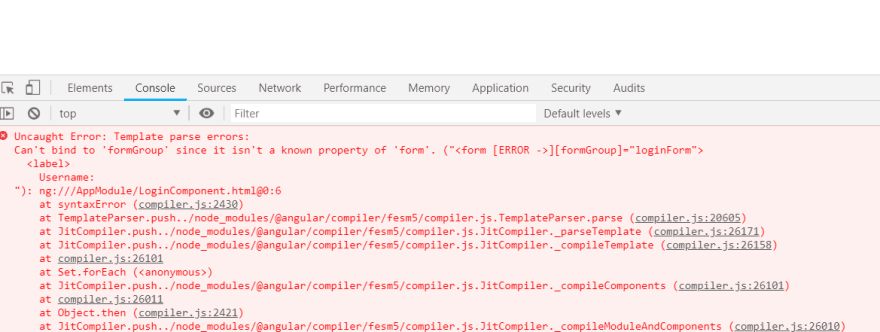
Open your browser and you should see an error message in your developer console saying that it can’t bind to ‘formGroup’ since it isn’t a known property of ‘form’.
That is because we did not include the ReactiveFormModules to our app.module.ts, so add the following code to your app.module.ts file.
import { BrowserModule } from '@angular/platform-browser';
import { NgModule } from '@angular/core';
import { ReactiveFormsModule } from '@angular/forms';

import { AppRoutingModule } from './app-routing.module';
import { AppComponent } from './app.component';
import { LoginComponent } from './login/login.component';
import { BrowserAnimationsModule } from '@angular/platform-browser/animations';

@NgModule({
  declarations: [
    AppComponent,
    LoginComponent
  ],
  imports: [
    BrowserModule,
    AppRoutingModule,
    ReactiveFormsModule,
    BrowserAnimationsModule
  ],
  providers: [],
  bootstrap: [AppComponent]
})
export class AppModule { }
If you go back to your browser, you should notice that there are no more errors in the developer console.
If you click on the login button nothing happens. We will need to create a function and call it when the form is submitted. Open login.component.htm and add the following to the form tag (ngSubmit)=”doLogin(loginForm)” In login.component.ts we a function called doLogin that accepts a parameter of type formGroup. Here is the code for the function:
login.component.html
<form [formGroup]="loginForm" (ngSubmit)="doLogin(loginForm)" class="myForm">
  Username:
  <input type="text" formControlName="userName">
  Password:
  <input type="password" formControlName="password">
  <button type="submit">Login</button>
</form>
login.component.ts
import { Component, OnInit } from '@angular/core';

import { FormGroup, FormControl } from '@angular/forms';

@Component({
  selector: 'app-login',
  templateUrl: './login.component.html',
  styleUrls: ['./login.component.scss']
})
export class LoginComponent implements OnInit {

  loginForm = new FormGroup({
    userName: new FormControl(''),
    password: new FormControl('')
  });

  constructor() { }

  ngOnInit() {
  }

  doLogin(formData: FormGroup) {
    console.log(formData);
  }
}
Make sure you have the developer console open in your browser and click the login button on your form. The console displays the FormGroup output. Click on the arrow on the left to expand the FormGroup properties.
Now that we have our login form working, let’s make it prettier. We will be using Angular Material, so we must first install it. For more information about Angular Material visit their website at https://material.angular.io. Type the following command on the command line.
ng add @angular/material
Once the install is done, we can import the theme we want to use. Add the following line to your styles.scss.
@import "~@angular/material/prebuilt-themes/indigo-pink.css";
Let’s replace the code in the following files:
Login.component.html
<mat-card class="loginCard">
  <mat-card-content>
    <form [formGroup]="loginForm" (ngSubmit)="doLogin(loginForm)" class="myForm">
      <mat-form-field class="fullWidth">
        <mat-label>
          Username:
        </mat-label>
        <input matInput type="text" formControlName="userName">
      </mat-form-field>
      <mat-form-field class="fullWidth">
        <mat-label>
          Password:
        </mat-label>
        <input matInput type="password" formControlName="password">
      </mat-form-field>
      <button mat-button type="submit">Login</button>
    </form>
  </mat-card-content>
</mat-card>
Login.component.scss
.loginCard {
  width: 400px;
  margin-left: auto;
  margin-right: auto;
}

.myForm{
  min-width: 150px;
  max-width: 500px;
  width: 100%;
}

.fullWidth {
  width: 100%;
}
App.component.html
<mat-toolbar color="primary">
  <mat-toolbar-row>
    <button mat-button [routerLink]="['/']">Home</button>
    <button mat-button [routerLink]="['login']">Login</button>
  </mat-toolbar-row>
</mat-toolbar>

<router-outlet></router-outlet>
App.module.ts
import { BrowserModule } from '@angular/platform-browser';
import { NgModule } from '@angular/core';
import { ReactiveFormsModule } from '@angular/forms';

import { AppRoutingModule } from './app-routing.module';
import { AppComponent } from './app.component';
import { LoginComponent } from './login/login.component';
import { BrowserAnimationsModule } from '@angular/platform-browser/animations';

// MATERIAL
import { MatCardModule } from '@angular/material/card';
import { MatFormFieldModule } from '@angular/material/form-field';
import { MatInputModule } from '@angular/material/input';
import { MatButtonModule } from '@angular/material/button';
import { MatToolbarModule } from '@angular/material/toolbar';

@NgModule({
  declarations: [
    AppComponent,
    LoginComponent
  ],
  imports: [
    BrowserModule,
    AppRoutingModule,
    ReactiveFormsModule,
    BrowserAnimationsModule,
    MatCardModule,
    MatFormFieldModule,
    MatInputModule,
    MatButtonModule,
    MatToolbarModule
  ],
  providers: [],
  bootstrap: [AppComponent]
})
export class AppModule { }
Build the application using ng serve and you will see a navigation header with the login form centered on the page.
Now that we have our login form looking nicer, we can add some form validation to ensure the user enters valid data.
Add the following code to login.component.ts.
import { Component, OnInit } from '@angular/core';

import { FormGroup, FormControl, Validator, Validators } from '@angular/forms';

@Component({
  selector: 'app-login',
  templateUrl: './login.component.html',
  styleUrls: ['./login.component.scss']
})
export class LoginComponent implements OnInit {

  loginForm = new FormGroup({
    userName: new FormControl('', Validators.compose([Validators.required])),
    password: new FormControl('', Validators.compose([Validators.required]))
  });

  constructor() { }

  ngOnInit() {
  }

  doLogin(formData: FormGroup) {
    console.log(formData);
  }
}
When you go back to the login page and click the login button, you will notice that the inputs will turn red, and if you open the console window in your browser, you can that the FormGroup valid property is set to invalid. This is because the username and password input was set to be required in the FormGroup.
Go back to the form and enter a username and password and click on login. You will see that the Formgroup valid property is now set to true in your console.
Conclusion
You now know how to create reactive forms. You could easily add multiple validators if you wanted to and even create your own custom validator. In my next article, I will show you how to create a login form that uses Firebase Authentication and we will also make a registration form that connects to Firebase as well.

Posted on July 10, 2019
Join Our Newsletter. No Spam, Only the good stuff.
Sign up to receive the latest update from our blog.
Related
November 2, 2024


