bowlerdesign.tech
Posted on November 16, 2020
Introduction
This article will cover setting up your own self-hosted Bitwarden instance with Docker and configuring ngnix to allow for public exposure for cross-device access to your vault.
What is Bitwarden?
Bitwardenis a free and open-source password management service that stores sensitive information such as website credentials in an encrypted vault. The Bitwarden platform offers avariety of client applicationsincluding a web interface, desktop applications, browser extensions, mobile apps, and a CLI.
I use Bitwarden as my main password vault. It stores my card details for automating the filling out of payment forms. Saves me from having to find or remember my card details. I also use Bitwarden for storing all of my passwords.
Having Bitwarden as a public endpoint means that I can connect to my password vault using the Bitwarden app on Android, specifying my self hosted instance.
Setting up the Bitwarden Server
This section of the tutorial is to set up the main Bitwarden 'hub'. This will be a publicly exposed Bitwarden API that will live on your server.
Step 1: Setting up your Linux server
You'll need to either have an existing server instance or create one. I use a Proxmox instance running on a server in my loft. You could also use something like Digital Ocean to host your Bitwarden Server. Using the following link will give you $100 worth of credits for 60 days to play around with, just sign up using this link.
Once you have the server set up, or have logged in. You'll need to do some updates and run some prerequisite installs.
sudo apt-get update
sudo apt-get upgrade
sudo apt-get install docker.io
sudo apt-get install docker-compose
Step 2: Provisioning your Bitwarden Server
Next, you'll need to create a new folder, this will house your Bitwarden Server, you can call it anything memorable. I'll just call mine bitwarden
cd ~
mkdir bitwarden
cd bitwarden
Next, you'll need to create a docker-compose.yml file. This is an orchistration file which docker-compose will use to provision your Docker instance.
touch docker-compose.yml
Next, you'll need to edit your docker-compose.yml file and paste in the following content.
# docker-compose.yml
version: '3'

services:
  bitwarden:
    image: bitwardenrs/server
    restart: always
    ports:
      - 80:80
    volumes:
      - ./bw-data:/data
    environment:
      WEBSOCKET_ENABLED: 'true' # Required to use websockets
      SIGNUPS_ALLOWED: 'true' # set to false to disable signups
I'm using bitwarden_rs as it's written in Rust, faster and more reliable. Also entirely opensource with a heavy user-base.
Save your docker-compose.yml file and exit back to your bitwarden directory.
Step 3: Running your Bitwarden Server locally
Now, you have everything provisioned for running your Bitwarden Server.
The next thing to do is run it.
sudo docker-compose up -d
This will start up your Bitwarden Server inside Docker, it may take some time to pull down the images.
You can eventually see your instance running by executing the following
sudo docker ps
This will list your running instance.
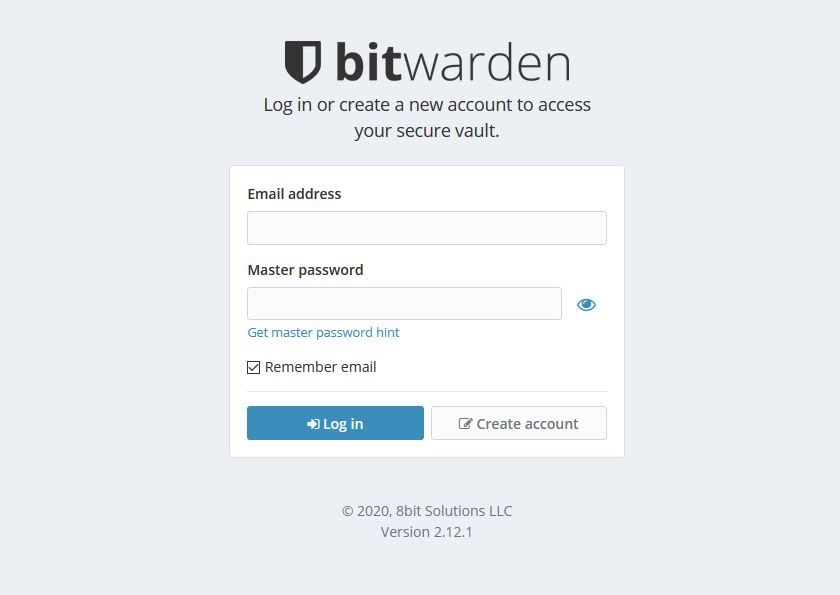
If all is well, you can locally view your Bitwarden Server by navigating to http://localhost:PORT. Or from another machine by using your ip address instead of localhost
You should see something that looks like the following.
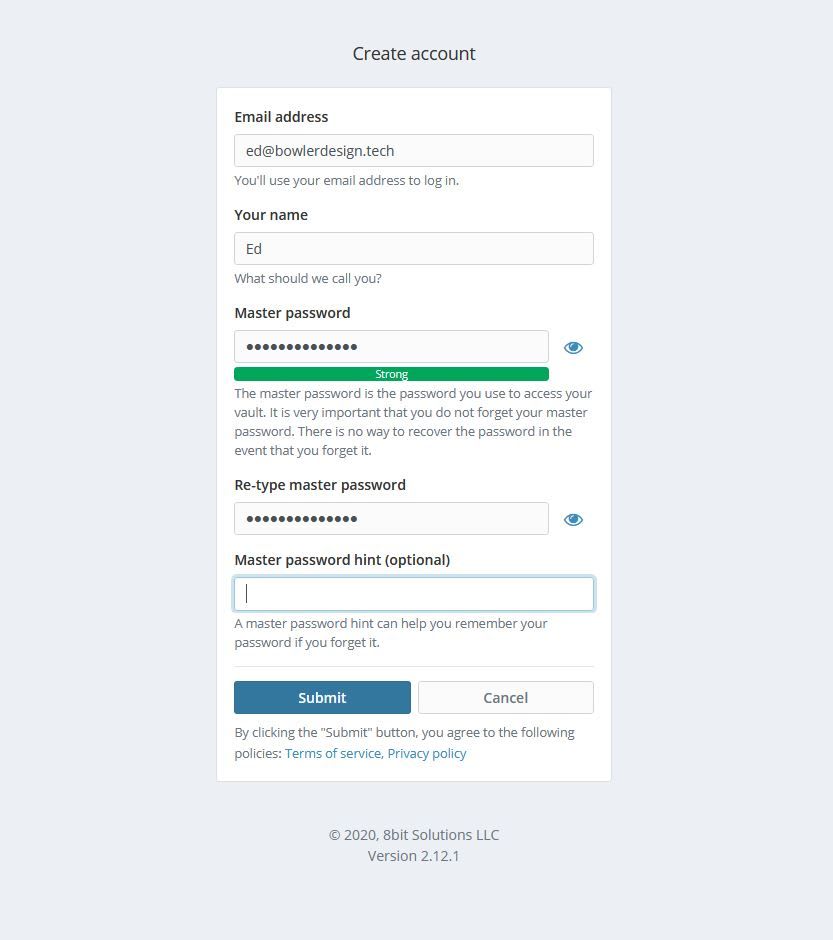
Finally, you'll just need to register for an account on your new hosted instance.
Click the Create Account button
Then fill out your details. If you have an existing Bitwarden account, you'll still have to create a new account on this instance. You can then Export and Import between accounts.
The last thing to do is hit Submit
Step 4: Exposing your new server publicly
This part may sound scary, but it is required to allow your Bitwarden Clients (Android, iOS, Chrome extension etc) to connect to your server.
We're going to be using nginx.
Setting up nginx
Nginx is a reverse proxy that allows you to point incoming web traffic to your new Bitwardeb server.
Firstly, install nginx if you haven't already
sudo apt-get install nginx
If you have UFW installed, you will have to Allow Nginx through your local firewall.
I have a tutorial for setting up UFW here
sudo ufw app list

Output
---

Available applications:
  Nginx Full
  Nginx HTTP
  Nginx HTTPS
  OpenSSH
As you can see, there are three profiles available for Nginx:
- Nginx Full : This profile opens both port 80 (normal, unencrypted web traffic) and port 443 (TLS/SSL encrypted traffic)
- Nginx HTTP : This profile opens only port 80 (normal, unencrypted web traffic)
- Nginx HTTPS : This profile opens only port 443 (TLS/SSL encrypted traffic)
It is recommended that you enable the most restrictive profile that will still allow the traffic you’ve configured. Since we will be configuring SSL for our server we will need to allow traffic on port 443.
You can enable this by typing:
sudo ufw allow 'Nginx HTTPS'
Next thing to do is just double check your nginx server is up and running
sudo systemctl status nginx
You should see something that looks like the following
● nginx.service - A high performance web server and a reverse proxy server
   Loaded: loaded (/lib/systemd/system/nginx.service; enabled; vendor preset: enabled)
   Active: active (running)
...
The next part allows us to take incoming traffic and point it to your container instance. Allowing you to expose your Bitwarden server to the internet.
Navigate to /etc/nginx/
cd /etc/nginx/
Use your favorite text editor and open the following file with sudo
sudo vim nginx.conf
I use the following code for my syncing server
server {
    listen 443;
    listen [::]:443;
    server_name vault.bowlerdesign.tech;

    location / {
        proxy_pass http://127.0.0.1:3000; # bitwarden server address
    }
}
Port-forwarding
You will need to port forward your instance to allow public access to your instance. This will involve googling how to port forward from your router.
You'll need to point port 443 to your instance where nginx is set up.
Linking Bitwarden Server with your public domain
You will also need to set up a public domain name. This can then be used to call your new public instance with port 443 exposed.
For example, I would set up a subdomain on bowlerdesign.tech to be vault.bowlerdesign.tech. Notice this is also the domain I specified in my nginx config above.
Here's something to search for with regards to setting up a domain name
Setting up Certbot
Certbot allows us to generate SSL certificates for free with Let's Encrypt. It's simple to install and use. Even hooks in with nginx, meaning that there's no more manual configuration required.
To install Certbot, simply run the following command
sudo apt-get install certbot
Then, to set up your SSL certificate, run
sudo certbot
Follow the instructions, select your domain name from the nginx list.
Also, select redirect as this will upgrade any http requests to https.
Step 5: Connecting to your new Bitwarden instance from a client.
I'm going to use the Firefox Bitwarden Plugin for this part of the tutorial. But the process is identical for all Bitwarden clients.
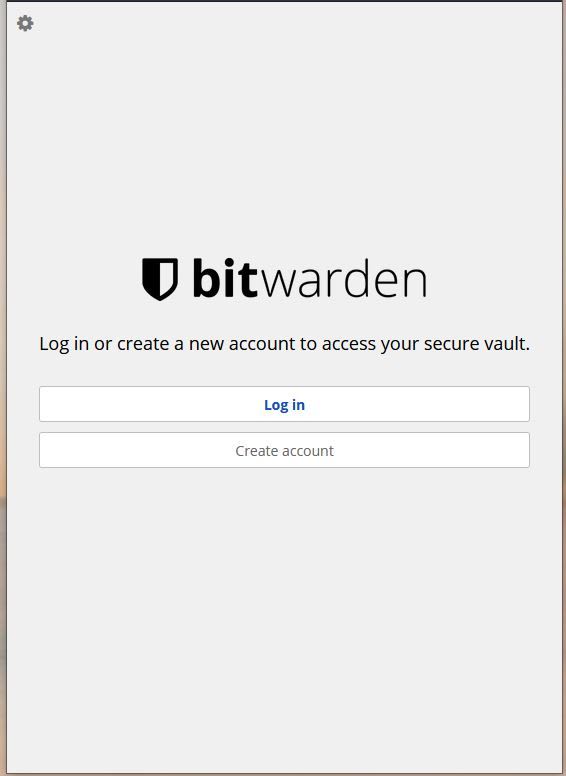
First, if you haven't already, install your chosen Bitwarden client and open it.
In the top left corner, click the cog icon
You'll then get some configuration. Simply add your full url into the Server URL field
Like so, then just hit Save and log in as normal
That's it
Pretty easy right?
Please don't hesitate to get in touch in the comments if you get stuck. I'd be more than happy to help out with any issues you may face.
Also, if this helped, please consider buying me a beer! It helps with server costs and providing these blog posts.
Thanks for reading!

Posted on November 16, 2020
Join Our Newsletter. No Spam, Only the good stuff.
Sign up to receive the latest update from our blog.


