How to create a simple REST API with Python and Flask in 5 minutes

Duomly
Posted on January 15, 2020

This article was originally published at: Python API tutorial
Python is one of the most in-demand programming languages in 2020. There are a lot of job offers for Python developers and lots of people who would like to learn this programming language. As we mention in one of the previous articles about learning Python, practicing knowledge is the most important.
Taking into consideration that Python can be used to build an application’s back-end, I decided to create an article, describing how to create a simple REST API using Python, Flask, and flask_restful library. I’m going to build a basic CRUD resource for the list of students. To follow this tutorial, you need Python and pip installed on your computer. To check the API, I will use Postman.
Besides, this tutorial is focusing mostly on building the API, so I’m using the mocked data. In most cases, while you are making API, it would be connected to the database.
We will go through the following points during the development:
- Installing flask and flask_restful
- Create and initialize the file
- Mocked data
- Create StudentsList class and route
- Create get() and post() methods for StudentsList()
- Define Student class and route
- Create get(), update() and delete() methods
- Test the endpoints
To make it easier and more convenient, I prepared a video version of this tutorial for those who prefer learning from the movies.
Let's start!
1. Installing Flask and Flask_RESTful
In the beginning, we have to install all the required libraries. Flask is a microframework written in Python, used to build web apps. So, let’s use the following command to install it:
pip install Flask
If it’s ready, we can start installing the flask library Flask_RESTful:
pip install Flask-RESTful
If it’s done, we are ready to start building our API!
2. Create and initialize the file
When we installed everything necessary for creating our API, let’s create a file. I’ll call it api.py, and you can use any name you prefer, but remember that Python files should have .py extension. Please open the file in your favorite code editor, and let’s import a few things which are necessary to start our project.
from flask import Flask
from flask_restful import Resource, Api, reqparse
While everything is essential in the top of our file, let’s initialize our API with the following code:
app = Flask(__name__)
api = Api(app)

STUDENTS = {}

if __name__ == "__main__":
  app.run(debug=True)
Great, now our API is initialized. Let’s go to the next point where we are going to create our mocked data.
3. Mocked data
Inside the STUDENTS variable, we are going to create a dictionary of students ordered by id. Every student will have a name, age, and spec property. Let’s create four simple users:
STUDENTS = {
  '1': {'name': 'Mark', 'age': 23, 'spec': 'math'},
  '2': {'name': 'Jane', 'age': 20, 'spec': 'biology'},
  '3': {'name': 'Peter', 'age': 21, 'spec': 'history'},
  '4': {'name': 'Kate', 'age': 22, 'spec': 'science'},
}
It’s ready, so we can move one step ahead and start creating our first class with a route.
4. Create StudentsList class and route
Now we can start doing interesting stuff. In the beginning, let’s create a class StudentsList and two methods inside it: get and post.
class StudentsList(Resource):
  def get(self);
  def post(self):
And when it’s ready, we should add a route that will be used as an URL to call the data from this class.
api.add_resource(StudentsList, '/students/')
Great, now we are almost ready to display our firs data from the endpoint, the last thing which left is to fill in the methods with some logic and run the first endpoints.
5. Create get() and post() methods for StudentsList()
This is a straightforward step. In the first get method of our API, we would like to return a list of all students. To do this, we are going to return our dictionary:
def get(self):
  return STUDENTS
Great, now it’s the time to create a post() method to have a possibility to add a new student to our list. For this, we need to create a parser variable just above the class StudentsList to be able to add params to our post() call, and later we can build a post method, where we generate new id and save new student based on passed arguments.
parser = reqparse.RequestParser()
def post(self):
  parser.add_argument("name")
  parser.add_argument("age")
  parser.add_argument("spec")
  args = parser.parse_args()
  student_id = int(max(STUDENTS.keys())) + 1
  student_id = '%i' % student_id
  STUDENTS[student_id] = {
    "name": args["name"],
    "age": args["age"],
    "spec": args["spec"],
  }
  return STUDENTS[student_id], 201
Now, we are ready to check the first calls to our API. First, let’s run the code. I will do it from my code editor. While the code is running you should see the following image in the console:
Then, please go the Postman and set the GET method, paste the localhost like where our server works and pass the route at the end. In my case link looks like follows:
The result should display the full list of the students:
Let’s also check if the post method works as well. For this, you have to change the method to POST, and pass the arguments: name, age, and spec:
It looks like everything works great! Now it’s time to create another class and other endpoints.
6. Define Student class and route
Now we will create another class and route for that class. The Student class will manage get, update, and delete. Everything in this class concerns a single student got by student_id.
class Student(Resource):
  def get(self, student_id):

  def put(self, student_id):

  def delete(self, student_id):
Next, we are going to add a new route below the current one:
api.add_resource(Student, '/students/<student_id>')
7. Create get(), update() and delete() methods
In this step we will create a logic for get(), update() and delete() methods. First, we would like to return a single student by student_id. Let’s do it:
def get(self, student_id):
  if student_id not in STUDENTS:
    return "Not found", 404
  else:
    return STUDENTS[student_id]
Great, next we will create the update() method logic. It will be very similar to the post() method from the previous class, but we won’t create the new id. First, we are going to check if the student with the given id exists. If yes, we will update the values; if no, we will return the information.
def put(self, student_id):
  parser.add_argument("name")
  parser.add_argument("age")
  parser.add_argument("spec")
  args = parser.parse_args()
  if student_id not in STUDENTS:
    return "Record not found", 404
  else:
    student = STUDENTS[student_id]
    student["name"] = args["name"] if args["name"] is not None else student["name"]
    student["age"] = args["age"] if args["age"] is not None else student["age"]
    student["spec"] = args["spec"] if args["spec"] is not None else student["spec"]
    return student, 200
And as the last thing, we will create a delete() method. In this case, we also have to check if the student with the given id exists to be able to delete the item.
def delete(self, student_id):
  if student_id not in STUDENTS:
    return "Not found", 404
  else:
    del STUDENTS[student_id]
    return '', 204
It seems like everything is ready! Let’s check it!
8. Testing the endpoints
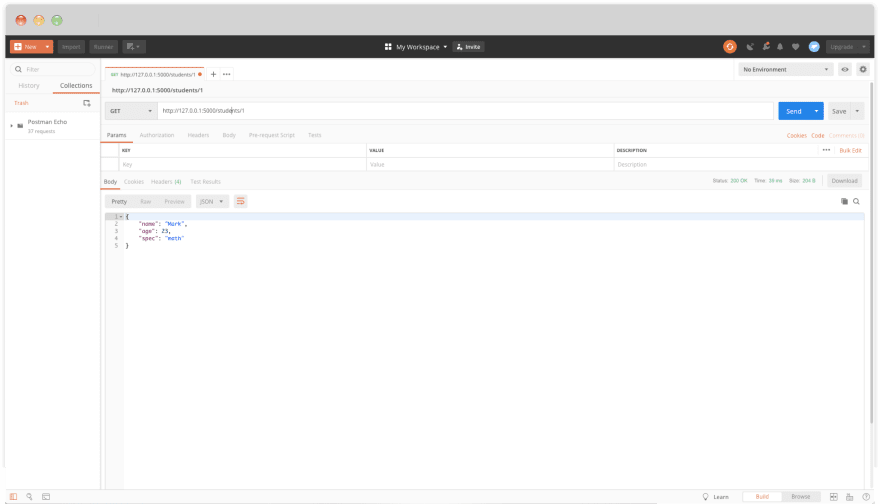
Let’s run our code and open the Postman to be able to test the endpoints. Let’s start by getting a single student. For this we have to pass the link with user id at the end:
It works! Let’s try to update the student, set the PUT method, pass the link with the user id, and add some parameter to change them:
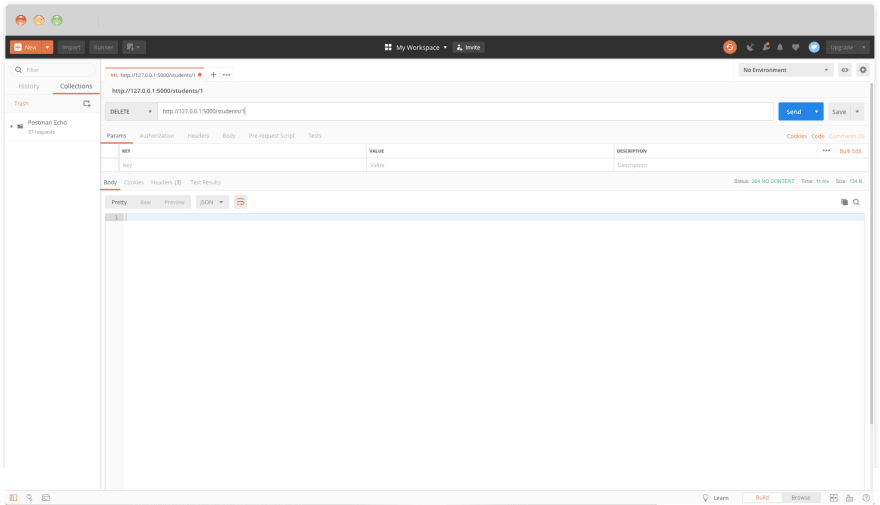
This one works as well! The last thing to check is delete method. So, let’s create a link with student id at the end and change the method to DELETE:
Everything works correctly!
Conclusion
In this article, we created a simple rest API with Python. We used the Flask framework and Flask_RESTful library to make it fast and easy. Our API allows us to get the list of all items, get one item by id, add a new item to the list, update item by id, and delete an item with the given id. For testing the endpoints, I used Postman. To write and run the code, I used the Visual Studio Code.
I hope you will find this tutorial helpful and use it as a base for your first Python API training! If you would like to master your Python knowledge, join Duomly and complete our renewed Python course!
Have a nice coding!
Anna from Duomly

Posted on January 15, 2020
Join Our Newsletter. No Spam, Only the good stuff.
Sign up to receive the latest update from our blog.


