Face Detection Made Easy with OpenCV and Python

Developer Service
Posted on February 1, 2024

In the fascinating world of computer vision, face detection stands as one of the most intriguing and widely applicable areas. Whether it's for security systems, user interface control, or even in social media for applying filters, the ability to detect faces accurately and efficiently is crucial. Today, I'm excited to share how you can easily implement face detection using OpenCV in Python.
Why OpenCV?
OpenCV (Open Source Computer Vision Library) is an open-source computer vision and machine learning software library. It's a powerhouse for anyone looking to delve into image processing, offering robust tools and algorithms. The best part? It's incredibly user-friendly, especially for beginners.
The Core: Haar Cascade Classifiers
Our journey in face detection employs Haar Cascade Classifiers, an effective object detection method. While there are more advanced methods available, Haar Cascades are perfect for getting started due to their simplicity and relatively good performance.
Implementing Face Detection
The Python script for face detection is surprisingly straightforward. Here’s a step-by-step guide:
Install OpenCV: Make sure you have OpenCV installed in your Python environment.
pip install opencv-python
The Script: Our script performs the following tasks:
- Load the pre-trained Haar Cascade model for face detection.
- Read the input image and convert it to grayscale (a necessary step for face detection).
- Detect faces and draw rectangles around them.
- Display the output.
import cv2

def detect_faces(image_path):
    # Load the Haar Cascade model
    face_cascade = cv2.CascadeClassifier(cv2.data.haarcascades + 'haarcascade_frontalface_default.xml')

    # Read the image
    img = cv2.imread(image_path)
    if img is None:
        print("Error: Could not read image")
        return

    # Convert to grayscale
    gray = cv2.cvtColor(img, cv2.COLOR_BGR2GRAY)

    # Detect faces
    faces = face_cascade.detectMultiScale(gray, 1.1, 4)

    # Draw rectangles around faces
    for (x, y, w, h) in faces:
        cv2.rectangle(img, (x, y), (x+w, y+h), (255, 0, 0), 2)

    # Display the output
    cv2.imshow('Detected Faces', img)
    cv2.waitKey()

# Replace 'path_to_your_image.jpg' with your image file
detect_faces('path_to_your_image.jpg')
Running the Script: Just replace 'path_to_your_image.jpg' with the path to your image, and you’re all set!
Let's see an example for the following image:
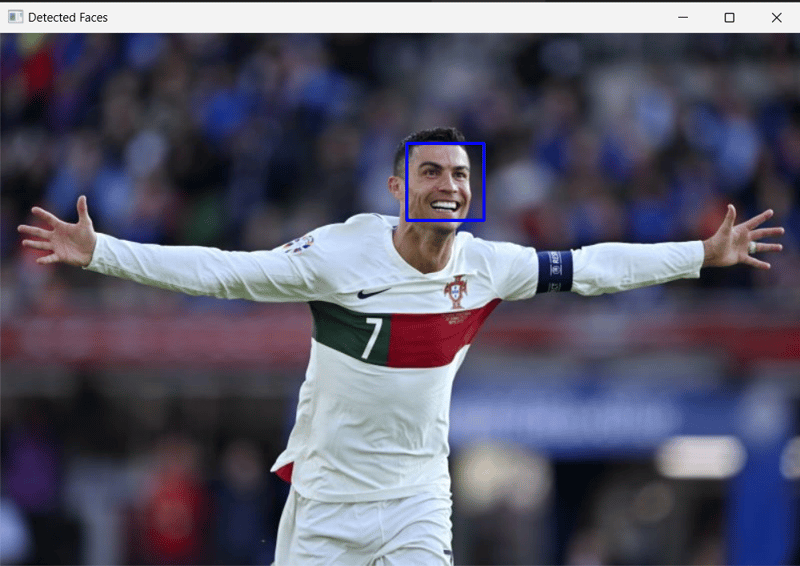
Running the script on this image we get the following output:
Conclusion
This simple yet powerful script opens the door to the world of computer vision. Whether you're a hobbyist, a student, or a professional, the potential applications are endless. Face detection is just the beginning; imagine where this could lead you in areas like facial recognition, emotion detection, or even augmented reality!

Posted on February 1, 2024
Join Our Newsletter. No Spam, Only the good stuff.
Sign up to receive the latest update from our blog.


