cuongld2
Posted on March 15, 2020
Previously, I’ve written a blog for how to build API service with spring-boot.
In this series, I will walk through how to build API service (a blog API service) in FastAPI with Python.
In today part, I will cover what FastAPI is, SQLAlchemy for working with MySQL, and simple API to create a new user account.
I.What is FastAPI
FastAPI is a modern, fast (high-performance), web framework for building APIs with Python 3.6+ based on standard Python type hints.
The key features are:
Fast: Very high performance, on par with NodeJS and Go (thanks to Starlette and Pydantic). One of the fastest Python frameworks available.
Fast to code: Increase the speed to develop features by about 200% to 300% *.
Fewer bugs: Reduce about 40% of human (developer) induced errors. *
Intuitive: Great editor support. Completion everywhere. Less time debugging.
Easy: Designed to be easy to use and learn. Less time reading docs.
Short: Minimize code duplication. Multiple features from each parameter declaration. Fewer bugs.
Robust: Get production-ready code. With automatic interactive documentation.
Standards-based: Based on (and fully compatible with) the open standards for APIs: OpenAPI (previously known as Swagger) and JSON Schema.
You can checkout more information from their official document page
II.Get started with “Hello {name}” with FastAPI:
1.Install FastApi:
To install FastAPI, simply use pip install fastapi
pip install fastapi
You will also need uvicorn to run the server, so install uvicorn also
pip install uvicorn
Above is how you install libraries in Python globally. But I would suggest you would install in your virtual environment.
For me I usually work with pipenv
So below is how to install library with pipenv
pipenv install {library_name}
2.Implement API which return “Hello {name}”
First, just create the new Python project in your favorite IDE, then create a main.py file like below
from fastapi import FastAPI

app = FastAPI()


@app.get("/")
async def root():
    return {"message": "Hello Donald"}
To run this, simply :
uvicorn main:map
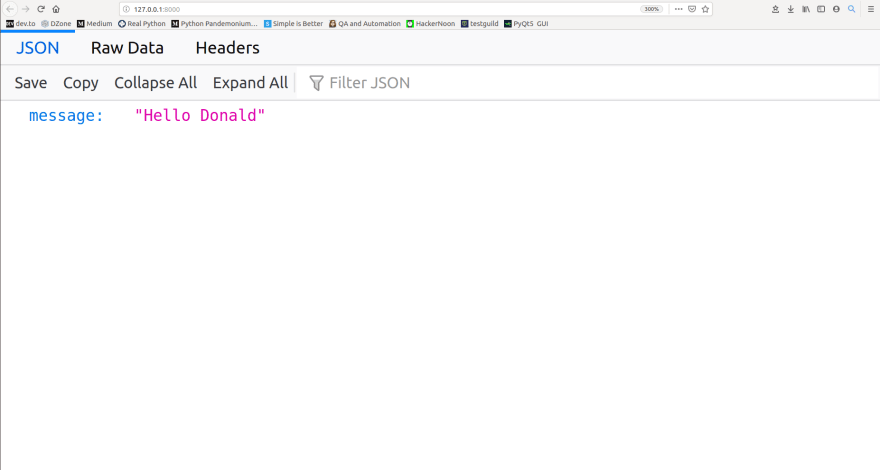
The result will be like this when you open the url in your browser

III. Build simple API to create new user account into your MySQL db
For doing this, first you need a way to connect to MySQL in Python.
We will be using SQLAlchemy with mysql-connector-python library.
1.SQLAlchemy:
SQLAlchemy is the Python SQL toolkit and Object Relational Mapper that gives application developers the full power and flexibility of SQL.
It provides a full suite of well known enterprise-level persistence patterns, designed for efficient and high-performing database access, adapted into a simple and Pythonic domain language.
You can find out more information for SQLAlchemy from here
To install SQLAlchemy:
pipenv install sqlalchemy
2.Mysql-connector-python
MySQL-connector-python is a self-contained Python driver for communicating with MySQL servers, and how to use it to develop database applications.
You can find out more from the official page.
To install mysql-connector-python:
mysql-connector-python
3.Create a new database with table “user_info” in MySQL:
Create a database name “restapi”
CREATE DATABASE restapi;
USE restapi;
Create a new table name “user_info”
CREATE TABLE user_info(
id INT(6) UNSIGNED AUTO_INCREMENT PRIMARY KEY,
username VARCHAR(50) NOT NULL,
password VARCHAR(500) NOT NULL,
fullname VARCHAR(50) NOT NULL
);
4.Create a new project for building the service with MySQL in Python
The new project will consists the following files:
- crud.py : to define method (read,write) to MySQL
- database.py : for connecting MySQL
- main.py: main file for build FastAPI service
- models.py: define class object models for FastAPI
- schemas.py: define schemas for working with the specific API request/response
database.py:
from sqlalchemy import create_engine
from sqlalchemy.ext.declarative import declarative_base
from sqlalchemy.orm import sessionmaker

SQLALCHEMY_DATABASE_URL = "mysql+mysqlconnector://root:cuong1990@localhost:3306/restapi"

engine = create_engine(
    SQLALCHEMY_DATABASE_URL,
)
SessionLocal = sessionmaker(autocommit=False, autoflush=False, bind=engine)

Base = declarative_base()
the database name will be : restapi
the username for database : root
the password for database : cuong1990
models.py
from sqlalchemy import Column, Integer, String
from sql_app.database import Base


class UserInfo(Base):
    __tablename__ = "user_info"

    id = Column(Integer, primary_key=True, index=True)
    username = Column(String, unique=True)
    password = Column(String)
    fullname = Column(String, unique=True)
Define the class/object model for userinfo to interact with table “user_info”
schemas.py

from typing import List
from pydantic import BaseModel


class UserInfoBase(BaseModel):
    username: str
    fullname: str


class UserCreate(UserInfoBase):
    password: str


class UserInfo(UserInfoBase):
    id: int

    class Config:
        orm_mode = True
Define the base schema and usercreate, userinfo schema for working with API request and response
crud.py
from sqlalchemy.orm import Session

from . import models, schemas


def get_user_by_username(db: Session, username: str):
    return db.query(models.UserInfo).filter(models.UserInfo.username == username).first()


def create_user(db: Session, user: schemas.UserCreate):
    fake_hashed_password = user.password + "notreallyhashed"
    db_user = models.UserInfo(username=user.username, password=fake_hashed_password, fullname=user.fullname)
    db.add(db_user)
    db.commit()
    db.refresh(db_user)
    return db_user
Define the method for create new user and get user by username
main.py
from typing import List

import uvicorn
from sqlalchemy.orm import Session
from fastapi import Depends, FastAPI, HTTPException

from sql_app import models, schemas, crud
from sql_app.database import engine, SessionLocal

models.Base.metadata.create_all(bind=engine)

app = FastAPI()

# Dependency


def get_db():
    db = None
    try:
        db = SessionLocal()
        yield db
    finally:
        db.close()


@app.post("/user", response_model=schemas.UserInfo)
def create_user(user: schemas.UserCreate, db: Session = Depends(get_db)):
    db_user = crud.get_user_by_username(db, username=user.username)
    if db_user:
        raise HTTPException(status_code=400, detail="Username already registered")
    return crud.create_user(db=db, user=user)


if __name__ == "__main__":
    uvicorn.run(app, host="127.0.0.1", port=8081)
Define for how to build api create_user and raise exception if create new username with username already.
To run the service with fastapi, you can easily run main file by clicking on green button

Then you can see the service running:

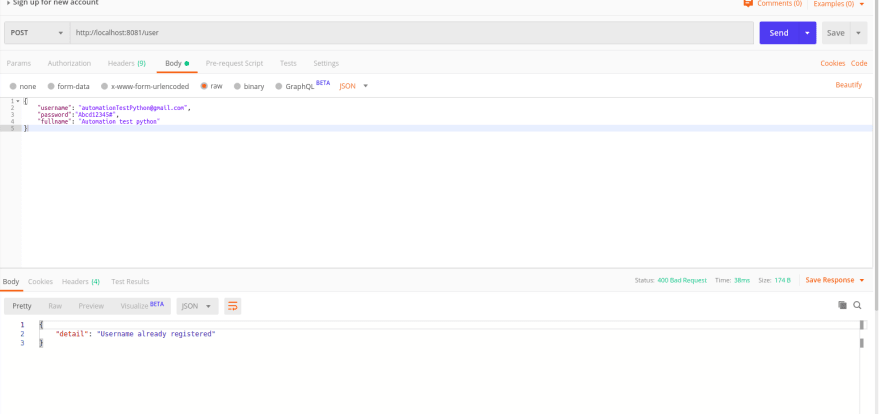
5.Interact with api using postman:
Create with username already existed:

Create new user account successfully

You can checkout sourcecode for this from github.
Happy coding ~~~

Posted on March 15, 2020
Join Our Newsletter. No Spam, Only the good stuff.
Sign up to receive the latest update from our blog.

