Beyond Cruising Speed: 6 Ways to Ship Fast Web Apps and Sites

Cristina Solana
Posted on October 22, 2019

When you've got 1gbps download speeds at home, it's easy to forget how others might experience what you build. And all though I am a software developer I forgot how the internet works and didn't quite prepare for my 7-day cruise.
My idea of preparation was to pay for Carnival's regular internet package. A day into the cruise I had to upgrade to their premium package which is supposedly 3x faster. My download speed went up by 0kb. Speeds were so slow that fast.com couldn't register a reading at all. I spent more time staring at an empty browser window with the loading bar stuck 9/10 of the way from done than I care to admit. 😞
But I'm not here to talk about that $150 refund I need to go fight for at guest services or my clear addiction to the internet because every millisecond counts for better UX, conversions and revenue.
User experience is as much, if not more, about performance than how many clicks it takes to make something happen. BBC loses an additional 10% of users for every additional second it takes for their site to load. They're not clicking anything once they're gone. And those numbers correlate with the data from other case studies, the negative impact of just milliseconds will affect your sites bottom line. Amazon also saw a 1% decrease in revenue for every 100ms increase in load time. Walmart, on the other hand, focused on improving performance and every 100ms improvement resulted in up to a 1% increase in revenue.
So let's preserve the sanity of future cruisers and anyone with slow connections or devices.
Bundle up with Webpack
Webpack provides, among others, a couple of features that can up performance significantly tree shaking and code splitting. Tree shaking eliminates unused code from the files your app or site loads. That means less JavaScript to download and parse. While tree shaking gets rid of any code that won't be used, code splitting takes it a step further making it possible to create separate bundled JS for pages, routes or components. These bundles include only the code needed for that particular view and you can even have multiple bundles that lazy load based on events triggered by a user further reducing page load time.
There is a lot more that Webpack can do that will improve performance like uglifying, minifying and caching, if you're not already using it, get on the bandwagon (but check out Parcel too).
Minimize data size and requests with GraphQL
Instagram increased impressions and user profile scroll interactions by decreasing the response size of the JSON needed for displaying comments. It's impossible, from the frontend, to decrease response size. On the backend you'd use or build an ORM to create the custom filters needed to include only the data you want in a response. With a REST API, as a frontend developer, that would mean that if a particular API endpoint couldn't return just what you need, you'd load all the data and wait on a backend developer to get the logic in to make it possible, if ever. With GraphQL, you get what you ask for.
For example, if the full response of a collection for a request from the API is
[
  {
    "id": 1009189,
    "name": "Black Widow",
    "description": "",
    "modified": "2016-01-04T18:09:26-0500",
    "thumbnail": {
      "path": "http://i.annihil.us/u/prod/marvel/i/mg/f/30/50fecad1f395b",
      "extension": "jpg"
    },
    "resourceURI": "http://gateway.marvel.com/v1/public/characters/1009189",
    "comics": {
      "available": 456,
      "collectionURI": "http://gateway.marvel.com/v1/public/characters/1009189/comics",
      "items": [
        {
          "resourceURI": "http://gateway.marvel.com/v1/public/comics/43495",
          "name": "A+X (2012) #2"
        },
        ...
      ],
      "returned": 20
    },
    "series": {
      "available": 179,
      "collectionURI": "http://gateway.marvel.com/v1/public/characters/1009189/series",
      "items": [
        {
          "resourceURI": "http://gateway.marvel.com/v1/public/series/16450",
          "name": "A+X (2012 - Present)"
        },
        ...
      ],
      "returned": 20
    },
    "stories": {
      "available": 490,
      "collectionURI": "http://gateway.marvel.com/v1/public/characters/1009189/stories",
      "items": [
        {
          "resourceURI": "http://gateway.marvel.com/v1/public/stories/1060",
          "name": "Cover #1060",
          "type": "cover"
        },
        ...
      ],
      "returned": 20
    },
    "events": {
      "available": 14,
      "collectionURI": "http://gateway.marvel.com/v1/public/characters/1009189/events",
      "items": [
        {
          "resourceURI": "http://gateway.marvel.com/v1/public/events/116",
          "name": "Acts of Vengeance!"
        },
        ...
      ],
      "returned": 14
    },
    "urls": [
      {
        "type": "detail",
        "url": "http://marvel.com/comics/characters/1009189/black_widow?utm_campaign=apiRef&utm_source=e4bbb7636ff9dfc843b2eb4cbd33f0fd"
      },
      ...
    ]
  }
  ...
]
I know, that's huge, and I ellipsed a ton of that data, it was several hundreds of lines for just the first object within the array.
Like everything else, you'll need to invest some time in getting GraphQL up and running, but the time saved in the long run and the ability to greatly decrease the size with a GraphQL query is worth the effort. You're not just improving performance for your users, you also get the sweet side effect of more efficiently getting data to the frontend. We can now omit the comics, series, stories, events and URLs arrays which each had numerous objects of their own with a query written like so:
{
  id
  name
  description
  thumbnail
  resourceURI
}
This is much better:
[
  {
    "id": 1009189,
    "name": "Black Widow",
    "description": "",
    "thumbnail": {
      "path": "http://i.annihil.us/u/prod/marvel/i/mg/f/30/50fecad1f395b",
      "extension": "jpg"
    },
    "resourceURI": "http://gateway.marvel.com/v1/public/characters/1009189",
  }
  ...
]
Experiment with the Intersection Observer API
As the name implies, the Intersection Observer API observes intersections between two elements. One of those elements could be the viewport. Using the view port as the root element, you can detect when a particular element becomes visible and make HTTP requests rather than making them on page load. And it's simple…
const options = {
  root: null, // use null for viewport
  rootMargin: '0px',
  threshold: 1.0
};
const observer = new IntersectionObserver(callback, options);
const target = document.querySelector('#someSection');

observer.observe(target);

function callback(entries, observer) {
  // fetch some data
}
Cache resources and data with Service Workers
A fraction of the time spent loading a page is spent on downloading resources like CSS, js, fonts, images and making HTTP requests. Storing and retrieving cache with service workers means delivering a page almost instantly, whether the connection is slow or there is no connection so long as the user has visited the page before.
When a user requests a page, if cache is available, your user gets instant gratification - even if they are offline. Otherwise, the necessary requests are made. There are several approaches you can take, it's all about the individual needs for each scenario:
- Need the freshest data: make requests first, only dig for the cache if no connectivity is detected.
- Want the quickest visible content, get cache first and then replace with fresh data as it is available.
Netlify wrote an article to get you up and running.
Deliver optimized images with Cloudinary + <picture>
There are other options, but Cloudinary is my service of choice. Cloudinary gives you the ability to optimize images to provide the best quality with the smallest possible file size with settings for dimensions (width, height, cropping, aspect ratio), quality and my favorites:
- File format: this is one is one of my favorite features, you can set the format to auto which will use the best possible image, and that means that in the case of browsers that support WebP, it will deliver images in that format. WebP is an image format, developed by Google, that is generally about ~25% smaller in size than JPEG or PNG without sacrificing quality.
- Resolution: do you remember the hell of having to create two images, one regular and one 2x images for retina screens. Cloudinary does all the work for you. Thank you very much. 😍
And those are just the performance settings, you get a lot more that is beyond the scope of performance. The best part is that they make it so easy. Want an image 300px wide with the resolution and format set automatically based on the browser? This is all you need to do:
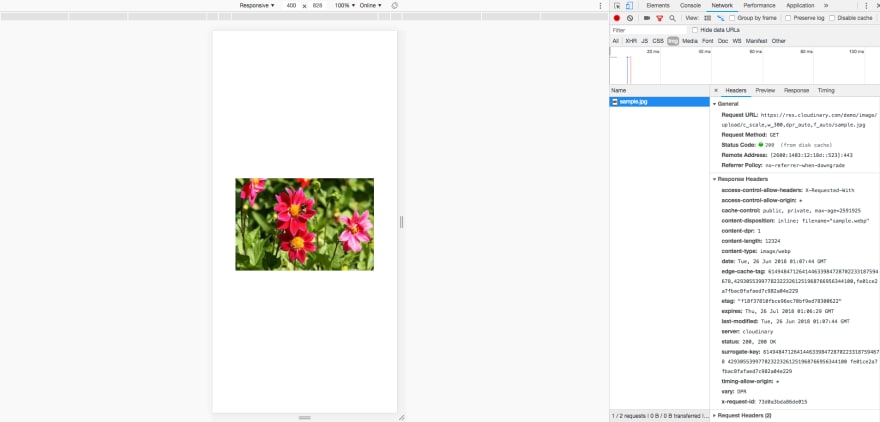
https://res.cloudinary.com/demo/image/upload/c_scale,w_300,dpr_auto,f_auto/sample.jpg
Pair that with the <picture> element and you're getting big wins.
The picture element lets you set images based on media queries right in an attribute. And it falls back to an image if the media criteria is not met or if it's not supported.
<picture>
    <source media="(min-width: 1200px)"
    srcset="https://res.cloudinary.com/demo/image/upload/c_scale,w_900,dpr_auto,f_auto/sample.jpg">
    <source media="(min-width: 900px)"
        srcset="https://res.cloudinary.com/demo/image/upload/c_scale,w_600,dpr_auto,f_auto/sample.jpg">
    <img src="https://res.cloudinary.com/demo/image/upload/c_scale,w_300,dpr_auto,f_auto/sample.jpg">
</picture>
So you've now got an image that is meant to be the closest possible size to what it will be based on the viewport and it is optimized for format and resolution too. And only the one that meets the srcset media criteria gets downloaded.

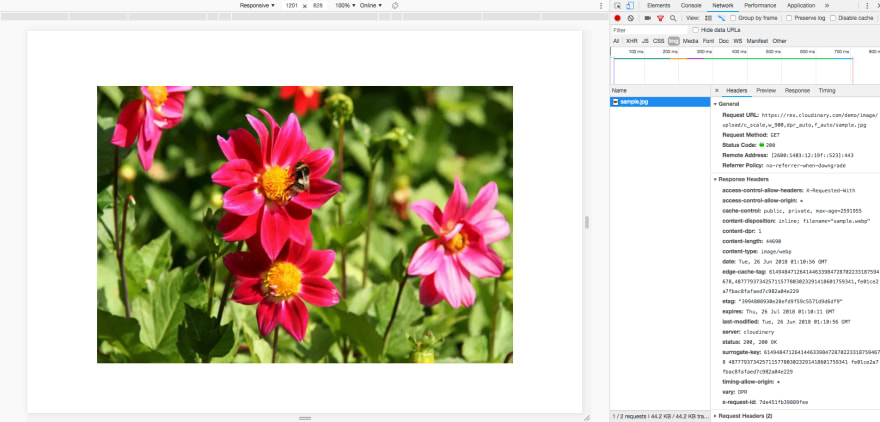
1201px wide viewport uses the image corresponding with the media min-width of 1200
Audit with Lighthouse
When trying to improve performance, it's important to test implementations. Sometimes what seems as if it should work, won't. Just a couple of weeks ago, I thought making some HTTP requests via a web worker would be a good move and it turned out it wasn't.
There's a boatload of performance analysis tools out there, however, Chrome Devtools has a plethora of tools in one place. You can throttle speed to mimic slow connections, audit runtime performance and for page load analysis use Lighthouse.
There isn't much to it.
- Go to Audits tab
- Click a button
- Sit back and read the data from performance case studies that Lighthouse displays while you wait
- Analyze the results and compile a to-do list
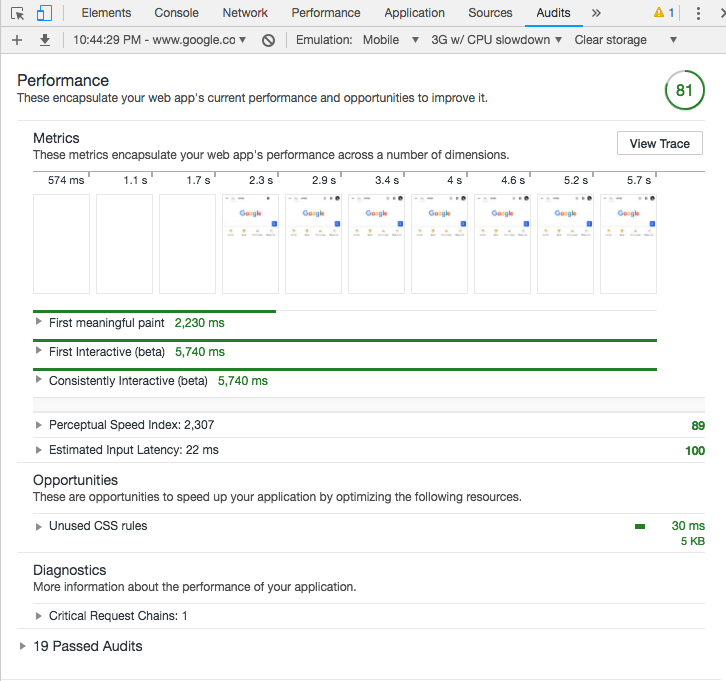
Lighthouse will give you various metrics with scores, take care of the red first, but if it isn't 100 there is room for improvement even if it's green. You'll have not just scores, but insights into what causes issues and how you might fix them.

Not gonna lie, I was expecting 100 here.
Aside from keeping your users happy and increasing conversions, there are other benefits when using Webpack or Parcel, GraphQL and Cloudinary (or any formidable competitor). A module bundler and GraphQL will vastly improve your development, making it more efficient, maintainable and scalable. Cloudinary gives you other useful features like image manipulation, as well as, video optimization and manipulation.
With some time and effort, you can get major wins that will improve your developer and user experience simultaneously. If you want to get more performance stats, check out WPO Stats.
This is a repost of an article that I should have posted here instead of Medium. :D

Posted on October 22, 2019
Join Our Newsletter. No Spam, Only the good stuff.
Sign up to receive the latest update from our blog.


