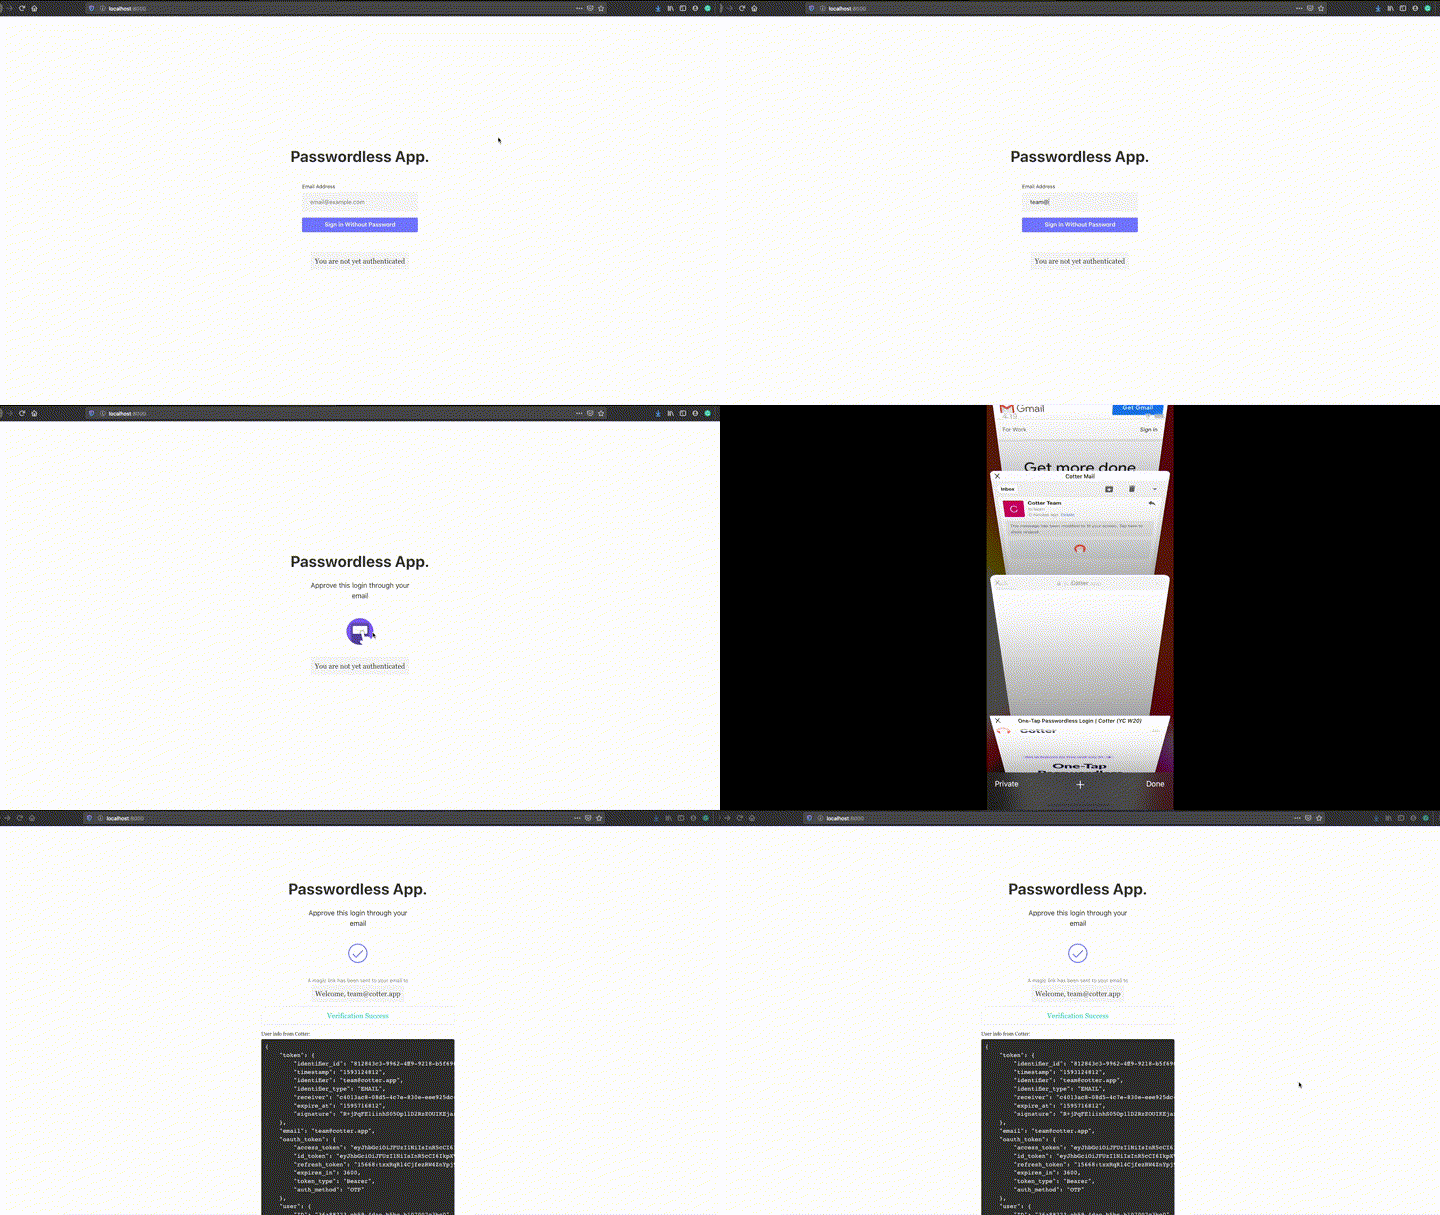
Stop spending days to code your login page! Add Cotter's magic link to your Gatsby app under 5 minutes

Kevin Chandra
Posted on July 7, 2020
Supercharge your Gatsby app's authentication system with Cotter's magic link. Like how Slack does it, but simpler.
In this guide, we'll show you how to integrate Cotter's magic link authentication to Gatsby.
Let's get started
a. Install Gatsby
# If you don't have Gatsby installed, run
npm install -g gatsby-cli
# Check if Gatsby exist
gatsby -v
b. Create New Gatsby Project
Let's start with an empty Gatsby project and name it gatsby-cotter.
gatsby new gatsby-cotter
cd gatsby-cotter && gatsby develop
Head to src/pages/index.js and modify the default Gatsby homepage HTML template by copy pasting the code below:
import React, { useState, useEffect } from "react"; // 👈 Add useEffect here!
// 2️⃣ TODO: Import Cotter

import "./styles.css";

const IndexPage = () => {
  const [responsePayload, setResponsePayload] = useState(null);
  const [loggedIn, setLoggedIn] = useState(false);

  // 3️⃣ TODO: Initialize Cotter and show the form

  return (
    <div className="container">
      <h1 className="title">Passwordless App.</h1>

      {/* 1️⃣ TODO: Setup a div to contain the form */}

      <div id="user-info">
        { loggedIn ? `Welcome, ${responsePayload.email}` : "You are not yet authenticated" }
      </div>

      {
        loggedIn
        ? <div id="user-response">
          <div className="success">Verification Success</div>
          <div className="title-response">User info from Cotter:</div>
          <pre>{JSON.stringify(responsePayload, null, 4)}</pre>
        </div>
        : null
      }
    </div>
  );
}

export default IndexPage
ERROR: It's Ok.
You will see an error indicating that you have not specified styles.css. Create a styles.css page under src/pages/styles.css and copy the code below:
.container {
  display: flex;
  flex-direction: column;
  justify-content: center;
  align-items: center;
  height: 100vh;
  width: 100vw;
}

#user-info {
  padding: 10px;
  max-width: 350px;
  border-radius: 4px;
  background-color: #f5f5f5;
  margin-bottom: 10px;
}

#user-response {
  max-width: 500px;
  max-height: 400px;
}

.success {
  padding: 10px;
  border-radius: 4px;
  border: 1px solid #f0f0f0;
  text-align: center;
  color: hsl(171, 100%, 41%);
  margin-bottom: 10px;
}

pre {
  word-wrap: break-word;
  background-color: #2e2e2e;
  padding: 10px;
  border-radius: 4px;
  color: white;
  overflow: scroll;
}

.title-response {
  font-size: 13px;
  color: black;
}
Integrating Cotter's Magic Link
a. Install Cotter
npm install cotter
You may need to re run
gatsby developif you find any errors saying that you missed a few files insidenode_modules. You can continue when if you don't see any errors.
b. Build the login form
Copy the code below
{/* 1️⃣ TODO: Setup a div to contain the form */}
<div
  id="cotter-form-container"
  style={{ width: 300, height: 300 }}
></div>
Then we import Cotter.
// 2️⃣ TODO: Import Cotter
import Cotter from "cotter"; // 👈 Add Cotter here!
Here we initialize Cotter, then show the form.
// 3️⃣ TODO: Initialize Cotter and show the form
useEffect(() => {
    var cotter = new Cotter("<YOUR_API_KEY_ID>");
},[]);
Replace <YOUR_API_KEY_ID> above with your API Key ID. Copy the code below to display the form.
// 3️⃣ TODO: Initialize Cotter and show the form
useEffect(() => {
    var cotter = new Cotter("<YOUR_API_KEY_ID>");
+ cotter.signInWithLink().showEmailForm().then(payload => {
+ setResponsePayload(payload);
+ setLoggedIn(true);
+ });
}, []);
To authenticate your users using a magic link via email, we will be using the signInWithLink function and showEmailForm as written above.
You can send the magic link through SMS/WhatsApp as well by using
showPhoneForm
Once a user is successfully authenticated, the payload will return information such as oauth_token , user's identifier (email or phone number), and Cotter's token.
You can see that
showEmailFormreturns a Promise, that means you can simply handle any error by chaining acatchkeyword afterthen.
The Finish Line

Done! You can now authenticate your users using a magic link without backend servers to store your users' credentials.
Find the complete code here.
What's next?
You may have a backend service that serves your users personalized content. If so, then you will need to validate the payload on your backend server. Then, you can send your own authentication token to the client side, or simply use our oauth_token to validate your users from now on.
Learn more about OAuth tokens returned from Cotter here to know more!
Questions & Feedback
Come and talk to the founders of Cotter and other developers who are using Cotter on Cotter's Slack Channel.
Ready to use Cotter?
If you enjoyed this tutorial and want to integrate Cotter into your website or app, you can create a free account and check out our documentation.
If you need help ping us on our Slack channel or email us at team@cotter.app.

Posted on July 7, 2020
Join Our Newsletter. No Spam, Only the good stuff.
Sign up to receive the latest update from our blog.
Related

November 15, 2024

