Integrating a Cloudsmith Repository with a GitLab CI/CD Pipeline

Dan McKinney
Posted on September 10, 2020

What is GitLab CI/CD
GitLab CI/CD is a tool that is built into GitLab. It allows you to create automated tasks that you can use to form a Continuous Integration and Continuous Delivery / Deployment process.
You configure GitLab CI/CD by adding a yaml file (called .gitlab-ci.yml) to your source repository. This file creates a pipeline, which will then run when a code change is pushed to the repository. Pipelines are made up of a series of stages, and each stage can each contain a number of jobs or scripts. The GitLab Runner agent will then run these jobs.
For an on-premise instance of GitLab, you can install the GitLab runner agent on your own instances, and it supports many different operating systems (thereby creating your own fleet of instances to run your pipelines). But to keep things simple in the following examples, we will use gitlab.com and the default hosted GitLab runner environments provided.
Why use Cloudsmith with Gitlab CI/CD
So why would you want to use Cloudsmith with your Gitlab CI/CD pipelines? Well, there are a few reasons:
- Universality – Cloudsmith supports over 20 package formats, so whatever artifacts your project produces, you can find a home for them in a private Cloudsmith repository
- Control – Cloudsmith private repositories provide extensive security and access controls, that have been designed to accommodate workflows such as internal development, deployment or even distribution to external customers. The fine-grained permissions system available enables you to craft bespoke access control, and lock down or open up your repository as much or as little as you need.
- Automation and Integration – Thanks to the Cloudsmith CLI and also native support for format-specific package managers, a Cloudsmith private repository can fit in seamlessly with other tools in your development or distribution processes. It provides you with a single source of truth across your packages and dependencies.
- Performance and Reliability – As a cloud-native platform, Cloudsmith manages the availability and performance of your repositories. You don’t need to worry about managing a fleet of servers, containers or virtual machines. Global performance, backed by our ultra-fast CDN and multi-region infrastructure, ensures that your packages are delivered worldwide. Reliably, quickly and securely.
That’s not all. With features like custom domain support, configurable upstream proxying and caching, configurable edge caching rules, download logs/statistics and more, Cloudsmith aims to provide the best solution for all your package management needs. It really is the ideal tool in a high-velocity CI/CD workflow – precisely the type of workflow that GitLab CI/CD is intended to enable you to create.
Let’s work through an example.
OK, so let’s get started with a worked example. The very first thing you will need is some source code in a GitLab repository that you want to build. For this example, we will build Ruby source code into a Ruby Gem package.
Our project on GitLab has the following structure:
The important thing here, as previously mentioned, is the .gitlab-ci.yml file. This is where we define the GitLab CI/CD pipeline that will run when we push a change to the GitLab repo.
Let’s take a look at the .gitlab-ci.yml file:
image: "ruby:2.5"

variables:
  RUBYGEMS_HOST: "https://ruby.cloudsmith.io/demo/examples-repo"


stages:
  - build
  - push

build:
  stage: build
  script:
    - gem build cloudsmith-ruby-example.gemspec
  artifacts:
    paths:
      - cloudsmith-ruby-example-*

push:
  stage: push
  script:
    - mkdir -p ~/.gem
    - mv $CLOUDSMITH_API_KEY ~/.gem/credentials && chmod 0600 ~/.gem/credentials
    - gem push cloudsmith-ruby-example-1.0.1.gem
The first thing we have specified is the image that will be used when creating the Docker container for the GitLab runner that will execute this pipeline, in this case, Ruby 2.5.
Next, we add an environment variable, RUBYGEMS_HOST. This is where we define the URL of the Cloudsmith package repository that we will push the result of the build to.
We then define two stages in this pipeline, the build stage and the push stage.
The Build Stage
build:
  stage: build
  script:
    - gem build cloudsmith-ruby-example.gemspec
  artifacts:
    paths:
      - cloudsmith-ruby-example-*
This stage is pretty straightforward. We just run the gem build command to build our Ruby source as defined in our cloudsmith-ruby-example.gemspec file. Following this, we have defined an artifact job, as we need to temporarily store the output of the build so that the push stage next can use it.
This is because different stages in a pipeline will run on a new runner instance, so a subsequent stage wouldn’t have the access to the package built in a previous stage. You could also perform any jobs required to build and push within the same stage, and therefore on the same runner to avoid this, but for more complex pipelines you’ll likely have many stages.
The Push Stage
push:
  stage: push
  script:
    - mkdir -p ~/.gem
    - mv $CLOUDSMITH_API_KEY ~/.gem/credentials && chmod 0600 ~/.gem/credentials
    - gem push cloudsmith-ruby-example-1.0.1.gem
The push stage is a little bit more complex. This is due to the fact that we are going to push our package to a private Cloudsmith repo, which requires authentication. The Ruby package manager, gem, allows you to store your authentication credentials (in our case, the Cloudsmith API Key) in a credentials file, located at ~/.gem/credentials – But of course, we don’t want to check this credentials file into our GitLab repository along with our source!
So we can make use of GitLab's ability to add variables to the source code repository. We can create a file variable called CLOUDSMITH_API_KEY, and then as part of the push step, we add a job to move this variable into the required location before we run the gem push command.
You add this file variable in your GitLab repository settings:
Now, when our push step runs, the mkdir and mv jobs will create the required ~/.gem/credentials file (with our Cloudsmith API Key in it), and all without exposing our API Key in any logs on the runner instance, nor checked in with our source code.
The final job in our push step simply runs gem push to upload the package we have built to our private Cloudsmith repo, as Cloudsmith repositories offer full native support for the gem package manager.
Triggering the pipeline
All that is left to do is for us to make a change to our source, and then commit and push the change to our Gitlab repo. Let’s see what happens when we do that.
We make a change, commit it and push:
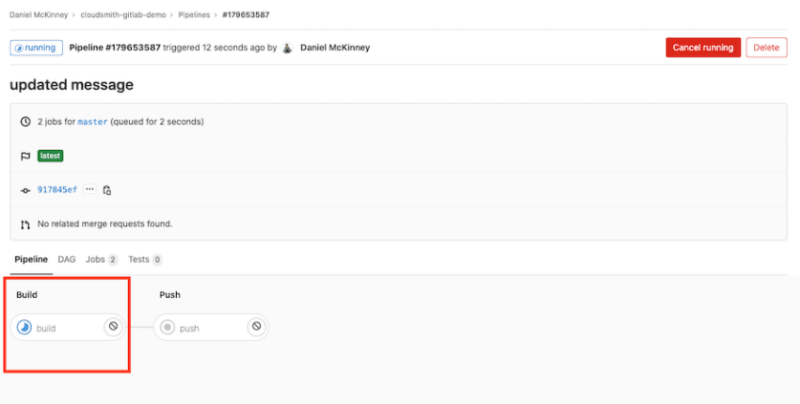
The Gitlab CI/CD pipeline starts, and the build stage executes:
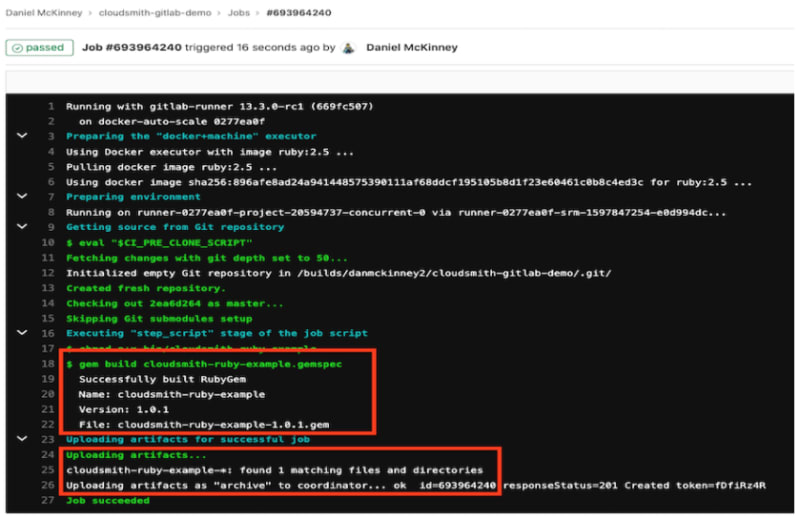
The build stage runs gem build to build the package and then stores it in GitLab’s temporary artifact storage:
The Push stage then starts to execute once the Build stage completes:
The push stage downloads the package from the temporary artifact storage, creates the required ~/gem/credentials file, and runs gem push which uploads the package to our private Cloudsmith repository:
And that’s it, the pipeline is now complete and reports as "Passed":
If we now go and login to Cloudsmith, and check our "examples-repo" repository, we can see that the Ruby gem we just built is present:
Final Thoughts
Integrating a private Cloudsmith repository with GitLab CI/CD pipeline is easy, whether you are building a package that Cloudsmith provides native tooling support for (like Ruby) or even if you are using the Cloudsmith CLI to push a raw file, or other binary artifacts. You can add your own private Cloudsmith repository with just a couple of lines of configuration, and it just works.
Package management can be complex and difficult, and doubly so if you are trying to manage your own package management solution and infrastructure at the same time. Try it for yourself, and see the productivity and efficiency gains that you can get from a centralized, hosted, secure package management service.

Posted on September 10, 2020
Join Our Newsletter. No Spam, Only the good stuff.
Sign up to receive the latest update from our blog.


