christianstrang
Posted on July 8, 2019
For this tutorial I assume that you used step 1 (Web App) to create your sails.js app.
1. Install Passport and the Facebook Strategy for Passport
$ npm install passport
$ npm install passport-facebook
2. Add the Passport middleware
We need to add passport to our middleware execution stack in config/http.js
module.exports.http = {

  middleware: {

    passportInit: require('passport').initialize(),
    passportSession: require('passport').session(),

    order: [
      'cookieParser',
      'session',
      'passportInit',
      'passportSession',
      'bodyParser',
      'compress',
      'poweredBy',
      'router',
      'www',
      'favicon',
    ],
  },
};
3. Add the Passport-FacebookStrategy
In the folder config create a new folder passport and inside create a file called config/passport/FacebookStrategy.js.
'use strict';

var passport = require('passport'),
  FacebookStrategy = require('passport-facebook').Strategy,
  request = require('request');


var verifyHandler = function(req, token, tokenSecret, profile, done) {

  process.nextTick(function() {
    var url = 'https://graph.facebook.com/v2.10/me?access_token=%s&fields=id,email,first_name,last_name';
    url = url.replace('%s', token);

    var options = {method: 'GET', url: url, json: true};
    request(options, function (err, response) {
      if (err) {
        return done(null, null);
      }

      var data = {
        id: response.body.id,
        first_name: response.body.first_name,
        last_name: response.body.last_name,
        email: response.body.email
      };

      return done(null, data);
    });
  });
};

passport.use(new FacebookStrategy({
  clientID: FACEBOOK_CLIENT_ID,
  clientSecret: FACEBOOK_APP_SECRET,
  callbackURL: /api/v1/auth/facebook/callback,
  passReqToCallback: true
}, verifyHandler));
Don't forget to change your credentials (clientID, clientSecret, callbackURL) at the bottom. Your Facebook Callback URL can be localhost but only for a test/development app, so you might have to create one in addition to your live/production app.
4. Create a Passport Controller to handle Facebook authentication
in your console run sails generate controller passport this will create a file PassportController.js in your api/controllers folder, add the following code:
/**
 * PassportController
 *
 * @description :: Server-side actions for handling incoming requests.
 * @help        :: See https://sailsjs.com/docs/concepts/actions
 */

var passport = require('passport');

module.exports = {
  facebookAuth: function(req, res, next) {
    passport.authenticate('facebook', { scope: ['email']})(req, res, next);
  },

  facebookCallback: function(req, res, next) {
    passport.authenticate('facebook', function(err, user) {

      console.log('facebook credentials');
      console.log(user);
      res.json(user);
    })(req, res, next);
  },

};
5. Add routes to your config/routes.js file
'GET /api/v1/auth/facebook': {controller: 'PassportController', action: 'facebookAuth'},
'GET /api/v1/auth/facebook/callback': {controller: 'PassportController', action: 'facebookCallback'},
These two routes will handle the request to and the callback from facebook.
6. Add the your localhost URL to your Facebook app
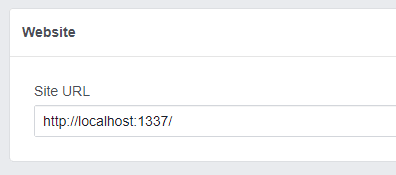
In your facebook for developers backend, go to Settings => Basic and add the Website plattform at the bottom. As the site url use your real domain or, if you created a test app, you can add a localhost url, in our case it should be this:
7. Login in via Facebook
If you visit http://localhost:1337/api/v1/auth/facebook you should now be redirected to facebook and get a prompt to allow your facebook app access to your credentials. Afterwards you are redirected to your callback url and be able to access the user credentials. With this information you can check if a user already exists in the database or create a new user.
Done
This is more of a step by step than a real tutorial, if you have any questions about a specific step or if anything is wrong/missing, please let me know in the comments.
Update: changed the callbackURL in the GoogleStrategy to make it more flexible for a staging/production environment with a different domain.

Posted on July 8, 2019
Join Our Newsletter. No Spam, Only the good stuff.
Sign up to receive the latest update from our blog.
