Chetan
Posted on April 17, 2021
In this article, you are going to learn How to create a project in Android Studio.
I assume that you have Android Studio installed on your device.
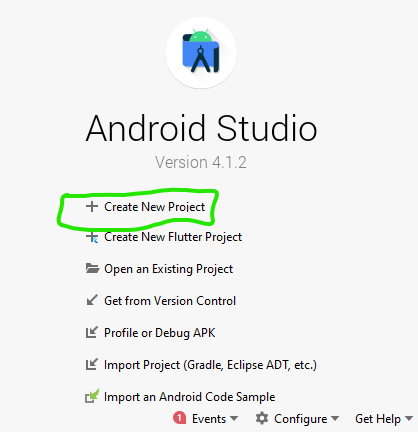
In the first step, you have to open Android Studio and click on Create New Project

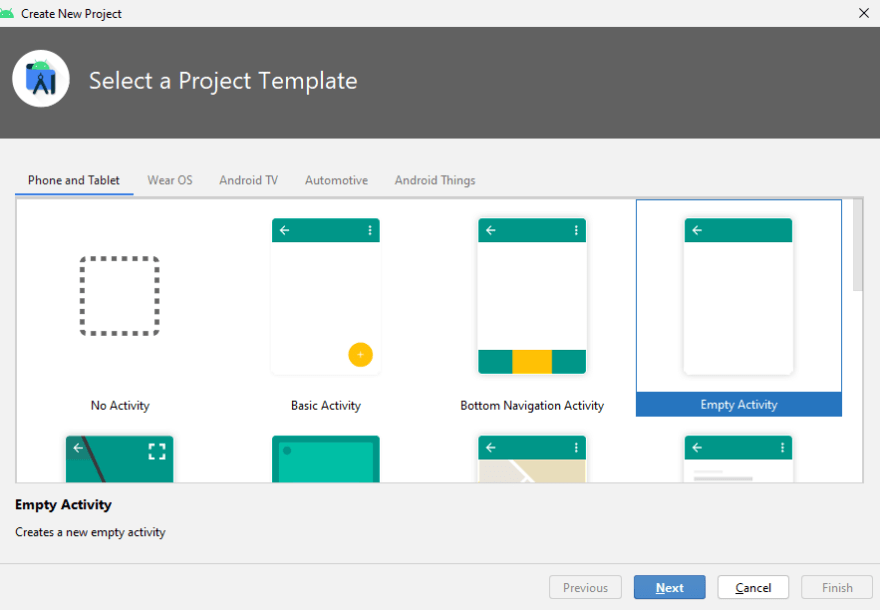
After doing this, you have to select a project template for our app. There are many project templates in Android Studio like:
No Activity- It will create empty projects means you have to add the MainActivity by yourself.
Basic Activity- It will create a new basic activity with Navigation Component.
Bottom Navigation Activity- It will create a new activity with bottom navigation.
Empty Activity- It will create a new empty activity. Most of the time you will use this activity.
Navigation Drawer Activity- This will create a new activity with navigation activity.
Apart from the above templates, there are also other templates available in Android Studio.
You can know the use of each template by just clicking on them.

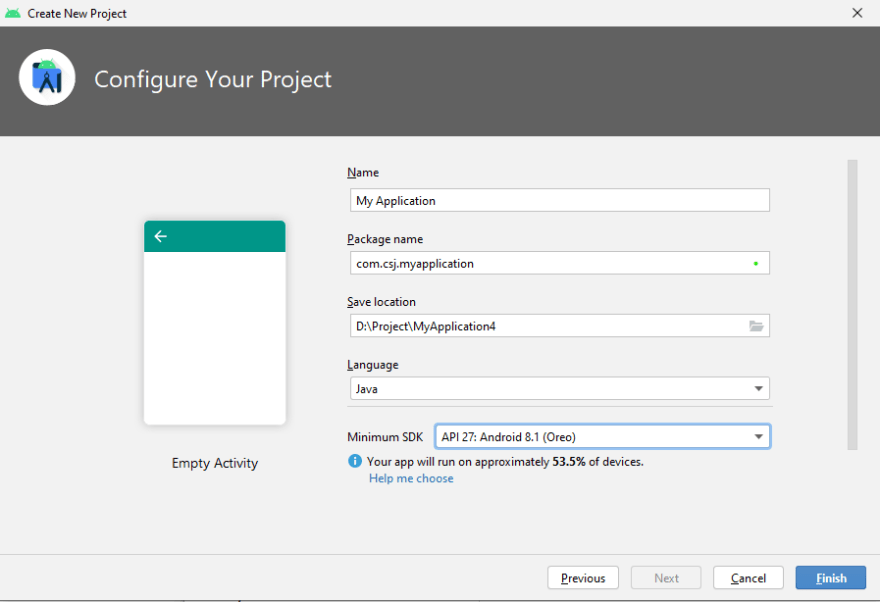
After selecting the required template click on the Next button, then a Configure Your Project screen will open.

From this You can change:
Project Name- This will the name that you want to give your project
Package Name- It will uniquely identify the app on the device. Make sure to change your package name. Your package name shouldn't be like com.example.appname because Google will not allow you to publish the app with such package names.
Save location- This is the location where you want to save your project.
Language- The language in which you want to write the code for the app. Java and Kotlin are the two available options.
Minimum SDK- This the minimum version of Android that your app can run on. It will show for the specific version, your app will run on what % of devices like
 for Android 8.1 it will run on 53.5% of devices
 and for Android 4.1 it will run on 99.8% of devices.
After filling all the fields click on the finish and your project will be created.
Happy Learning!

Posted on April 17, 2021
Join Our Newsletter. No Spam, Only the good stuff.
Sign up to receive the latest update from our blog.

