Deploying AWS RDS Multi-AZ Instance

John Bulla
Posted on February 9, 2023

Note: ✋ This post was originally published on my blog wiki-cloud.co
In a previously article explained the high availability deployment models presented by Amazon RDS called Multi-AZ that presents two options where you can have one or two standby database instances that are Multi-AZ DB instance deployment and Multi-AZ DB cluster deployment respectively.
Next, we are going to concentrate on a practical example of the implementation of Multi-AZ DB instance deployment. The objective of this practical example is to configure the Multi-AZ DB instance schema and we are going to check its functionality by simulating how if there was a failure in the primary database doing a restart and see how the failover is done automatically in the standby database for it this to take the place of the primary.
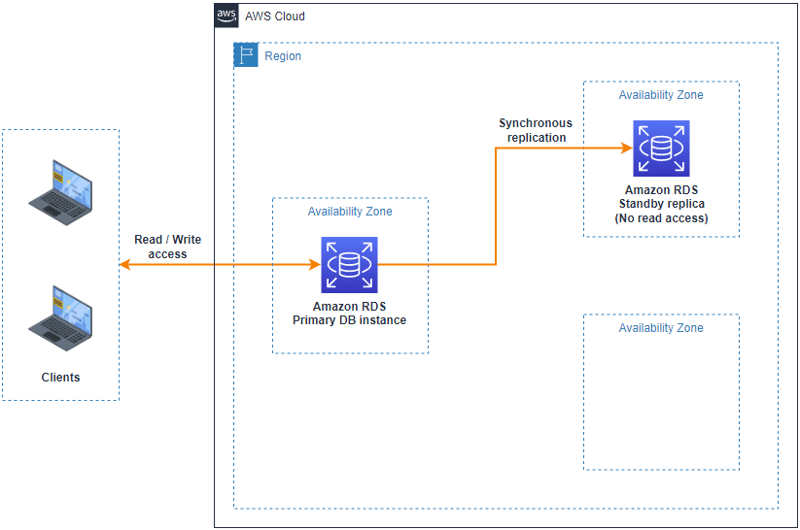 Image 1 – Multi-AZ DB Instance Deployment Architecture
Before starting with the deployment of the RDS database and the configuration of the Multi-AZ deployment model, you must have previously created and configured the VPC with its respective public and private subnets according to the architecture that has been designed.
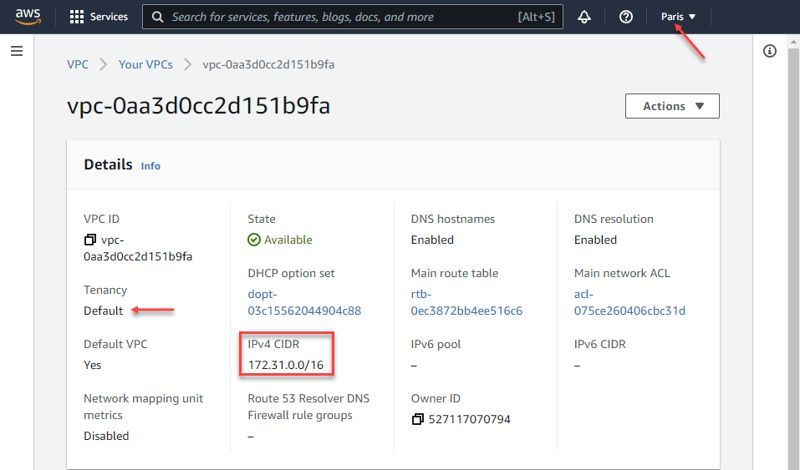
For the following practical exercise used the region of Europe (Paris) / eu-west-3 that has three availability zones and where the VPC that comes by default for this region will be used, later during the creation and configuration of the Amazon RDS instance the respective subnets will be created.
Create and Configure Amazon RDS Multi-AZ instance
We will proceed to search in the AWS Management Console the RDS service and then start the process of creating and configuring the Amazon RDS DB instance by enabling the Multi-AZ scheme.
We select the standard create option which allows us to set configuration options including the Multi-AZ deployment model option.
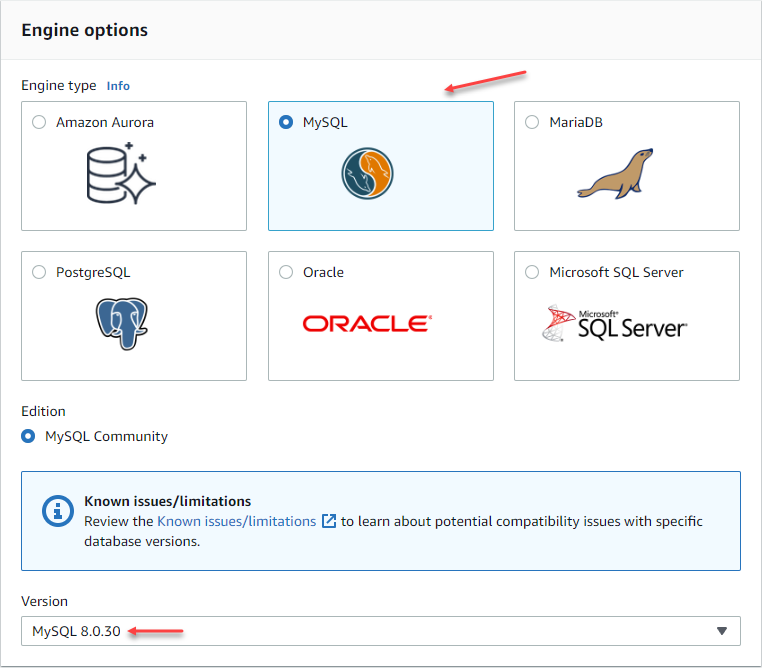
In this example we are going to select the MySQL database engine to create our instance and select the latest version available in production.
Now in the templates we select the production that already brings us default values for high availability.
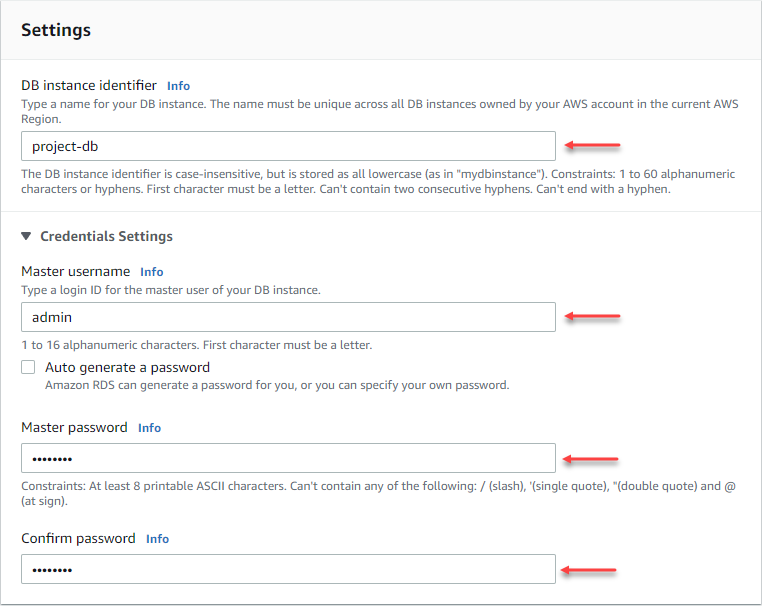
The next step is to define the name of the database instance and we configure a master user with its respective password, complying with the parameters defined by the AWS management console.
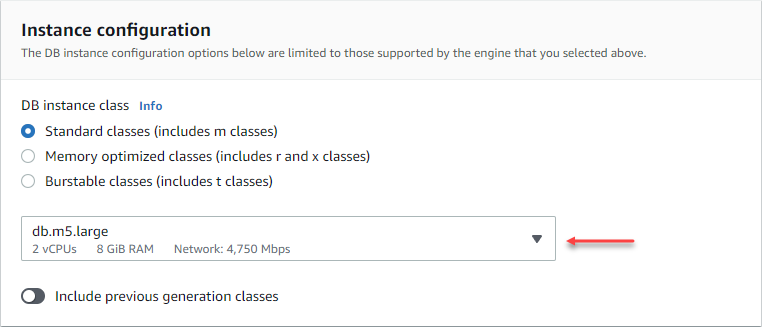
The next step is to select the type of instance for the database that includes the number of vCPUs, RAM, and network. For this practice exercise, I selected the instance with the fewest features.
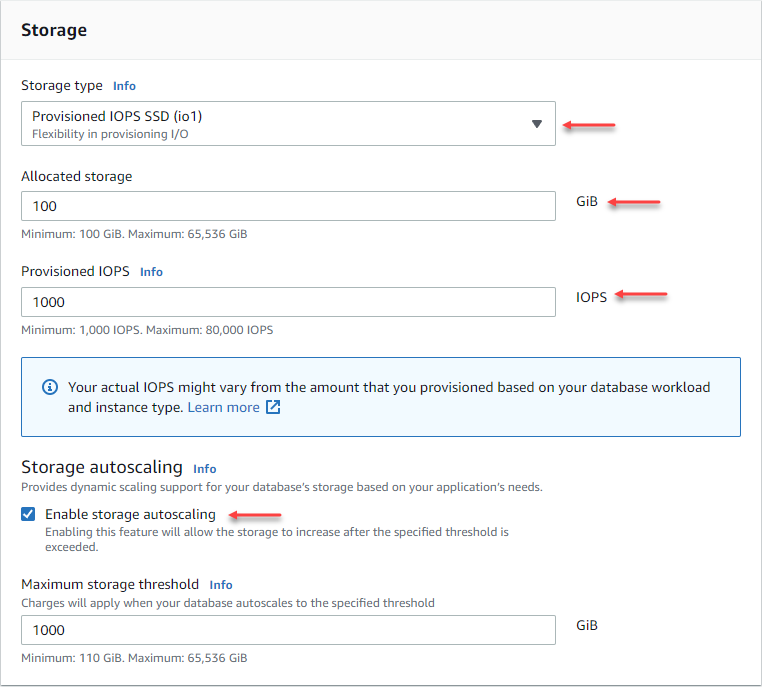
Now we select the storage where our data will be hosted, where we specify the type of disk, its capacity in GiB and the amount of IOPS and if we want our storage to have auto scaling (optional).
Now comes the most important step of this practical exercise and it is the availability and durability part, where we select the Multi-AZ deployment model that is recommended for production scenarios, in this case a standby instance will be created in another availability zone in the region we have selected (Europe – Paris / eu-west-3).
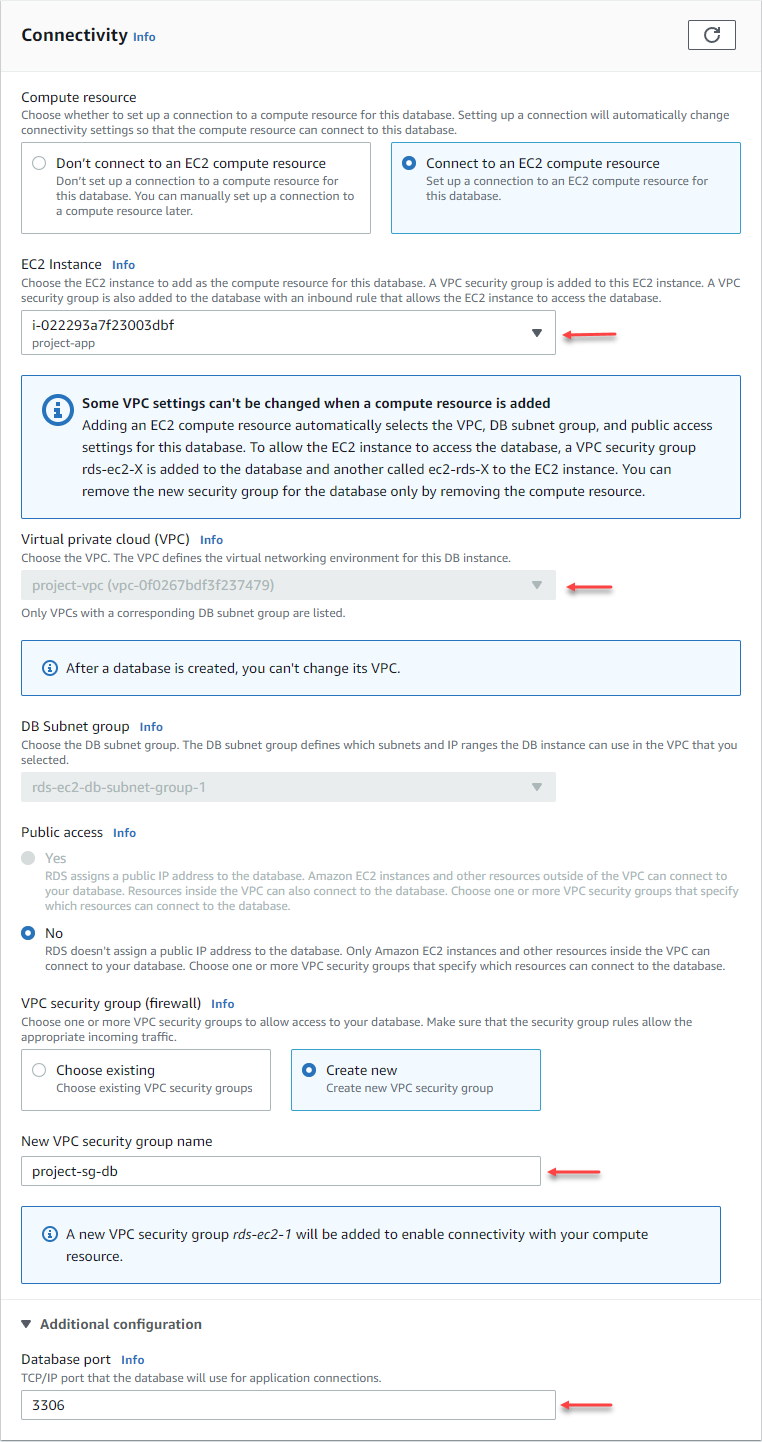
Finally, we configure the connectivity part, where in this case we select the option to connect to an EC2 instance that was the one that we previously created and we select the VPC that is created by default for this region and we add a new security group for the database enabling port 3306 that will serve us for connectivity tests.
I leave the following options by default and click on the “Create Database” button.
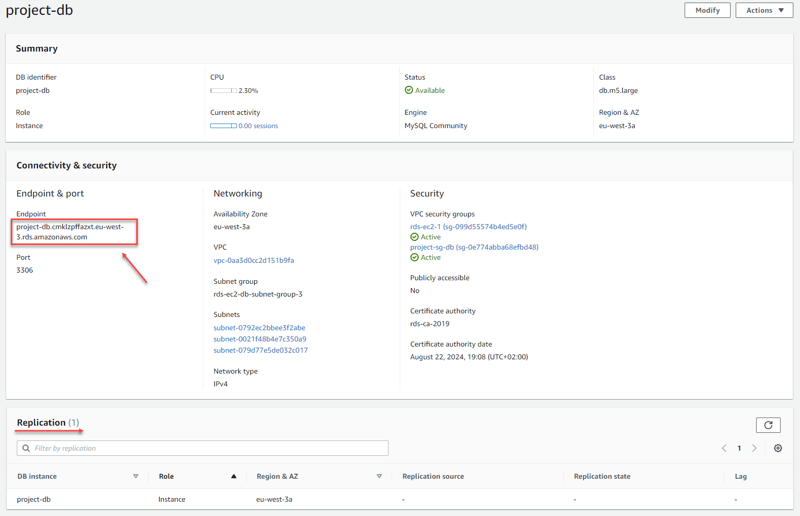
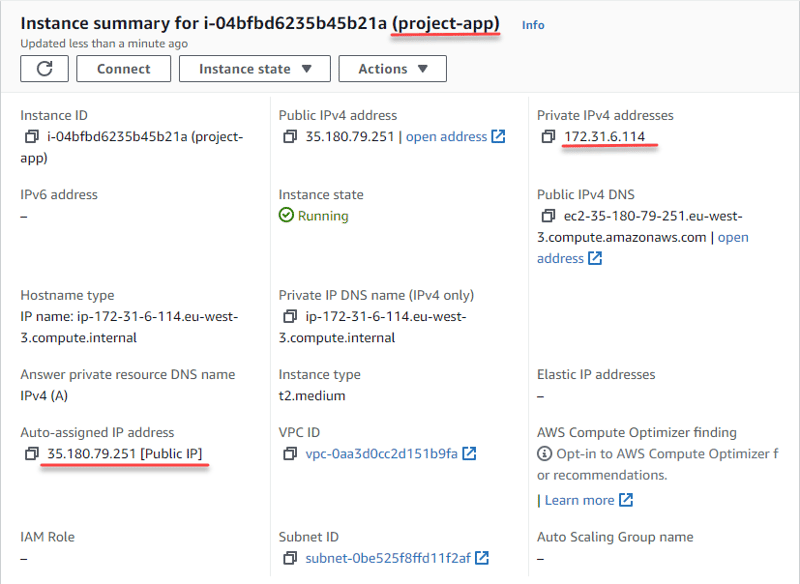
Once our Amazon RDS (MySQL) database instance has been created, we will also have our subnets and our EC2 instance created to do the respective connectivity tests. It is important to copy the Endpoint that will be used to configure the connection string to our database instance.
Connection and testing Amazon RDS Multi-AZ instance
For the part of the connection tests and verification of the Multi-AZ deployment model, we are going to start with the part of the connectivity tests from an EC2 instance (Linux) and later we are going to simulate a failure to verify that the Multi-AZ deployment model and the replication works correctly.
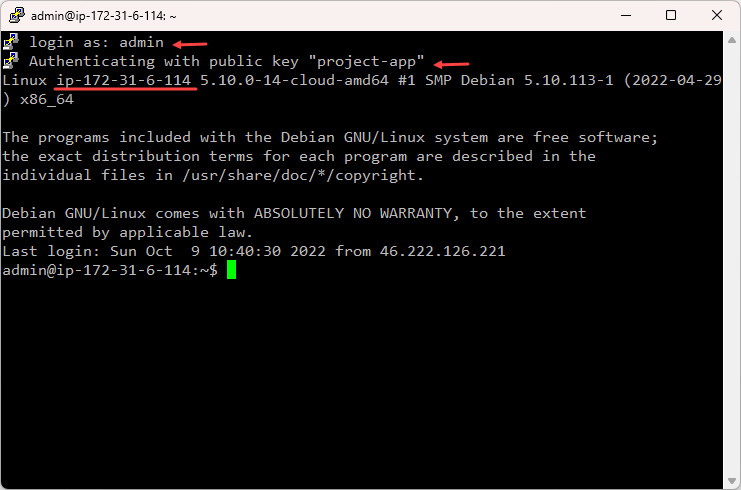
The first step is to connect to the EC2 instance that we have created and configured. In my case I will connect through Putty but we can also do it directly from the AWS Management Console.
Next we are going to run the following command on our EC2 Linux instance to download the updated package lists from the repositories in order to get information about the latest versions of the packages and their respective dependencies.
sudo apt-get update
Now going to install the MySQL client on our EC2 instance to connect to the Amazon RDS (MySQL) instance that we have already created and configured and where we will run some commands to interact with a database and verify the replication. During the execution of the following command, the system asked if we want to continue and we type “Y” and the “Enter” key to continue with the process.
sudo apt-get install default-mysql-client
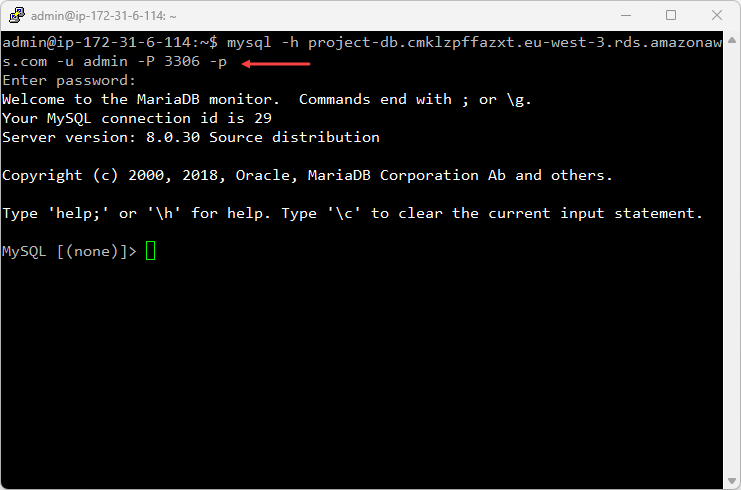
Once the MySQL client is installed, the next step will be to connect to our Amazon RDS instance and we will do it through the following command where we put the Endponit that provides us with the Amazon RDS configuration that appears in the AWS management console.
mysql -h project-db.cmklzpffazxt.eu-west-3.rds.amazonaws.com -u admin -P 3306 -p
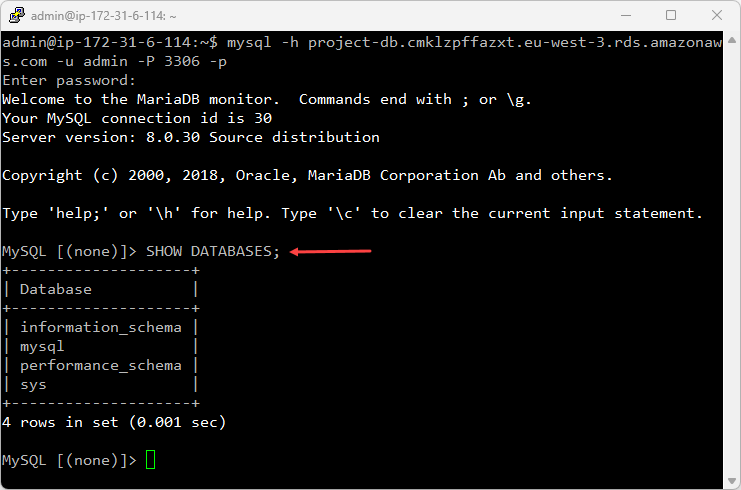
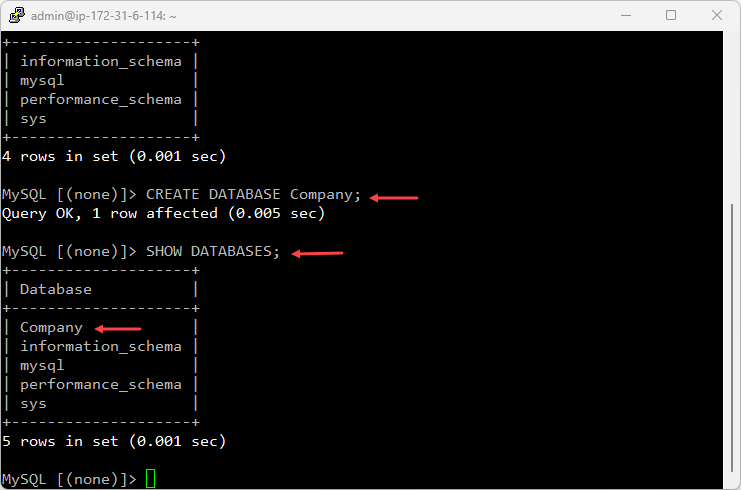
Next, we are going to run a series of commands to the MySQL database engine to create a database, create a table, and insert some sample data.
SHOW DATABASES;
CREATE DATABASE Company;
SHOW DATABASES;
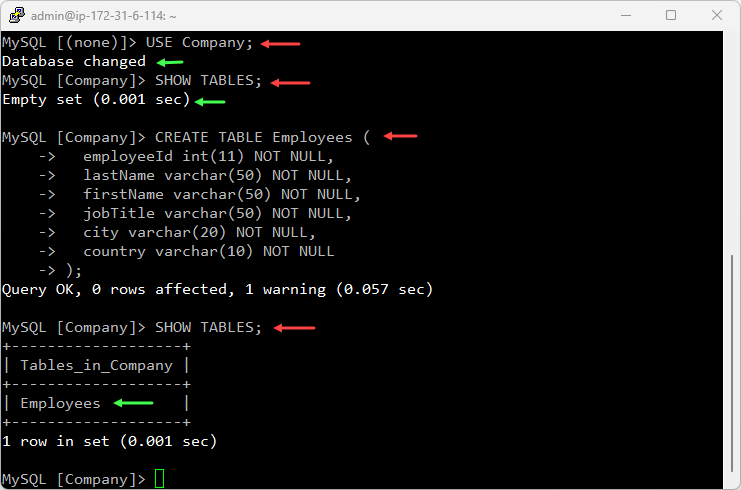
USE Company;
SHOW TABLES;
CREATE TABLE Employees (
  employeeId int(11) NOT NULL,
  lastName varchar(50) NOT NULL,
  firstName varchar(50) NOT NULL,
  jobTitle varchar(50) NOT NULL,
  city varchar(20) NOT NULL,
  country varchar(10) NOT NULL
);
SHOW TABLES;
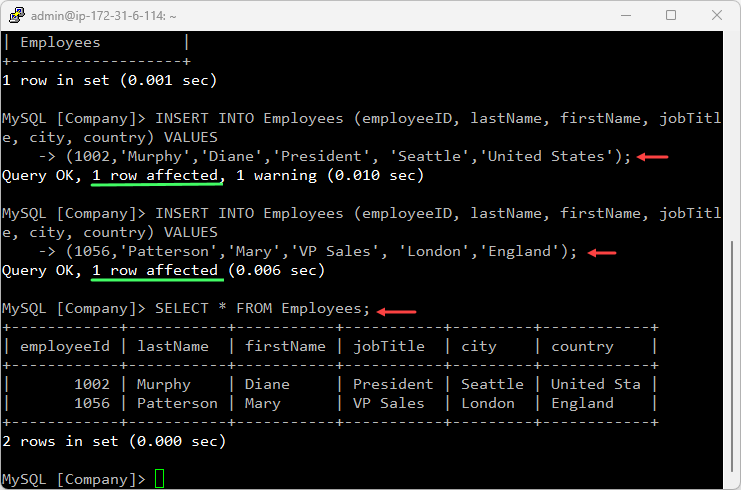
INSERT INTO Employees (employeeID, lastName, firstName, jobTitle, city, country) VALUES (1002,'Murphy','Diane','President', 'Seattle','United States');
INSERT INTO Employees (employeeID, lastName, firstName, jobTitle, city, country) VALUES (1056,'Patterson','Mary','VP Sales', 'London','England');
INSERT INTO Employees (employeeID, lastName, firstName, jobTitle, city, country) values (1102,'Bondur','Gerard','Sales Manager EMEA', 'Berlin','Germany');
INSERT INTO Employees (employeeID, lastName, firstName, jobTitle, city, country) values (1567,'Castillo','Paola','Sales Rep', 'Madrid','Spain');
SELECT * FROM Employees;
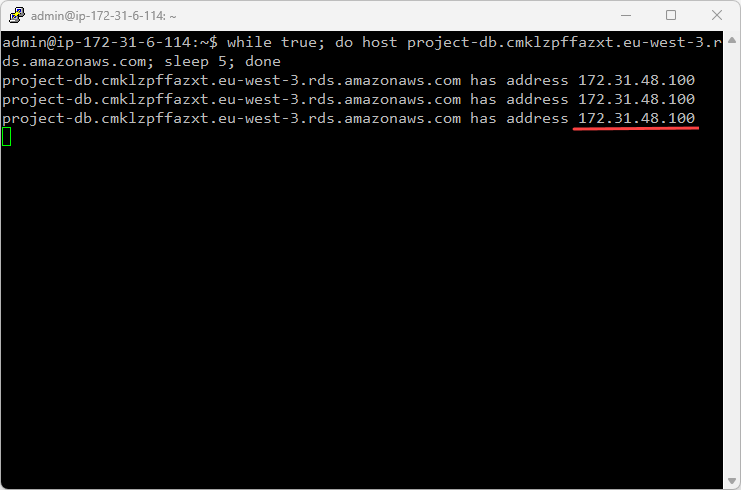
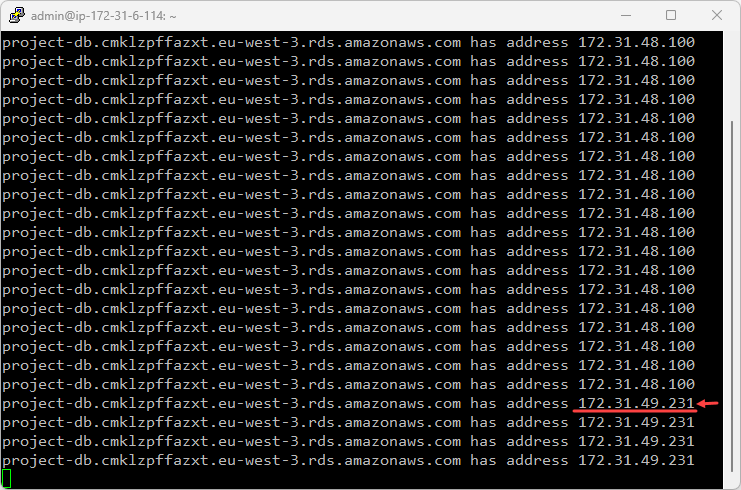
Now we do is execute a command at an interval of every 5 seconds to find out the IP address of the (primary) database that is responding to the requests that an application would make.
while true; do host project-db.cmklzpffazxt.eu-west-3.rds.amazonaws.com; sleep 5; done
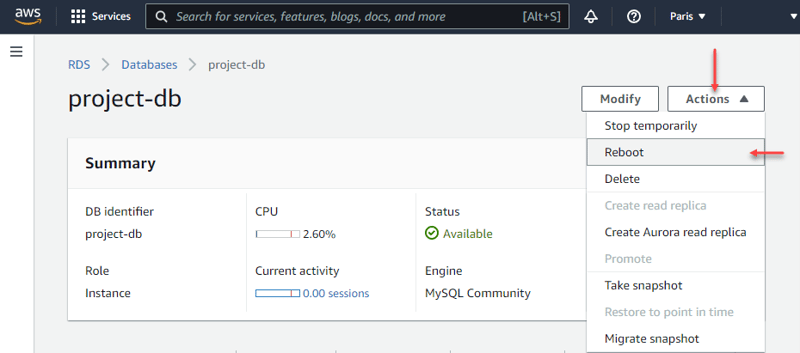
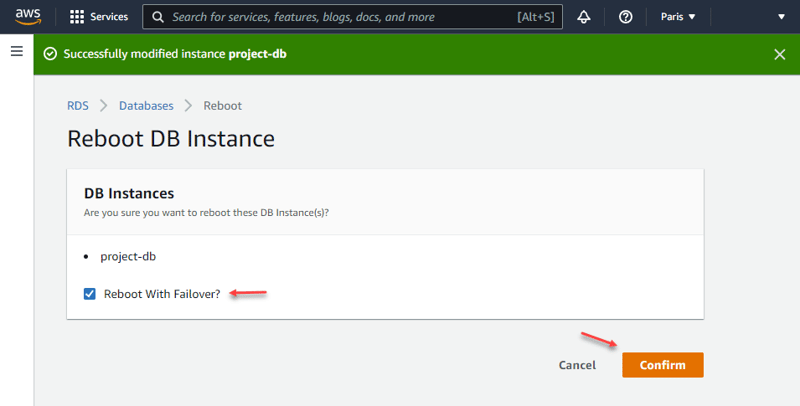
To verify that the failover is done, we do is a reboot to the Amazon RDS DB instance from the AWS Management Console.
After the Amazon RDS primary database is restarted, the standby database that contains the replica of the data takes its place to become the primary and begins serving incoming requests.
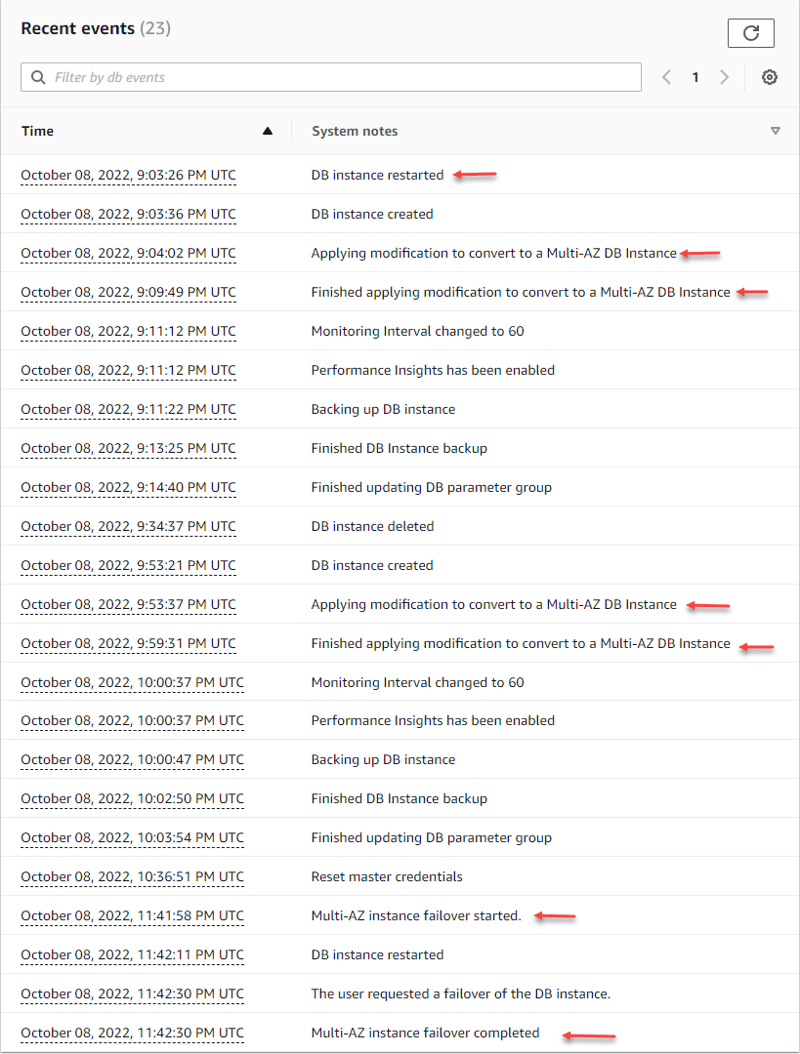
Finally, we check the Amazon RDS (MySQL) instance events in the AWS Management Console to verify that it has made the failover and the Multi-AZ deployment model has been applied.
I hope this information is useful.
Follow me:
👉Wiki Cloud | 👉Twitter | 👉LinkedIn | 👉Youtube

Posted on February 9, 2023
Join Our Newsletter. No Spam, Only the good stuff.
Sign up to receive the latest update from our blog.
