Building a Music Player using React hook useState() with my own implementation

Anthony Zhang
Posted on December 9, 2023

Having been practicing the piano for almost 10 years, I came across this idea to add a music player playing my favorite music on my portfolio website as the development process was halfway through. I feel that it’s just a nice and unique feature to have because it can also showcase my personality through the music I listen to.
The building process is a struggle. I got a painful and slow start with this idea. I did not know what technology I would be using to implement the basic functionalities of a music player, such as play/pause, previous/next song, volume control, backward/forward, etc. Fortunately, there are methods that I found build-in with JavaScript that can do some of these things. However, features like go to the next song can not be found within its function library(Correct me if I’m wrong), so I decided to write my own functions with the help of hook useState().
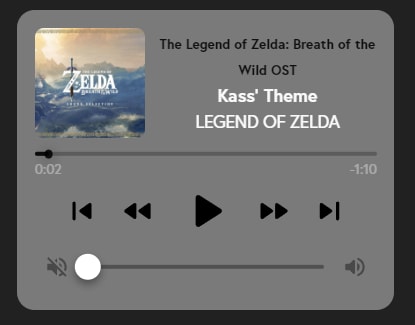
We need some sort of music player layout with good aesthetics to start with so that it is appealing to people’s eyes. Here, I take the music player layout from Material UI, where they showcase an example for their Slider component.
For a better user experience, with just a little twist I added a previous and next song button and a mute volume icon.
With our layout ready, we can start thinking about the logic behind functionalities and start coding.
First, we need to initialize a few state. A few elements we need to consider are:
Duration, playback position and time left indication.
Playing? Or, paused?
song unique ID.
Volume.
From above, we have the following state initialized:
// song length in sec
const [duration, setDuration] = useState(0);

// playback position
const [position, setPosition] = useState(0);

// playing or paused
const [paused, setPaused] = useState(true);

const randomizer = Math.floor(Math.random() * (musicList.length - 1) + 1)
//initial random song
const [songId, setSongId] = useState(randomizer);

//0.2 means 20% volume
const [volume, setVolume] = useState(0.2);
One thing to point out is that we need the song to be paused initially because it can be obtrusive if the song played by itself. This is better practice because you usually want your video or audio to be muted unless the play interaction is started by the users. Think about a college student or your colleagues opened your website during a class or a meeting but forget to mute their laptop, it will be very awkward for them.
To start putting audio element on the webpage, we need an tag, and its
Here is a peek of the structure of my music list data in a JavaScript file. You can add more songs later on.
Here comes the main part, where we are going to implement features for each of our buttons and bars.
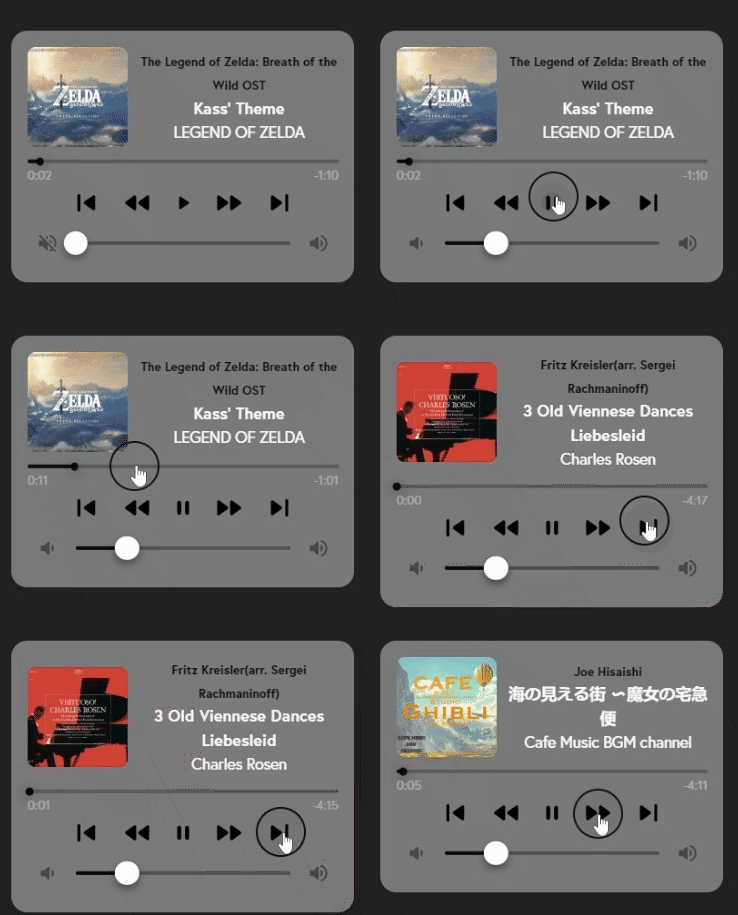
- Playing/Paused. Fairly simple. JavaScript includes play() and pause() functions. All we need to do is to change their state when the button is clicked.
2. Rewind/Forward. Playback bar. I found 5 secs to be reasonable for rewind and forward. currentTime gives the current playing timestamp for the song. It is one of the properties of audioRef.current.
If the song is at the beginning 5 seconds, it should not go below 0 seconds. For the same reason, if a song is at the end 5 seconds, it should not go beyond song’s duration. Otherwise this music player will be bugged out.
Keep in mind. We not only have to change the currentTime of our song, but also have to show its position on the playback bar. The code below keeps them in sync. Every time a user drags the playback bar, it will update its position and assign the value to the currentTime property.
3. Previous/Next Song. This is more complicated because there are more things to be considered.
If this is the last song in our music list, it should skip to the first song. Otherwise, it will proceed as a normal song skip. And every time we skip a song, we need to load the new data and play so that the user do not need to click the play button again. For better experience, we could add an error handler if something went wrong with the loading.
4. Volume Change. Here I use localStorage to let the browser remember what user’s previous volume is.
To show the mute volume icon when volume reaches 0, I simply use a ternary operation.
5. Display current playback time/Time left. Current playback time is the same as current playback position. Time left will be song duration minus current playback time.
Due to the fact that the duration property of audioRef.current is in seconds, we need to format it into min:sec.
We can only get the song duration after song data is being loaded so here we can use the onLoadedMetadata event handler.
The loadedmetadata event is fired when the metadata has been loaded.
6. Time update on each tick. Keep track of playback in real time, and if song reaches to the end, it will trigger the skip next song function. Here we use another event handler onTimeUpdate.
The timeupdate event is fired when the time indicated by the currentTime attribute has been updated.
We have finished writing all the functions with the buttons and bars. The last thing we need to do is to put these functions in their corresponding onClick event handler as well as incorporating them with our layout. (For bars, you would need to use onChange event handler).
Now I have a bug free music player on my portfolio website created by myself. I know for sure this is not the best practice to build it this way, so please leave a comment if you know anything that can improve upon on my implementation.
Here is my entire code for the music player component in JSX: Code. If you like my work, please don’t forget to star my repo.
Let’s connect:

Posted on December 9, 2023
Join Our Newsletter. No Spam, Only the good stuff.
Sign up to receive the latest update from our blog.
Related

December 9, 2023


