Build An Admin Dashboard Using React & GraphQL

Al Rubel Rana
Posted on February 20, 2020

Original post:React GraphQL Admin Dashboard Template
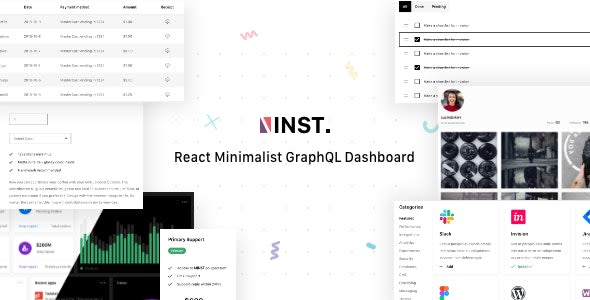
Inst is a Minimalist React Dashboard built with React, NextJS, TypeScript, GraphQL & Uber’s Base UI. It is very easy to use; GraphQL and TypeGraphQL are implemented. Inst is a Next.js GraphQL powered admin dashboard. Used progressive web application pattern, highly optimized for your next react application. You can use it for both Dashboard and Public pages for your web applications. Available in both Light and Dark mode.
To activate the Dark mode, Click on the profile image at the right corner, and you will find the ‘Dark Mode’ in Drop-down.
Note: Please note that, This is not an HTML template. It is a React Dashboard template built using Next.js Framework.
P.S. Design inspiration was taken from Now.sh
Inst – React GraphQL Admin Dashboard Template
Built with
- Next JS, React Apollo and GraphQL are used.
- All components are written in TypeScript.
- Monorepo Supported with Lerna Configuration.
- SSR support for building highly scalable apps.
- Uber's BaseUi
- React Big Calendar
Stack Used by Developer
- Lerna (A tool for managing JavaScript projects with multiple packages. https://lernajs.io)
- Yarn Work-space
- React Js and Next Js
- TypeScript
- GraphQL
- TypeGraphQL
- Baseweb design for UI components. https://v9-50-0.baseweb.design/
- Now Deployment
Template Features
- Create Next App, React Hooks, React Context
- BaseUI Design, Next.Js, Next Optimized Image
- Glide.Js for Slider, TypeScript, Apollo Client
- GraphQL, TypeGraphQL, Styletron
- Comes with both Dark & Light Mode
- Charts, User Profile, ToDo
- Github Search, Firebase CRUD, Product Hunt
- Shop Page, Checkout Page, Invoice
- Pricing Plan, Billing, Authorized Applications
Getting Started
After downloading the file from Themeforest, You will find inst.zip file. Unzip the inst.zip and run the following commands on inst folder to get started with the project.
yarn
//For starting dev server run
yarn dev
NOTE: Before start the project add your config credentials in next.config.js file
env: {

      APOLLO_CLIENT_URL: 'http://localhost:4000/graphql',

      APOLLO_GITHUB_CLIENT_URL: 'https://api.github.com/graphql',

      APOLLO_PRODUCT_HUNT_CLIENT_URL:

        'https://api.producthunt.com/v2/api/graphql',

      GITHUB_AUTH_TOKEN: 'your_github_auth_token',

      PRODUCT_HUNT_AUTH_TOKEN: 'your_product_hunt_auth_token',

      FIREBASE_API_KEY: 'your_firebase_api_key',

      FIREBASE_AUTH_DOMAIN: 'your_firebase_auth_domain',

      FIREBASE_DATABASE_URL: 'your_firebase_database_url',

      FIREBASE_PROJECT_ID: 'your_firebase_project_id',

      FIREBASE_STORAGE_BUCKET: 'your_firebase_storage_bucket',

      FIREBASE_MESSAGING_SENDER_ID: 'your_firebase_messaging_sender_id',

      FIREBASE_APP_ID: 'your_firebase_app_id',

      FIREBASE_MEASUREMENT_ID: 'your_firebase_measurement_id',

    },
Folder Structure
/api

  /src

    /data

    /services

      /dashboard

      /integration

      /invoice

      /product

      /profile

/frontend

  /apollo

  /assets

  /components

  /containers

  /contexts

  /data [ui elements api data]

  /firebase

  /pages

  /types

  /utils
Routes
/

/apps

  /todo

  /firebase-crud

  /invoice

    /[id]

    /add

  /github

  /product-hunt

/shop

  /[slug]

  /checkout

/charts

  /area

  /column

  /bar

  /mixed

  /pie

  /radar

  /product-view

  /cash-flow

/forms

  /hook-form

/uielements

  /page-title

  /widget-card

  /carousel

  /cart-product

  /instagram-card

  /product-card

  /pricing-card

  /listgrid-card

/pricing

/profile

/settings

  /password

  /billing

  /applications

/login

/signup

/terms

/privacy
Explaining Containers
In the containers directory you will get folder for Calendar, Crud, Formik, HookForm[React hook form], Posts, Shop, Todo and Widgets.
All of these containers contain regular reactjs code.
Deployment
Developer has provided now.sh deployment support by default. Follow below instruction.
now.sh
Developer has given now.sh deployment by default. For hosting the project in now.sh.
- Add your production credentials on next.config.js
-
first you have to go api folder and run now
$ cd api/
$ now -
After deploying api you will get a url from now. You have to put that url in the
/frontend/next.config.js APOLLO_CLIENT_URL.
-
Now go to frontend folder and run now
$ cd frontend/
$ now
Note: Make sure you have now-cli installed in your system.
This post includes affiliate links; I may receive compensation if you purchase products or services from the different links provided in this article.

Posted on February 20, 2020
Join Our Newsletter. No Spam, Only the good stuff.
Sign up to receive the latest update from our blog.
