AFCM
Posted on April 17, 2024
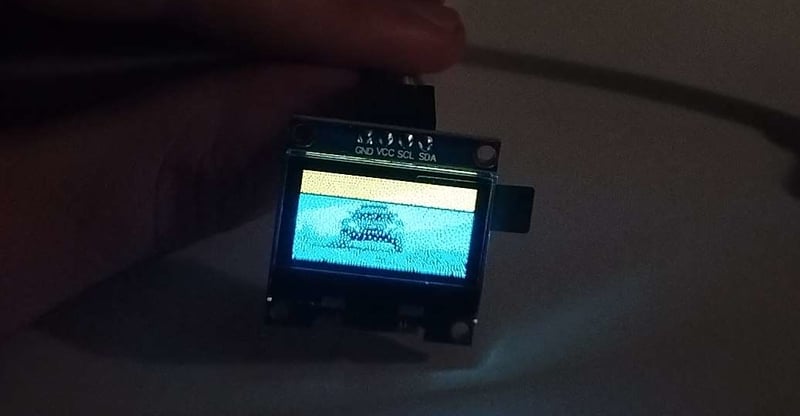
In this exemple, I will be using a SSD1306 OLED display driven by the ESP32-WROOM-32.
Getting the video
First, you need a video to display.
In my case, I wanted to display a video available on YouTube, so I used the Parabolic GUI for the yt-dlp project, which allows downloading videos from YouTube and other video streaming services.
IMPORTANT:
Please keep in mind you may not have the right to include a video in your project.
If you want you can also use directly the yt-dlp CLI tool after following the official documentation to install it. This should get you a video file inside the folder you have run the command from:
yt-dlp https://www.youtube.com/watch?v=dQw4w9WgXcQ
Of course, you can use a video from any other source you want.
Getting usable video data
For the next step, we need to get the video as a sequence of images at a 128x64 resolution.
To do this, I will be using the FFmpeg media processing toolkit. You can install it on your system following the official documentation.
You can now run the following:
ffmpeg -i ./My_Video_File.mp4 -s 128x64 -vf fps=15 -ss 0 -t 60 ./My_Video_File_Output/out%4d.png
We can explain the command line like this:
-
-s 128x64Specify the wanted resolution -
-vf fps=15Specify the targeted FPS. Usually, videos are at 25FPS or more, but for such a small screen and limited memory, 15FPS will be enough in most cases. -
-ss 0Used to limit the amount of video extracted. Specify the start timestamp, can use several different formats, notably number of seconds orHH:MM:SS -
-t 60Used to limit the amount of video extracted. Specify the duration of the video taken after the start timestamp, can use several different formats, notably number of seconds orHH:MM:SS -
./My_Video_File_Output/out%4d.pngDefine where the PNG sequence will be. In that case, they will be namedoutXXXX.pngwhereXXXXis the frame ID. It is very important you do not overflow the specified number of digits (here 4), or the frames will not be ordered in the next step.
Getting the generated C code
To generate C code, I will be using the image2cpp website, which runs entirely in your browser without a server. You can also close the project source code and run it locally.
In the first step, you can select all images in your sequence.
CAUTION:
Depending on how many images you have, crashes may happen.
In my testing, Firefox crashed when I uploaded 6000 images. Chrome didn't crash, but on my Fedora 39 installation, thexdg-desktop-portalprocess used by Chrome to select the files wasn't stopping after the files had been uploaded, while taking a huge amount of RAM, requiring me to kill the process.
The image importing process is quite slow and uses a lot of RAM since it's done all at once, which is a downside of the project being web-based. Resizing the video to 128x64 must be done by FFmpeg, even if the website can resize images because it will take too much RAM if you use the website.
After the importation finishes, you will go to the image settings step.
You need to set the background color to white, but the most important setting is the dithering.
IMO Floyd-Steinberg was the best-looking method in my testing.
You can then generate Arduino code that will look like this:
...
// 'outXXXX', 128x64px
const unsigned char epd_bitmap_outXXXX [] PROGMEM = {
  ...
  0xaa, 0xaa, 0xaa, 0xaa, 0xaa, 0xaa, 0xaa, 0xaa, 0xaa, 0xaa, 0xaa, 0xaa, 0x15, 0x55, 0x55, 0x55,
  ...
};

// Array of all bitmaps for convenience. (Total bytes used to store images in PROGMEM = 1234)
const int epd_bitmap_allArray_LEN = 123;
const unsigned char* epd_bitmap_allArray[123] = {
  ...
  epd_bitmap_outXXXX,
  ...
};
The epd_bitmap_allArray array will be used to display the video, here it's important to not overflow the digits in the file names, or the images will not be ordered correctly.
Displaying the video
To display the video in a loop using the following libraries:
#include <SPI.h>
#include <Wire.h>
#include <Adafruit_GFX.h>
#include <Adafruit_SSD1306.h>

#define OLED_RESET 0x3C
Adafruit_SSD1306 display(128, 64, &Wire, -1);

// Used to know which frame to display
int t = 0;

void setup() {
  // initialize with the I2C addr 0x3D (for the 128x64)
  display.begin(SSD1306_SWITCHCAPVCC, OLED_RESET);
  display.clearDisplay(); // Make sure the display is cleared
}

void loop() {
  // Clear the display
  display.clearDisplay();

  // Draw the t frame from the array
  display.drawBitmap(0, 0, epd_bitmap_allArray[t], 128, 64, WHITE);
  display.display();

  // Wait for 1000ms/15FPS
  // If you changed the number of FPS in FFmpeg output, you need to update this for the video to play in real-time
  delay(1000/15);

  // Which frame is next, back to 0 at the end of the array
  t += 1;
  if (t == epd_bitmap_allArray_LEN) {
    t = 0;
  }
}
Wokwi diagram:

Posted on April 17, 2024
Join Our Newsletter. No Spam, Only the good stuff.
Sign up to receive the latest update from our blog.

