Automating Mobile Web Browsers with Appium

Abhay Chaturvedi
Posted on March 28, 2024

Ensuring your application functions flawlessly across various browsers is crucial in mobile application development. This is where Appium, an open-source automated mobile browser testing tool, becomes invaluable.
What is Appium?
Appium is a cross-platform automation tool used for automating mobile applications. It supports testing on iOS and Android platforms and can automate web applications on mobile browsers like Safari on iOS and Chrome on Android.
Getting Started with Appium for Browser Testing
When initiating Appium browser testing, following a structured setup process is essential. This begins with installing Appium on your system. You can do this via Node.js using npm (Node Package Manager). It's crucial to ensure you have the latest version of Node.js installed to avoid compatibility issues.
Next, install the Appium desktop client, which provides a GUI for Appium server configurations and inspection tools. This simplifies the process of setting up tests and monitoring their execution.
Connecting Appium to devices is the next crucial step for Appium browser testing. You can either use real devices or emulators/simulators. For real devices, you must ensure proper USB debugging (for Android) or WebDriverAgent installation (for iOS). Configure emulators or simulators to match the specifications of the devices you aim to test.
Finally, setting up the environment variables is critical. These variables allow your testing scripts to communicate with Appium. They include paths to the Android SDK (for Android testing) and Xcode (for iOS testing).
This setup provides a robust foundation for conducting effective Appium automated mobile browser testing, ensuring your automated tests run smoothly on Android and iOS platforms.
Appium for Android and iOS Browser Automation
Appium's ability to automate browser testing on Android and iOS devices is one of its standout features. Appium typically employs the UIAutomator2 driver for Android, which is known for its speed and reliability. This driver allows testers to interact with the browser and native app components, making it ideal for comprehensive testing scenarios.
On the iOS side, Appium uses the XCUITest driver. XCUITest, developed by Apple, offers robust support for iOS's native components. It interacts seamlessly with Safari, providing an accurate testing environment that mirrors real user interactions. With XCUITest, testers can automate tasks in Safari, handle alerts, and efficiently work with web elements.
Appium browser automation on these platforms emphasizes compatibility and performance. Test scripts written for one platform can often be reused with minimal changes on the other, thanks to Appium's consistent API. This cross-platform compatibility significantly reduces the time and effort required in writing and maintaining test scripts for multiple platforms.
Moreover, Appium's support for real devices, emulators, and simulators means testing can be as close to real user conditions as possible. Whether it's testing a web app on Chrome, an Android device, or Safari, Appium provides the tools and flexibility needed for thorough and efficient browser testing.
This cross-platform capability makes Appium a highly versatile tool, ideal for teams aiming to ensure their web applications perform consistently across the most widely used mobile browsers.
Writing Tests with Appium
The process of writing tests with Appium is remarkably similar to Selenium WebDriver due to their shared API. If you're familiar with Selenium, transitioning to Appium is straightforward. The primary step is choosing a programming language (Java, Python, Ruby, etc.) and an appropriate testing framework (like TestNG for Java or pytest for Python).
In an Appium test script, you start by defining the desired capabilities. These capabilities include essential information about the test session, like the platform (Android or iOS), browser (e.g., Chrome or Safari), and device specifics. Once the session starts, Appium commands allow you to navigate the browser, interact with elements (like clicking links and entering text), and retrieve information (such as getting text from elements).
Moreover, Appium facilitates locators to find elements on the web page, just like in Selenium. This involves using strategies like ID, XPath, or CSS selectors. What's unique about Appium is its ability to handle mobile-specific components and gestures, such as swiping or tapping, which are not typically present in desktop browser automation.
Testing scenarios can range from simple validation checks (like verifying the title of a web page) to more complex interactions involving multiple steps and validations. This flexibility makes Appium a powerful tool for automating many test cases in mobile browsers, ensuring comprehensive coverage of your web application's functionality.
This approach to writing tests in Appium ensures a robust framework for mobile web browser testing, catering to the specific challenges presented by mobile environments.
Appium Chrome Browser Automation
Appium's capability to automate Chrome browser testing on Android devices is a significant feature for mobile web application testing. This automation is facilitated through the ChromeDriver, which interacts with Chrome on Android, enabling the execution of complex web testing scenarios.
- Setting Up ChromeDriver in Appium: To initiate Chrome browser automation, Appium integrates with ChromeDriver. Ensuring the ChromeDriver version is compatible with the Chrome version on the testing device is crucial.
- Capabilities for Chrome Automation: Specific capabilities such as 'browserName' and 'platformName' must be set when writing test scripts for Chrome. These capabilities allow Appium to understand that the test is meant for a web browser on a mobile device.
- Accessing Web Elements: Similar to desktop web testing, Appium allows the identification and interaction with web elements in Chrome using locators like ID, XPath, and CSS selectors. This is essential for clicking links, entering text, and validating content.
- Handling Mobile-Specific Scenarios: Appium enables testers to handle scenarios unique to mobile browsing, such as touch gestures, orientation changes, and viewport adjustments.
- Automating Hybrid Applications: Besides pure web applications, Appium can handle hybrid applications where web content is embedded within a native app.
- Debugging and Logging: Appium provides extensive debugging and logging capabilities to troubleshoot issues during the automation of Chrome browser testing.
- Continuous Integration and Scalability: Appium can be integrated into CI/CD pipelines, allowing automated tests to run as part of the build process. Its compatibility with cloud-based device farms enhances scalability.
By leveraging these features, testers can create comprehensive and reliable test suites for Chrome browser automation, ensuring the mobile web applications perform well across a wide range of Android devices.
Advanced Features in Appium for Enhanced Testing
Appium's advanced features significantly enhance mobile browser testing, taking automation beyond basic functionalities:
- Network Conditioning: This feature allows testers to simulate different network conditions, like low bandwidth, to test how an app behaves under various network environments. This is particularly useful for ensuring mobile web applications remain functional and user-friendly even in less-than-ideal network conditions.
- Gesture Simulation: Appium can simulate complex user gestures like swipe, scroll, pinch, and zoom. This is crucial for testing the responsiveness and interactivity of web elements in a mobile browser environment.
- Integration with Cloud Services: Appium's compatibility with cloud-based device farms like Sauce Labs or BrowserStack enables testing on various devices and browser versions without needing a physical device lab. This ensures comprehensive coverage and scalability in testing efforts.
- Visual Regression Testing: With Appium, visual elements of a web application can be tested for consistency across different devices and resolutions. This is vital for maintaining a uniform user experience.
- Continuous Integration Support: Appium integrates well with CI/CD pipelines, allowing automated tests to be a part of the development process. This ensures that any changes in the web application are tested in real time, reducing the risk of bugs in production.
These advanced capabilities of Appium fortify the testing process, making it robust, scalable, and suited for the dynamic requirements of modern mobile web applications.
Appium has taken the Automation world by storm recently. A majority of the customers work with it exclusively to test their Android and iOS apps. A common issue they struggle with is knowing how to use automation to test their websites on real devices, instead of relying on the inbuilt debug tools on their desktop browsers to simulate the mobile layout.
At HeadSpin, we focus on showing customers the real user experience on real devices, so it’s essential we have an automation framework that allows testing mobile websites. Luckily, Appium has robust support for testing on both Safari for iOS and Chrome for Android. Recently, one of our largest telco customers engaged our professional services team to automate several of the most popular websites in their country. It was an interesting challenge, so we would like to share the process in the hopes that it helps the automation community build robust, scalable automation tests for their mobile websites.
Using Appium Desktop (and why it isn’t much help)
The first thing you can do when investigating a novel app without source code or accessibility IDs is to use Appium Desktop – a nice front end for Appium with a built-in inspector.
Luckily, HeadSpin takes away a lot of the hard work with setting up a server and offers its own stripped-down inspector without the server.
First, let’s connect to our device of choice and use Chrome for Android (Safari for iOS also works). Here’s an example of the capabilities used:
Android:
{

 “deviceName”: “SM-G960F”,

 “udid”: “xxxxxxx”,

 “autoAcceptAlerts”: true,

 “automationName”: “UiAutomator2”,

 “browserName”: “Chrome”,

 “platformName”: “Android”,

 “headspin:autoDownloadChromedriver”: true

}
iOS:
{

 “deviceName”: “iPhone X”,

 “udid”: “xxxxxxxxxxxxx”,

 “automationName”: “XCUITest”,

 “platformVersion”: “13.3”,

 “platformName”: “iOS”,

 “browserName”: “Safari”,

 “safariInitialUrl”: “https://wikipedia.org”,

 “autoWebview”: true

}
Testing locally on Chrome on Android requires a Chromedriver. With Headspin we set a capability to download the latest before testing automatically. Testing on Safari requires the web inspector to be switched on the phone.
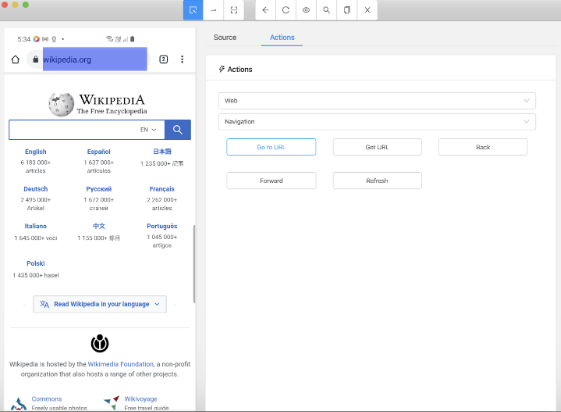
Once we are in the inspector, we can investigate the native paths and IDs of the website. First let’s navigate to our site using the Go to URL in Web – Navigation Actions:
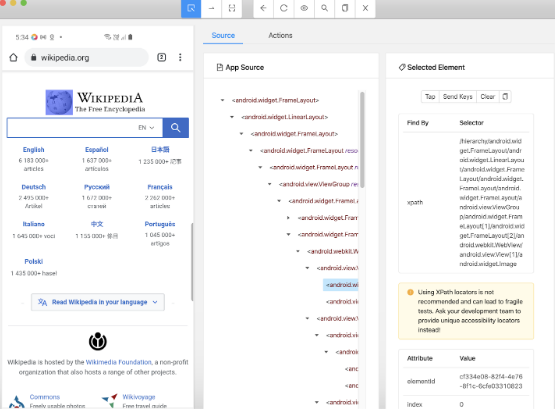
Looking at the source, notice how most of the Element descriptors are not human readable or informative.
Using Chrome or Safari to help identify elements
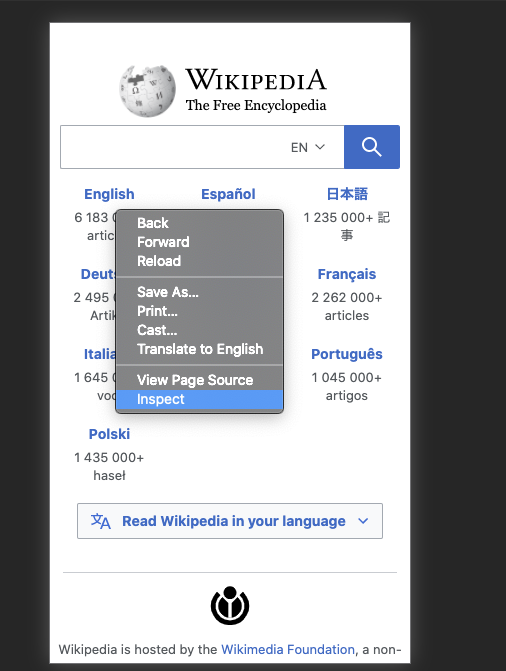
Instead of the standard app automation workflow let’s use the inbuilt element inspector in Chrome or Safari to help write our automation script.
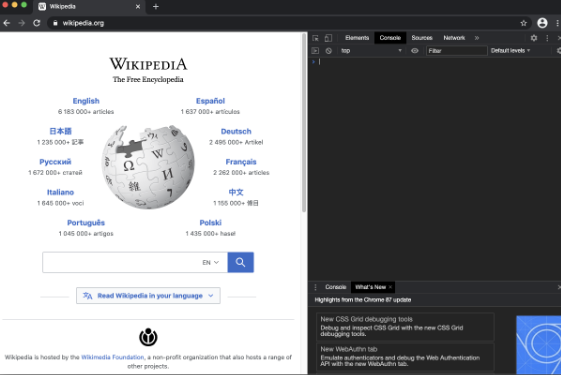
Let’s open our page in Chrome and access devtools with F12.
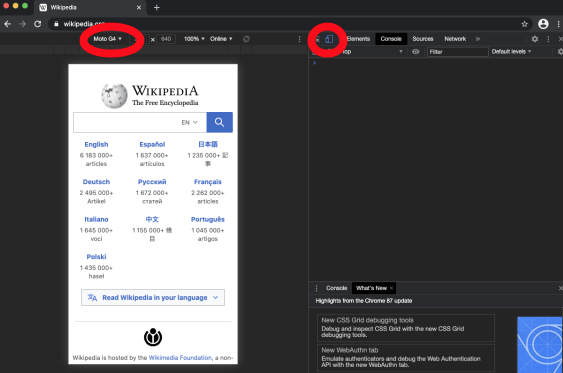
Now, click the Toggle Device Toolbar on the top left of the inspector window and select your preferred resolution.
Now to prepare the code. After specifying the Appium capabilities and initializing the driver, let’s go to the website using driver.get (All code samples are in python, the equivalent bindings for your favorite language can be found in the Appium docs linked.)
driver.get(“https://wikipedia.org”)
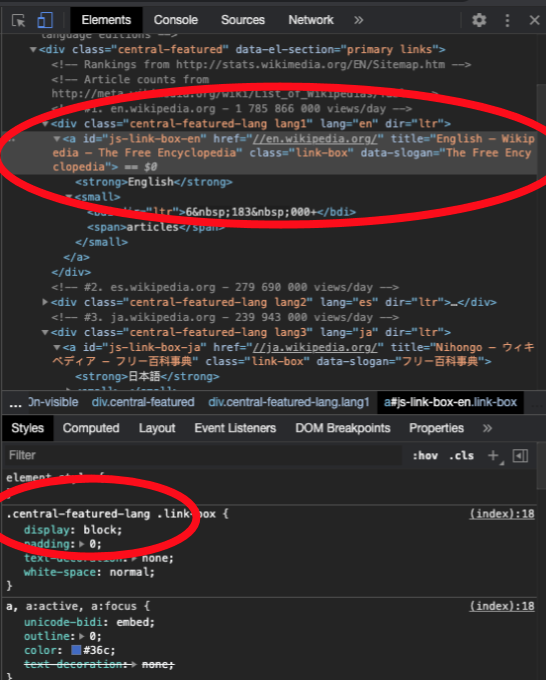
Next, let’s use Chrome to inspect the element we would like to interact with.
We can inspect the element and notice there are two ways to find the element with Appium to interact with it.
First is by using the HTML code at the top. We can use the find_element_by_xpath (or xpaths if multiple) capability to select based on the HTML element descriptor. In this case:
element = driver.find_element_by_xpath(“//a[@id=’js-link-box-en’]”)
element.click()
Or we can use the CSS selector at the bottom with the find_elements_by_css_selector class. In most cases several elements will use the same CSS selector so we need to select the correct element in the array:
element = driver.find_elements_by_css_selector(“.central-featured-lang”)
element[0].click()
You can use these two strategies to build the rest of the script. We hope this will help you build robust, scalable Appium scripts to test your mobile webpages!
Article resource: This post was originally published on https://www.headspin.io/blog/automating-mobile-web-browsers-with-appium

Posted on March 28, 2024
Join Our Newsletter. No Spam, Only the good stuff.
Sign up to receive the latest update from our blog.
