How to Save First-person 3D Shooter Game on STM32F1?

Abby
Posted on August 25, 2020

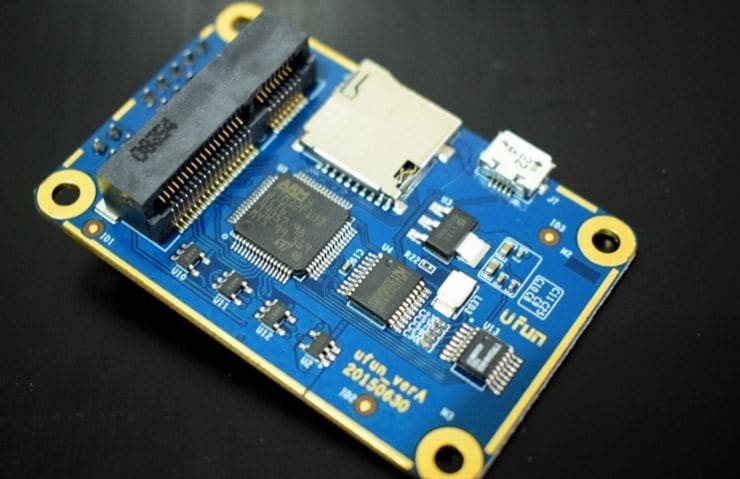
Whenever we mention a 3D first-person shooter, it's natural to think of high-performance graphics card, as well as a few GB or even dozens of GB hard drive storage space, so is it possible to save a large first-person shooter on a small board like STM32F103RC with only 256KB Flash?
When we connect the board to the computer with a USB cable, we could see a USB stick with just over 100 KB, which was flash on the STM32.
Then you can see that there is a 90KB game in the USB stick.
Double-click it to enable a first-person shooter on STM32.
The full demo presentation video please refer to RT-Thread YouTube Channel.
1. Run RT-Thread
RT-Thread is an open-source embedded real-time operating system that stores the code on Github, and it provides detailed documentation. Below summarized the tools needed for this project:
- Git Bash
- Keil
- STM32
- RT-Thread source code
- RT-Thread Env Tool
2. On-chip Flash File System
Mount the flash on the stm32 as a file system, and enable USB in CubeMX.
After turning on USB, verify that the external crystal is consistent with the crystal on the board in the clock configuration and that the USB clock is 48MHz, then click it to generate the code. Since we have modified the clock, we need to copy the function void SystemClock_Config(void) inside board/CubeMX_Config/Src/main.c to the board/board.c and replace it.
Then, modify the Kconfig file in the board directory under BSP.
1config BSP_USING_ON_CHIP_FLASH
2    bool "Enable on-chip FLASH"
3    default n
4
5config BSP_USING_USBD_FS
6    bool "Enable USBD as USB device"
7    select RT_USING_USB_DEVICE
8    default n
This allows you to right-click ConEmu Here in the BSP directory to see the configuration interface (Env tutorial) and select the following options:
1. Hardware Drivers Config --> Enable on-chip Flash
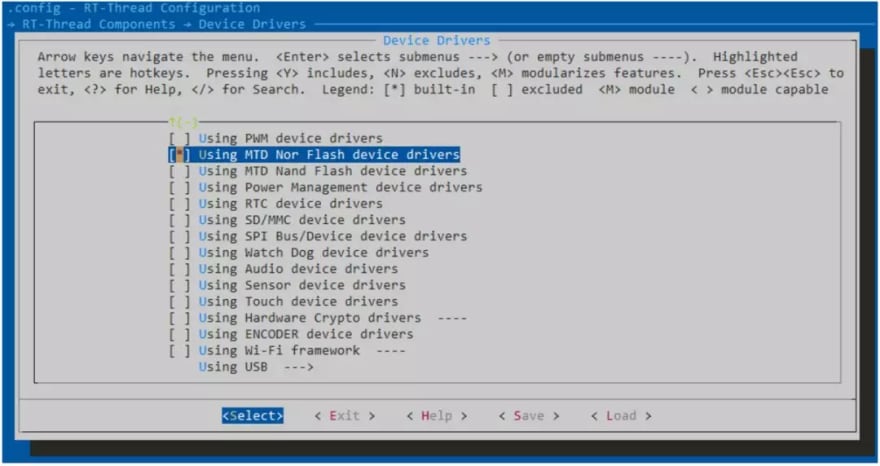
2. RT-thread Components --> Device Drivers --> Using MTD Nor Flash device drivers
3. RT-Thread Online Packages --> System Packages Selects fal & Littlefs

4. RT-Thread Components --> Device Virtual File System
Save the configuration and exit, enter the command inside Env to automatically generate the Keil project:
1pkgs --update
2scons --target=mdk5 -s
We need to organize the flash first, STM32F103RC has a total of 256KB, you can use the last 128KB as a file system, so let's create a new fal_cfg.h:
1extern const struct fal_flash_dev stm32_onchip_flash;
2
3#define FAL_FLASH_DEV_TABLE                                          \
4{                                                                    \
5    &stm32_onchip_flash,                                           \
6}
7
8#define FAL_PART_TABLE                                                          \
9{                                                                               \
10    {FAL_PART_MAGIC_WROD,       "app", "onchip_flash",         0,   128*1024, 0}, \
11    {FAL_PART_MAGIC_WROD,      "flash0", "onchip_flash",   128*1024,  128*1024, 0}, \
12}
Then modify the main.c mount file system:
1#include <rtthread.h>
2#include <rtdevice.h>
3#include <board.h>
4#include <fal.h>
5#include <dfs_posix.h>
6
7/* defined the LED0 pin: PC13 */
8#define LED0_PIN    GET_PIN(C, 13)
9
10#define FS_PARTITION_NAME  "flash0"
11
12int main(void)
13{
14    int count = 1;
15    /* set LED0 pin mode to output */
16    rt_pin_mode(LED0_PIN, PIN_MODE_OUTPUT);
17
18    fal_init();
19
20#ifdef RT_USB_DEVICE_MSTORAGE
21    struct rt_device *flash_dev = fal_blk_device_create(FS_PARTITION_NAME);
22#else
23    struct rt_device *flash_dev = fal_mtd_nor_device_create(FS_PARTITION_NAME);
24#endif
25
26    if (flash_dev == NULL)
27    {
28        rt_kprintf("Can't create a block device on '%s' partition.\n", FS_PARTITION_NAME);
29    }
30    else
31    {
32        rt_kprintf("Create a block device on the %s partition of flash successful.\n", FS_PARTITION_NAME);
33    }
34
35    while (count++)
36    {
37#ifndef RT_USB_DEVICE_MSTORAGE
38        if(rt_device_find(FS_PARTITION_NAME) != RT_NULL)
39        {
40            dfs_mkfs("lfs", FS_PARTITION_NAME);
41
42            if (dfs_mount(FS_PARTITION_NAME, "/", "lfs", 0, 0) == RT_EOK)
43            {
44                rt_kprintf("sd card mount to '/'\n");
45                break;
46            }
47            else
48            {
49                rt_kprintf("sd card mount to '/' failed!\n");
50            }
51        }
52#endif
53        rt_pin_write(LED0_PIN, PIN_HIGH);
54        rt_thread_mdelay(500);
55        rt_pin_write(LED0_PIN, PIN_LOW);
56        rt_thread_mdelay(500);
57    }
58
59    return RT_EOK;
60}
Compile and download the project to the board, and enter the fal probe in msh should see the partition table:
Linux's commonly used commands, such as ls, cat, mkdir, cd are all supported, so we can mount the on-chip flash on the stm32 as a file system, and the next step is to make it recognized as a USB stick.
3. Mount On-chip Flash as U Stick
Similarly, select the option in Env configuration.
1. Hardware Drivers Config --> On-chip Peripheral Drivers

2. RT-Thread Components --> Device Drivers --> Using USB
Save the configuration, and the project file will be generated in Env.
1scons --target=mdk5 -s
Compile and download to the board, connect USB to the computer, such as stm32f103 USB pin is PA11 and PA12, you would see that the computer recognized a new USB stick, note that you may need to format it for the first time use.
In the end, you just need to copy the game and put it on the on-chip flash of STM32.
RT-Thread Contact Info:

Posted on August 25, 2020
Join Our Newsletter. No Spam, Only the good stuff.
Sign up to receive the latest update from our blog.
Related

November 30, 2024
November 30, 2024


