How to add custom fonts to a React Native project with Expo and React Navigation!

Imad
Posted on August 4, 2020

To achieve our goal, we will take the following steps :
- Generate a new test project with Expo-CLI.
- Install and import react-navigation, react-navigation-stack modules.
- Create 2 screens and display some dummy text.
- Download a Font and add it to the project.
- Import and use loadAsync helper from Expo
- Wire up the newly added font and use it in the project.
1- Generate a new Expo project
Head over to a directory of your choice and run :
Using npx: npx expo-cli init test-custom-font
OR
Using expo-cli: expo init test-custom-font
2- Install the dependencies
run the following to install react-navigation dependencies:
npm i react-navigation react-navigation-stack react-navigation-gesture-handler
While the installation is running, let’s open the project and add some boilerplate.
3- Create the screens and display some text
To keep this article short, i will skip the how-to-create-and-import-export-your-components section, and head over to the adding the Font.
At this point, your files should look like this :
App.js
import { createAppContainer } from "react-navigation";
import { createStackNavigator } from "react-navigation-stack";
import HomeScreen from "./src/screens/HomeScreen";
import DetailScreen from "./src/screens/DetailScreen";
const AppNavigation  = createStackNavigator(
  {
    Home: HomeScreen,
    Details: DetailScreen
  }
);
export default createAppContainer(AppNavigation);
HomeScreen.js
import React from "react";
import { View, Text, StyleSheet, Button } from "react-native";

const HomeScreen = ({ navigation }) => {
  return (
    <View style={styles.container}>
      <Text style={styles.textStyle}> Welcome to the Home Screen </Text>
      <Button
        title="See Details"
        onPress={() => navigation.navigate("Details")}
      />
    </View>
  );
};

const styles = StyleSheet.create({
  container: {
    flex: 1,
    justifyContent: "center",
    alignItems: "center"
  }
});

export default HomeScreen;
DetailScreen.js
import React from "react";
import { View, Text, StyleSheet } from "react-native";
const DetailScreen = () => {
return (
<View style={styles.container}>
<Text style={styles.textStyle}>
Lorem Ipsum is simply dummy text of the printing and typesetting
industry. Lorem Ipsum has been the industry's standard dummy text ever
since the 1500s, when an unknown printer took a galley of type and
scrambled it to make a type specimen book. It has survived not only five
centuries, but also the leap into electronic typesetting, remaining
essentially unchanged. It was popularised in the 1960s with the release
of Letraset sheets containing Lorem Ipsum passages, and more recently
with desktop publishing software like Aldus PageMaker including versions
of Lorem Ipsum.
</Text>
</View>
);
};
const styles = StyleSheet.create({
container: {
padding: 12,
flex: 1,
justifyContent: "center",
alignItems: "center"
}
});
export default DetailScreen;
```
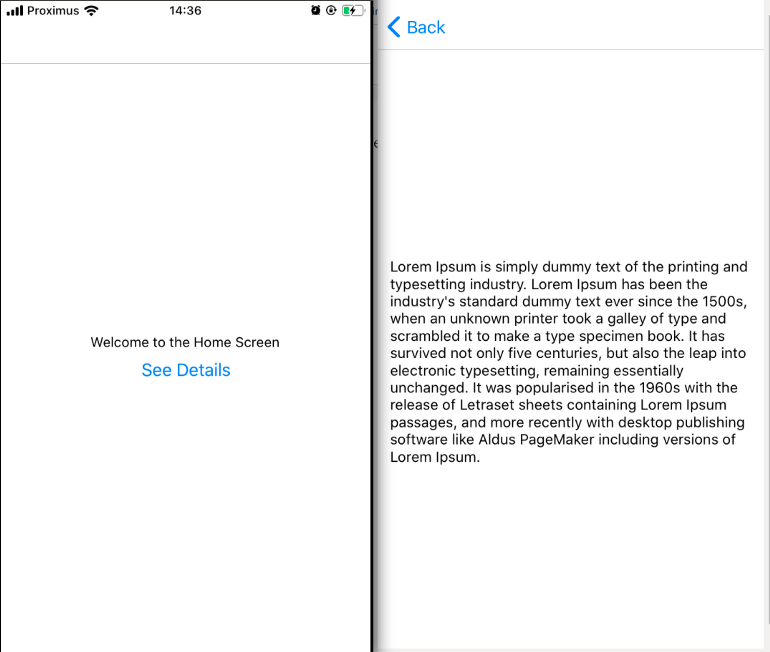
run `expo start` the result should look like this :

**3- Download a Font and add it to the project.**
* Inside the assets folder, create a fonts folder.
* Head over to [google fonts](https://fonts.google.com).
* Download and unzip a font of your choice in any location on your machine.
* Copy/paste the .ttf file inside the font folder in the project.
* In this demo we will use "montserrat"
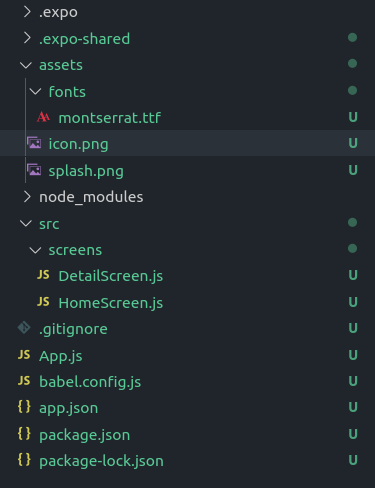
By now, the project structure should look like this :

**3- Import Expo Font module and wire up the custom font.**
Depending on whether you are using classes or functional components, loading the font is slightly different, let's have a look at both :
According to Expo documentation, loading a custom font should be done using the built-in `Font.loadAsync` helper method, and since "as it's name suggests" its an `async` function, we should invoke it inside a life cycle method.
---
**Class based approach**
The current implementation of our App.js does not support a life cycle method, as the root component (App.js line 11)is created and exported immediately.
Likely for us, the only thing Expo expects from our App.js is a valid React component.
So let’s build and export a custom App component with our loaded font.
Your App.js should look like this now,
```
// import React
import React, { Component } from "react";
// import Expo Font module
import * as Font from "expo-font";
import { createAppContainer } from "react-navigation";
import { createStackNavigator } from "react-navigation-stack";
import HomeScreen from "./src/screens/HomeScreen";
import DetailScreen from "./src/screens/DetailScreen";
// import AppLoading helper
//https://docs.expo.io/versions/latest/sdk/app-loading/
import { AppLoading } from "expo";
const appNavigator = createStackNavigator(
{
Home: HomeScreen,
Details: DetailScreen
},
{
initialRouteName: "Home"
}
);
// instead of immediately exporting the AppNavigator component we assign in to a constant.
const RootApp = createAppContainer(appNavigator);
// we create and export our own custom App component
export default class App extends Component {
state = {
loaded: false
};
// create a helper function to load the font
_loadFontsAsync = async () => {
// loadAsync returns true | error
let isLoaded = await Font.loadAsync({
// add as many fonts as you want here ....
Montserrat: require("./assets/fonts/montserrat.ttf")
});
this.setState({ loaded: isLoaded });
};
// call _loadFontsAsync
componentDidMount() {
this._loadFontsAsync();
}
render() {
if (!this.state.loaded) {
return <AppLoading />;
}
// from the custom App we return the component we assigned to RootApp.
return <RootApp />;
}
}
```
---
**Functional approach**
In functional components, we can make use of React hooks to solve this problem, likely for us, a font loading hook already exist and we do not have to build our own.
We will make use of `@use-expo/font` from Expo to load our Font.
lets install the package first, run `npm i @use-expo/font`
Next, let's implement it :
```
// import React
import React from "react";
// import Expo Font module
import * as Font from "expo-font";
// import useFonts hook
import { useFonts } from "@use-expo/font";
import { createAppContainer } from "react-navigation";
import { createStackNavigator } from "react-navigation-stack";
import HomeScreen from "./src/screens/HomeScreen";
import DetailScreen from "./src/screens/DetailScreen";
// import AppLoading helper
//https://docs.expo.io/versions/latest/sdk/app-loading/
import { AppLoading } from "expo";
const appNavigator = createStackNavigator(
{
Home: HomeScreen,
Details: DetailScreen
},
{
initialRouteName: "Home"
}
);
// instead of immediately exporting the AppNavigator component we assign in to a constant.
const RootApp = createAppContainer(appNavigator);
// require in the font
const customFonts = {
Montserrat: require("./assets/fonts/montserrat.ttf"),
};
const App = () => {
// the same as Font.loadAsync , the hook returns true | error
const [isLoaded] = useFonts(customFonts);
if (!isLoaded) {
return <AppLoading />;
}
// from the custom App we return the component we assigned to RootApp.
return <RootApp />;
}
export default App
```
---
As you can see, the functional approach is way cleaner and more readable.
---
**5- Use the newly added font:**
Now, all we have to do is add the font family to our style object, in both HomeScreen.js and DetailScreen.js :
`textStyle:{ fontFamily:'Montserrat'}`
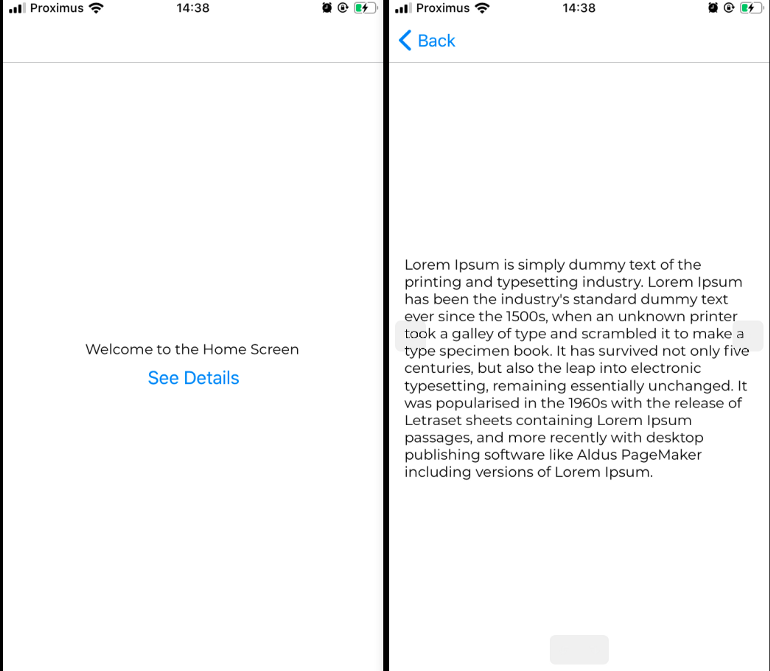
**Result:**

---
Like this post ? let me know, i will be posting about advanced topics on React, React Native or Node.js.
You can find me on twitter too ! :)

Posted on August 4, 2020
Join Our Newsletter. No Spam, Only the good stuff.
Sign up to receive the latest update from our blog.
